本文转自 http://my.oschina.net/u/730579/blog/168924。
1、步骤
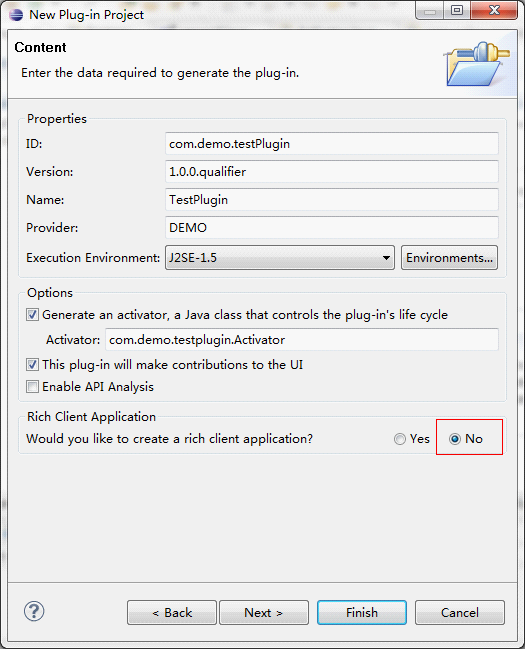
1.1.创建plug-in项目:


这次做的是eclipse插件,这里选择NO
选择plug in with a view,创建项目。

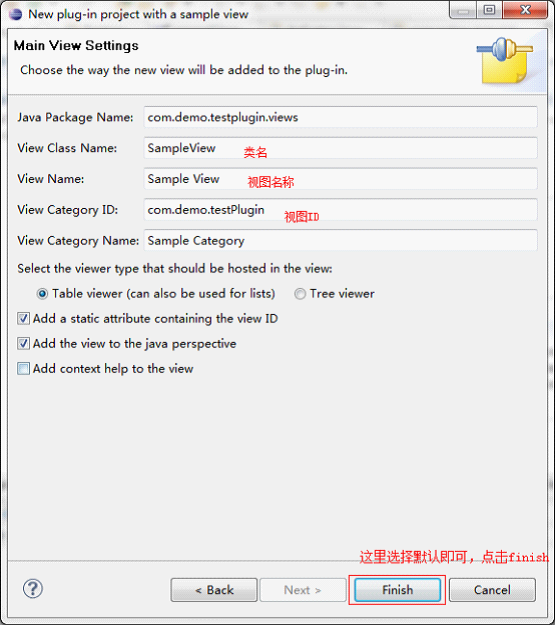
到这里,我们已经创建好一个eclipse插件工程了:

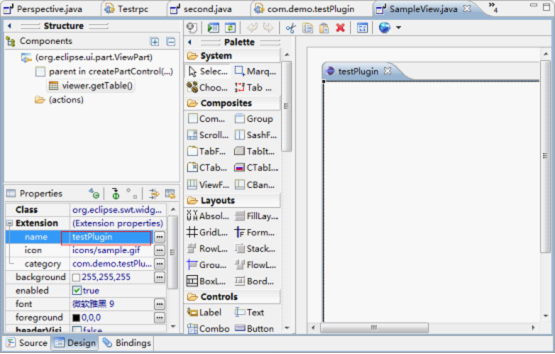
这里我们可以修改我们插件视图的名称,为了认识一下我们把它改成testPlugin:
1.2运行插件
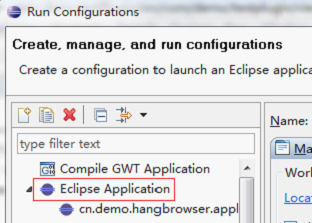
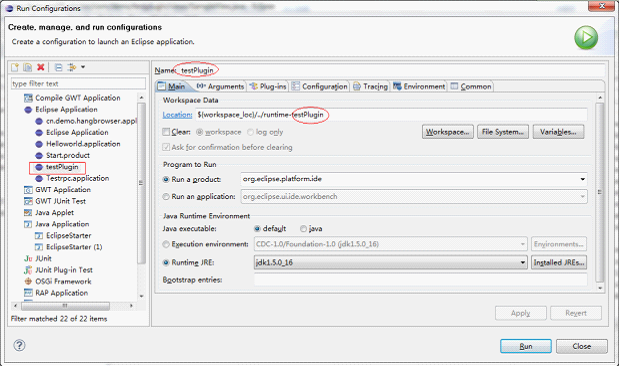
点击 ,打开润Run Configurations,双击Eclipse Application,新建一个configuration,名称为testPlugin,切换到plug-in标签,只选择我们创建的插件项目,点击apply,然后点击run运行插件:
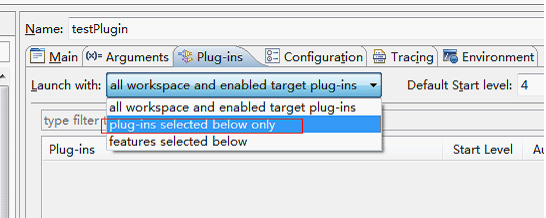
选择自己创建的插件项目:
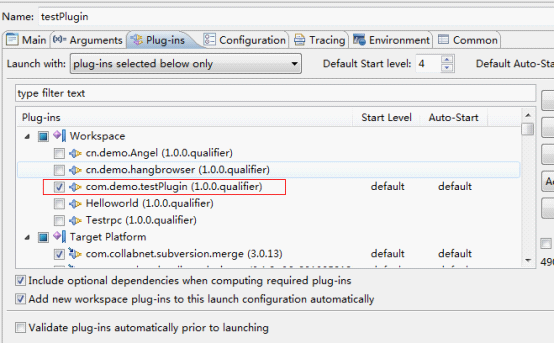
点击apply,然后点击run运行:
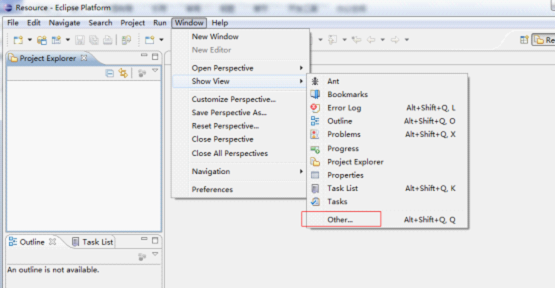
在window->show View->other里,找到刚才我们创建的视图testPlugin:
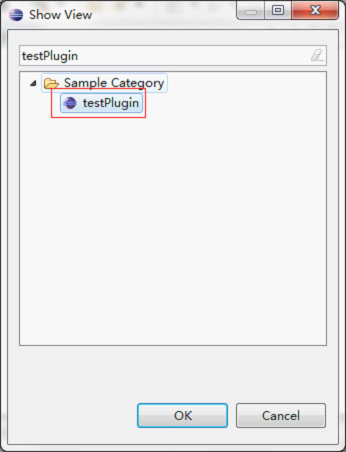
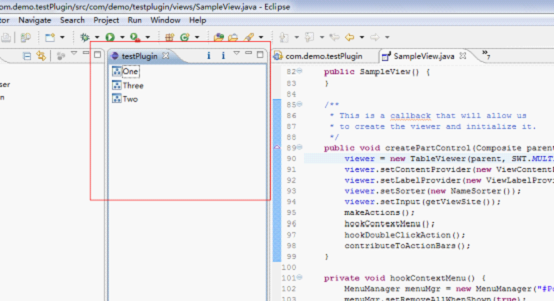
点击OK,我们就可以在eclipse平台上看到我们刚才创建的插件了:

1.3插件的导出与安装
前面我们只是在调试的状态下运行插件,当我们完成一个插件的开发后,我们需要导出并安装它到我们的eclipse中,然后就可以随时使用这些插件了,下面是导出插件并安装的一个步骤:
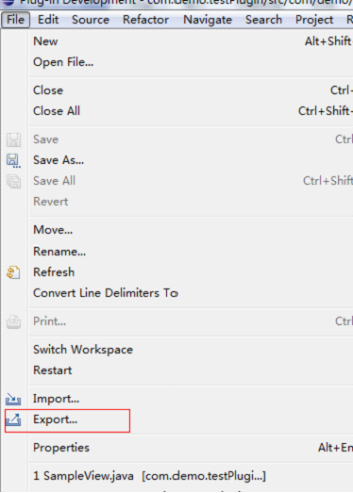
选择File ->export:
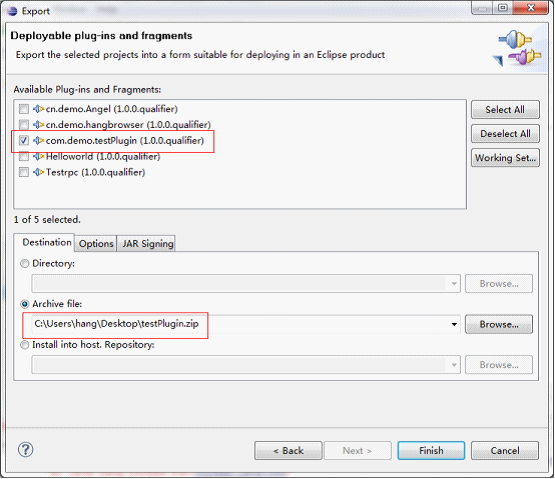
选择deployable plug-ins and fragments:

选择自己的插件项目以及保存路径,点击Finish,完成导出:
将导出得到的testPlugin.zip里的jar文件解压到你Eclipse开发工具的plugins目录下,我的是E:\eclipse\plugins(要把jar文件放到plugins目录下,不然放文件夹的话似乎找不到,我就遇到这样的问题):
重启eclipse ,打开window->show view ->other,找到testPlugin,点击打开视图:
到这里我们就可以使用自己创建的eclipse插件了!
1、步骤
1.1.创建plug-in项目:
这次做的是eclipse插件,这里选择NO
选择plug in with a view,创建项目。
到这里,我们已经创建好一个eclipse插件工程了:
这里我们可以修改我们插件视图的名称,为了认识一下我们把它改成testPlugin:
1.2运行插件
点击,打开润Run Configurations,双击Eclipse Application,新建一个configuration,名称为testPlugin,切换到plug-in标签,只选择我们创建的插件项目,点击apply,然后点击run运行插件:
选择自己创建的插件项目:
点击apply,然后点击run运行:
在window->show View->other里,找到刚才我们创建的视图testPlugin:
点击OK,我们就可以在eclipse平台上看到我们刚才创建的插件了:
1.3插件的导出与安装
前面我们只是在调试的状态下运行插件,当我们完成一个插件的开发后,我们需要导出并安装它到我们的eclipse中,然后就可以随时使用这些插件了,下面是导出插件并安装的一个步骤:
选择File ->export:
选择deployable plug-ins and fragments:
选择自己的插件项目以及保存路径,点击Finish,完成导出:
将导出得到的testPlugin.zip里的jar文件解压到你Eclipse开发工具的plugins目录下,我的是E:\eclipse\plugins(要把jar文件放到plugins目录下,不然放文件夹的话似乎找不到,我就遇到这样的问题):
重启eclipse ,打开window->show view ->other,找到testPlugin,点击打开视图:
到这里我们就可以使用自己创建的eclipse插件了!


