Android深入浅出系列之服务机制—1.Android中的Service
阅读目录
一:Service是什么
二:布局文件编写
三:代码文件编写
四:项目定义文件编写
五:运行效果
六:Service是新的进程吗?是新的线程吗?
一:Service是什么?
Service是Android系统的组件之一,和Activity,Intent,Conent Provider并称Android四大天王,Service是不可见的,是没有界面的,是在后台运行的,Service一般处理比较耗时以及长时间运行的操作。我以前给一个电子商务网站做过一个Windows服务,就是一直审核用户下达的未审核的订单,如果符合某种规范则这个订单审核通过,这个服务是一直在运行的,就跟这个电子商务网站一直在线上跑一样,它能省掉很多人工的时间,所以说服务一般处理长时间工作的操作。
我之前在看一本书上说到“即便是通过Activity启动的Service,也不会在相同的process进程当中运行,而是各自属于不同的进程”,我翻阅了Android的SDK “A Service is not a separate process. The Service object itself does not imply it is running in its own process; unless otherwise specified, it runs in the same process as the application it is part of.”这句话的意思是说,Service不是一个独立的进程,服务对象本身并不意味着这是运行在其自己的进程内,它与应用程序运行在同一个进程当中。当书本和Android SDK两者的理论发生矛盾的时候,我们以Android SDK为准,所以我们认为Service和带起它的应用程序在一个进程当中。因为我们知道了Service和带起它的应用程序在一个进程当中,如果你的Service里的操作阻塞住了,就会导致整个应用程序没有响应,所以我们在Service里面新开一个线程。
二:布局文件编写
 1 <?xml version="1.0" encoding="utf-8"?>
 2 <LinearLayout xmlns:android="http://schemas.android.com/apk/res/android"
 3           android:orientation="vertical"
 4           android:layout_width="fill_parent"
 5           android:layout_height="fill_parent">
 6
 7      <Button android:layout_width="wrap_content"
 8             android:layout_height="wrap_content"
 9            android:text="启动Service"
10            android:id="@+id/start"/>
11       <Button android:layout_width="wrap_content"
12             android:layout_height="wrap_content"
13             android:text="取消Service"
14             android:id="@+id/end"/>
15 </LinearLayout>
三:代码文件编写
3.1 MainActivity.java
 1  package com.menglin.service1;
 2
 3  import android.app.Activity;
 4  import android.content.Intent;
 5  import android.content.IntentFilter;
 6  import android.os.Bundle;
 7  import android.view.View;
 8  import android.view.View.OnClickListener;
 9  import android.widget.Button;
10
11  public class MainActivity extends Activity
12  {
13      // 声明两个Button对象
14    private Button btn_start, btn_end;
15
16    @Override
17     public void onCreate(Bundle savedInstanceState)
18     {
19        super.onCreate(savedInstanceState);
20        //加载布局文件main.xml
21       setContentView(R.layout.main);
22        //通过findViewById()方法得到两个Button对象
23        btn_start = (Button)findViewById(R.id.start);
24        btn_end = (Button)findViewById(R.id.end);
25        //给两个按钮绑定监听单击事件
26        btn_start.setOnClickListener(btn_start_listener);
27        btn_end.setOnClickListener(btn_end_listener);
28      }
29
30    //监听单击事件
31    private OnClickListener btn_start_listener = new OnClickListener()
32    {
33      @Override
34      public void onClick(View v)
35      {
36        //创建一个Intent对象
37        Intent intent = new Intent();
38        //第一个参数是自己的这个类的对象,第二个参数是要调用的Service的对象
39        intent.setClass(MainActivity.this, Service1.class);
40        //启动服务
41        startService(intent);
42      }
43    };
44
45    //监听单击事件
46    private OnClickListener btn_end_listener = new OnClickListener()
47    {
48      @Override
49      public void onClick(View v)
50      {
51        //创建一个Intent对象
52        Intent intent = new Intent();
53        //第一个参数是自己的这个类的对象,第二个参数是要调用的Service的对象
54        intent.setClass(MainActivity.this, Service1.class);
55        //关闭服务
56        stopService(intent);
57      }
58    };
59  }
3.2 Service1.java
 1 package com.menglin.service1;
 2
 3 import android.app.Service;
 4 import android.content.Intent;
 5 import android.os.IBinder;
 6 import android.util.Log;
 7
 8  public class Service1 extends Service
 9  {
10
11    private String TAG = "service";
12
13    @Override
14    public IBinder onBind(Intent intent)
15    {
16      // TODO Auto-generated method stub
17      return null;
18    }
19
20    //当启动Service的时候会调用这个方法
21    @Override
22    public void onCreate()
23    {
24      Log.i(TAG, "onCreate");
25      super.onCreate();
26    }
27
28    //当系统被销毁的时候会调用这个方法
29    @Override
30    public void onDestroy()
31    {
32      Log.i(TAG, "onDestroy");
33      super.onDestroy();
34    }
35
36    //当启动Service的时候会调用这个方法
37    @Override
38    public int onStartCommand(Intent intent, int flags, int startId)
39    {
40      Log.i(TAG, "onStartCommand");
41      return super.onStartCommand(intent, flags, startId);
42    }
43
44  }
四:项目定义文件编写
AndroidMainfest.xml
为了让Android的系统知道有这个我们自定义的服务,所以我们需要加上service节点<service android:name=".Service1"></service>。
 1 <?xml version="1.0" encoding="utf-8"?>
 2 <manifest xmlns:android="http://schemas.android.com/apk/res/android"
 3     package="com.david.beginservice"
 4     android:versionCode="1"
 5     android:versionName="1.0" >
 6
 7     <uses-sdk
 8         android:minSdkVersion="8"
 9         android:targetSdkVersion="21" />
10
11     <application
12         android:allowBackup="true"
13         android:icon="@drawable/ic_launcher"
14         android:label="@string/app_name"
15         android:theme="@style/AppTheme" >
16         <service android:name=".firstService"></service>
17         <activity
18             android:name=".MainActivity"
19             android:label="@string/app_name" >
20             <intent-filter>
21                 <action android:name="android.intent.action.MAIN" />
22
23                 <category android:name="android.intent.category.LAUNCHER" />
24             </intent-filter>
25         </activity>
26     </application>
27
28 </manifest>
五:运行效果
当我们单击"启动Service"按钮后,发现系统输出了"onCreate"我们要的信息,我们再次点击"启动Service"按钮发现没有再次调用onCreate()方法,而是调用了onStartCommand()方法,一个服务启动起来后,一直在后台运行,当你再想启动这个服务的话,就不会再调用onCreate()方法了,因为这个服务已被创建了,而是直接调用onStartCommand()方法,一些主要的操作我们都是在onStartCommand()方法中实现的,就是我们在onStartCommand()方法中开启新的线程,根据Activity传进来的Inetent对象来完成一些操作,当我们不需要这个Service的时候,我们可以单击"取消Service"按钮,在这里我们单击"取消Service"按钮,不仅会停止服务还会输出"onDestroy"。


六:Service不是一个新的进程,也不是一个新的线程,是与当前进程绑定
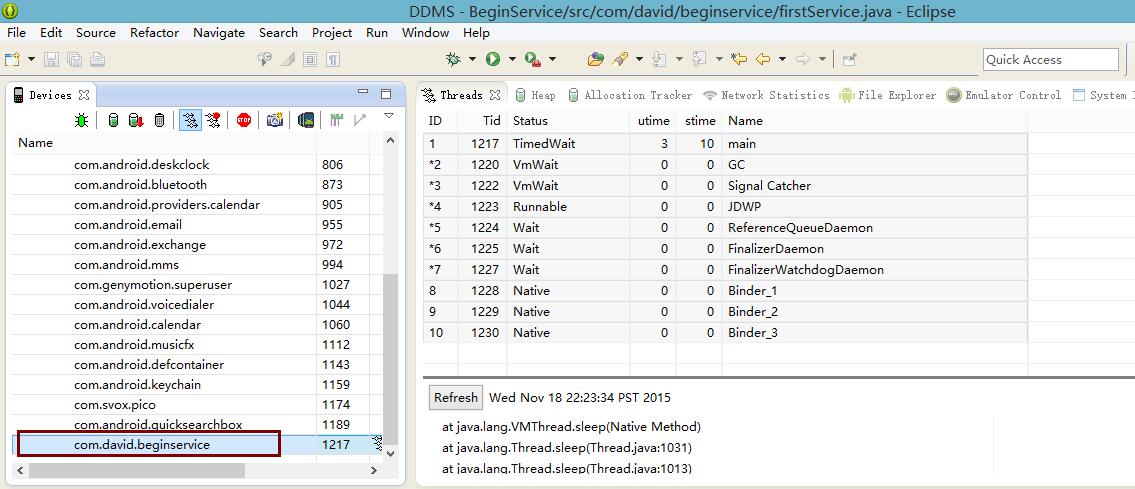
从下图中看到,并没有一个新的进程产生,这个进程只是Activity进程

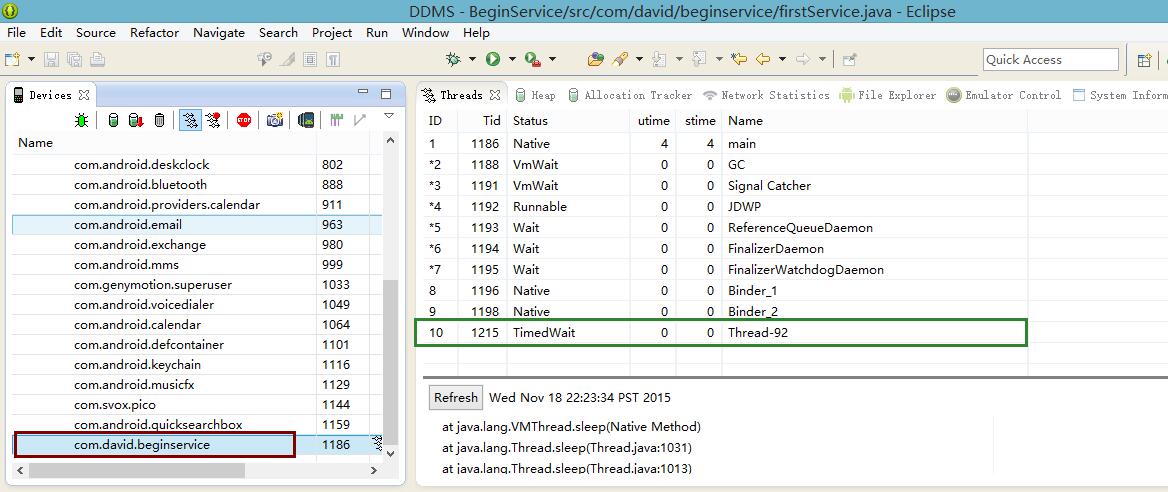
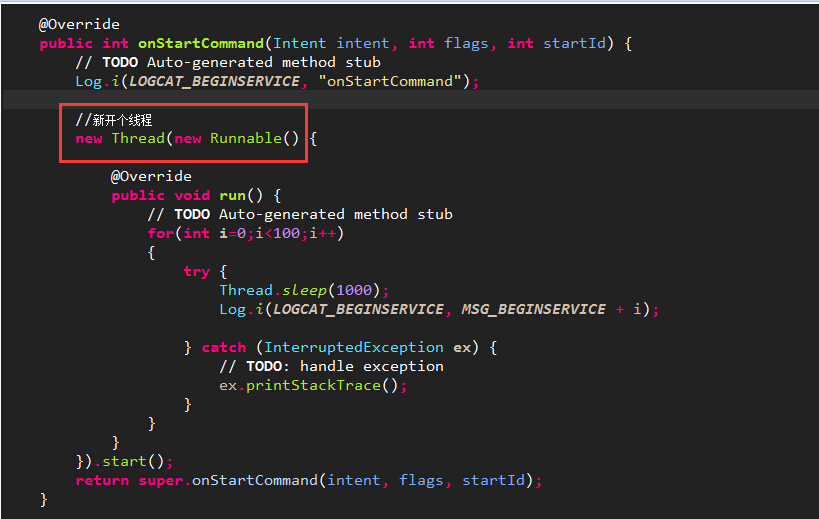
从下图看到是有个新的线程产生了,但是这个新的线程是我自己在Service的onStartCommand方法里自己开启的


 浙公网安备 33010602011771号