文本编辑器之kindeditor
摘要:最近在自己学习搭建网站的时候,突然要搭建网站的时候发现了一个好东西,那就是kindeditor这个文本编辑器,这个编辑器简单好用,而且很小,并且是开源的。
文本编辑器介绍
KindEditor 是一套开源的在线HTML编辑器,主要用于让用户在网站上获得所见即所得编辑效果,开发人员可以用 KindEditor 把传统的多行文本输入框(textarea)替换为可视化的富文本输入框。 KindEditor 使用 JavaScript 编写,可以无缝地与 Java、.NET、PHP、ASP 等程序集成,比较适合在 CMS、商城、论坛、博客、Wiki、电子邮件等互联网应用上使用。
kindeditor的主要特点
- 快速:体积小,加载速度快
- 开源:开放源代码,高水平,高品质
- 底层:内置自定义 DOM 类库,精确操作 DOM
- 扩展:基于插件的设计,所有功能都是插件,可根据需求增减功能
- 风格:修改编辑器风格非常容易,只需修改一个 CSS 文件
- 兼容:支持大部分主流浏览器,比如 IE、Firefox、Safari、Chrome、Opera
发展历程
- 2006年07月:KindEditor 2.0 发布
- 2009年01月:KindEditor 3.0 发布
- 2010年06月:KindEditor 3.5 发布
- 2011年08月:KindEditor 4.0 发布
文本编辑器的下载

点击下载就可以使用了,下载位置看你喽,我是直接下载到了桌面,后面使用方便。
文本编辑器的使用
将下载成功的编辑器直接放在项目的static文件夹中,然后在你需要的模板中使用就好,我这里是backend.html,然后再我们需要的textarea中设置就可以实现编辑,找到textarea的id(每一个标签的id都是唯一的),然后给这个东西添加脚本。
textarea文本框
<textarea id="editor_id" name="content" style="width:700px;height:300px;"> <strong>HTML内容</strong> </textarea>
编辑器脚本
<script charset="utf-8" src="/editor/kindeditor.js"></script>
<script charset="utf-8" src="/editor/lang/zh-CN.js"></script>
<script>
        KindEditor.ready(function(K) {
                window.editor = K.create('#editor_id');
        });
</script>
Note
- 第一个参数可用其它CSS选择器,匹配多个textarea时只在第一个元素上加载编辑器。
- 通过K.create函数的第二个参数,可以对编辑器进行配置,具体参数请参考 编辑器初始化参数 。
你在使用第二个参数的时候,要用字典的形式
<script>
        KindEditor.ready(function(K) {
                window.editor = K.create('#id_content',{
                    width:'100%',
                    height:'450px',
                });

        });
</script>
在初始化参数里面有许多可以支持自定义,你可以根据你的需求进行更改
编辑器使用
width
编辑器的宽度,可以设置px或%,比textarea输入框样式表宽度优先度高。
- 数据类型: String
- 默认值: textarea输入框的宽度
示例:
K.create('#id', {
        width : '700px'
});
items
配置编辑器的工具栏,其中”/”表示换行,”|”表示分隔符。
- 数据类型: Array
- 默认值:
[
        'source', '|', 'undo', 'redo', '|', 'preview', 'print', 'template', 'code', 'cut', 'copy', 'paste',
        'plainpaste', 'wordpaste', '|', 'justifyleft', 'justifycenter', 'justifyright',
        'justifyfull', 'insertorderedlist', 'insertunorderedlist', 'indent', 'outdent', 'subscript',
        'superscript', 'clearhtml', 'quickformat', 'selectall', '|', 'fullscreen', '/',
        'formatblock', 'fontname', 'fontsize', '|', 'forecolor', 'hilitecolor', 'bold',
        'italic', 'underline', 'strikethrough', 'lineheight', 'removeformat', '|', 'image', 'multiimage',
        'flash', 'media', 'insertfile', 'table', 'hr', 'emoticons', 'baidumap', 'pagebreak',
        'anchor', 'link', 'unlink', '|', 'about'
]
参数具体意思
| source | HTML代码 |
| preview | 预览 |
| undo | 后退 |
| redo | 前进 |
| cut | 剪切 |
| copy | 复制 |
| paste | 粘贴 |
| plainpaste | 粘贴为无格式文本 |
| wordpaste | 从Word粘贴 |
| selectall | 全选 |
| justifyleft | 左对齐 |
| justifycenter | 居中 |
| justifyright | 右对齐 |
| justifyfull | 两端对齐 |
| insertorderedlist | 编号 |
| insertunorderedlist | 项目符号 |
| indent | 增加缩进 |
| outdent | 减少缩进 |
| subscript | 下标 |
| superscript | 上标 |
| formatblock | 段落 |
| fontname | 字体 |
| fontsize | 文字大小 |
| forecolor | 文字颜色 |
| hilitecolor | 文字背景 |
| bold | 粗体 |
| italic | 斜体 |
| underline | 下划线 |
| strikethrough | 删除线 |
| removeformat | 删除格式 |
| image | 图片 |
| flash | Flash |
| media | 视音频 |
| table | 表格 |
| hr | 插入横线 |
| emoticons | 插入表情 |
| link | 超级链接 |
| unlink | 取消超级链接 |
| fullscreen | 全屏显示 |
| about | 关于 |
| 打印 | |
| code | 插入程序代码 |
| map | Google地图 |
| baidumap | 百度地图 |
| lineheight | 行距 |
| clearhtml | 清理HTML代码 |
| pagebreak | 插入分页符 |
| quickformat | 一键排版 |
| insertfile | 插入文件 |
| template | 插入模板 |
| anchor | 插入锚点 |
这个是默认带的,可以自己修改
resizeType
2或1或0,2时可以拖动改变宽度和高度,1时只能改变高度,0时不能拖动。
- 数据类型: Int
- 默认值: 2
extraFileUploadParams
上传图片、Flash、视音频、文件时,支持添加别的参数一并传到服务器。
- 数据类型: Array
- 默认值: {}
额外参数的携带,比如django的csrfmiddlewaretoken中间件
extraFileUploadParams : {
                        'csrfmiddlewaretoken':'{{ csrf_token }}'
                       }
更多 编辑器初始化参数内容,快来点击吧!
编辑器内部文本图片上传
uploadJson
指定上传文件的服务器端程序。
- 数据类型: String
- 默认值: basePath + ‘php/upload_json.php’
uploadJson:'/upload_img', //路由哦
路由
url(r'upload_img',views.upload_img)
视图函数
def upload_img(request):
    if request.method == 'POST':
        print(request.FILES)
        file_obj = request.FILES.get('imgFile')
        # print(file_obj,type(file_obj))  # 文件  #<class 'django.core.files.uploadedfile.InMemoryUploadedFile'>
        # print('>>>>>>>>>>>>>',file_obj.name,type(file_obj.name))  #<class 'str'>
        path = os.path.join(settings.BASE_DIR, 'media', 'article_img')
        if not os.path.exists(path):
            os.mkdir(path)
        file_path = os.path.join(path, file_obj.name)
        with open(file_path,'wb') as f:
            for line in file_obj:
                f.write(line)
        return HttpResponse('ok')
然后发现你的图片是上传成功了,但是显示的是
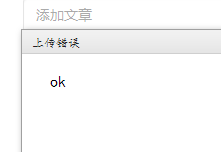
怎么回事捏?
原来是因为你将所有的信息都做好之后,要求你必须返回一个他指定要的格式,example👇👇👇
//成功时
{
        "error" : 0,
        "url" : "http://www.example.com/path/to/file.ext"
}
//失败时
{
        "error" : 1,
        "message" : "错误信息"
}
现在我们上传的时候就可以正常上传了,快去试试吧,很有成就感哦!
