


安装环境centos7,kylo版本0.10.1
常用的链接地址
kylo官网:https://kylo.io/
kylo文档:https://kylo.readthedocs.io/
下载地址
官网:https://kylo.readthedocs.io/en/v0.10.0/about/Downloads.html
https://s3-us-west-2.amazonaws.com/kylo-io/releases/tar/0.10.1/kylo-0.10.1.tar
百度网盘:https://pan.baidu.com/s/1xBtfSwETebN20iWoakdLeg 提取码:c5ae
自己编译:https://www.cnblogs.com/maobuji/p/10820691.html
系统需要提前安装工具:
yum install wget unzip
1.安装mysql或者mysql客户端
https://www.cnblogs.com/maobuji/p/8336702.html
本次使用已安装好的外部mysql,只安装客户端
wget https://repo.mysql.com//mysql57-community-release-el7-11.noarch.rpm

yum install mysql57-community-release-el7-11.noarch.rpm

yum install mysql-community-client
2.设置用户
kylo安装脚本会为activemq或者nifi分配独立的用户
但kylo不会创建用户和组,但已存在的用户和组可以指定给kylo,所以我们需要先创建用户和组
useradd -r -m -s /bin/bash nifi && useradd -r -m -s /bin/bash kylo && useradd -r -m -s /bin/bash activemq
groupadd -f kylo && groupadd -f nifi && groupadd -f activemq
3.准备安装包
获取安装包到服务器上,进行解压
mkdir /opt/kylo
cd /opt/software
tar -zxvf kylo-0.10.1.tar -C /opt/kylo
解压后的目录结构

4.准备软件包
执行 /opt/kylo/setup/generate-offline-install.sh 下载依赖的软件包。会自动下载所有依赖。
如果下载很慢,可以下载网盘上的文件,放到/opt/software下,修改generate-offline-install.sh,将下载修改为拷贝
链接:https://pan.baidu.com/s/108OEtNPTPyT2RST4ltJ7Dg 提取码:v2xc
#!/bin/bash

NIFI_VERSION=1.6.0

cd /opt/kylo/setup

# wget https://archive.apache.org/dist/activemq/5.15.6/apache-activemq-5.15.6-bin.tar.gz -P ./activemq
cp /opt/software/apache-activemq-5.15.6-bin.tar.gz ./activemq/

# Modify to DEB file if necessary
# wget https://artifacts.elastic.co/downloads/elasticsearch/elasticsearch-5.5.0.deb -P ./elasticsearch/
# wget https://artifacts.elastic.co/downloads/elasticsearch/elasticsearch-5.5.0.rpm -P ./elasticsearch/
cp /opt/software/elasticsearch-5.5.0.rpm ./elasticsearch/

# wget --no-check-certificate --no-cookies --header "Cookie: oraclelicense=accept-securebackup-cookie" http://download.oracle.com/otn-pub/java/jdk/8u131-b11/d54c1d3a095b4ff2b6607d096fa80163/jdk-8u131-linux-x64.tar.gz -P ./java
cp /opt/software/jdk-8u131-linux-x64.tar.gz ./java/

# wget --no-check-certificate --no-cookies --header "Cookie: oraclelicense=accept-securebackup-cookie" http://download.oracle.com/otn-pub/java/jce/8/jce_policy-8.zip -P ./java
cp /opt/software/jce_policy-8.zip ./java/


# wget https://archive.apache.org/dist/nifi/${NIFI_VERSION}/nifi-${NIFI_VERSION}-bin.tar.gz -P ./nifi
cp /opt/software/nifi-1.6.0-bin.tar.gz ./nifi

cp /opt/kylo/kylo-services/lib/mariadb-java-client-*.jar ./nifi


VAULT_VERSION="${VAULT_VERSION:-0.9.0}"
UNAME=$(uname -s |  tr '[:upper:]' '[:lower:]')
VAULT_ZIP="vault_${VAULT_VERSION}_${UNAME}_amd64.zip"
# wget "https://releases.hashicorp.com/vault/${VAULT_VERSION}/${VAULT_ZIP}" -P ./vault
cp /opt/software/vault_0.9.0_linux_amd64.zip ./vault/

tar -cvf kylo-install.tar *
执行脚本拷贝或下载文件
cd /opt/kylo/setup/
sh generate-offline-install.sh
5.安装jdk
安装一个1.8的jdk,安装后配置环境变量
vi /etc/profile
export JAVA_HOME=/opt/myjdk/jdk1.8.0_131
export PATH=.:$JAVA_HOME/bin:$PATH
export CLASSPATH=.:$JAVA_HOME/lib/dt.jar:$JAVA_HOME/lib/tools.jar
source /etc/profile
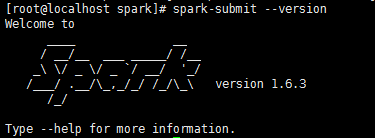
6.安装spark
安装过程中,kylo安装脚本会调用sprak-submit命令,所以需要提前安装好spark
可以到以下网址下载spark文件,建议使用1.6.3版本
https://archive.apache.org/dist/spark/
https://archive.apache.org/dist/spark/spark-1.6.3/spark-1.6.3-bin-hadoop2.6.tgz
在网盘中,也已经提前下载好了对应的文件,我们以从网盘拷贝到/opt/software目录下的文件为例。
mkdir /opt/spark
cd /opt/spark
cp ../software/spark-1.6.3-bin-hadoop2.6.tgz ./
tar zxvf spark-1.6.3-bin-hadoop2.6.tgz
vi /etc/profile
export SPARK_HOME=/opt/spark/spark-1.6.3-bin-hadoop2.6
export PATH=$PATH:$SPARK_HOME/bin
source /etc/profile
7.执行预安装脚本
脚本的作用是将kylo启动命令加入到服务中
/opt/kylo/setup/install/post-install.sh /opt/kylo root root
8.通过向导进行安装
向导可以自动安装jdk、elasticsearch、activemq、nifi、kylo,你需要选择合适的选项。本次使用的是裸服务器,所以全部安装。
一定要加-o参数,否则会重新下载文件
cd /opt/kylo/setup
sh setup-wizard.sh -o
执行过程,没有没有输入的都使用默认值
[root@localhost setup]# sh setup-wizard.sh -o
Working in OFFLINE mode
The working directory is /opt/kylo/setup
Welcome to the Kylo setup wizard. Lets get started !!!

Please enter Y/y or N/n to the following questions:

Enter the kylo home folder location, hit Enter for '/opt/kylo':
Enter the kylo linux user, hit Enter for 'kylo':
Enter the kylo linux group, hit Enter for 'users':

Would you like to install the database scripts in a database instance? Please enter y/n: y
Would you like Kylo to manage installing and upgrading the database automatically? Please enter y/n: y
Which database (Enter the number)?
1) MySQL
2) PostgresSQL
3) SQL Server
> 1

选择mysql数据库
Please enter the database hostname or IP, hit Enter for 'localhost'
> 192.168.0.1
Please enter the database ADMIN username
> root
Please enter the database ADMIN password
> Creating MySQL database 'kylo'
mysql: [Warning] Using a password on the command line interface can be insecure.

录入mysql ip、用户、密码后会自动建库

Please enter the password for the dladmin user
>
Please re-enter the password for the dladmin user
>
Please choose an option to configure Java for Kylo, ActiveMQ, and NiFi
1) I already have Java 8 or higher installed as the system Java and want to use that
2) Install Java 8 in the /opt/java folder for me and use that one
3) I have Java 8 or higher installed in another location already. I will provide the location
4) Java is already setup. No changes necessary
> 2

选择kylo提供的jdk

Would you like me to install a local elasticsearch instance? Please enter y/n: y

Would you like me to install a local activemq instance?  Please enter y/n: y
Enter the Activemq home folder location, hit Enter for '/opt/activemq':
Enter the user Activemq should run as, hit Enter for 'activemq':
Enter the linux group Activemq should run as, hit Enter for 'activemq':

Would you like me to install a local nifi instance? Please enter y/n: y
Enter Nifi version you wish to install, hit Enter for '1.6.0':
Enter the NiFi home folder location, hit Enter for '/opt/nifi':
Enter the user NiFi should run as, hit Enter for 'nifi':
Enter the linux group NiFi should run as, hit Enter for 'nifi':
安装完成提示
Externalizing NiFi data files and folders to support upgrades
Changing permissions to the nifi user
NiFi installation complete
Modifying the nifi.properties file
Updating the log file path
Adding custom Java path to the NiFi startup script
Working in offline mode
Installing the kylo libraries to the NiFi lib
Creating symbolic links to jar files
Creating symlinks for NiFi version 1.6.0.jar compatible nars
Copy the mysql lib from a lib folder to /opt/nifi/mysql
Copy the activeMQ required jars for the JMS processors to /opt/nifi/activemq
setting up temporary database in case JMS goes down
Creating flow file cache directory
Install the nifi service
Updating the home folder for the init.d script
Updating the provenance cache location
Installation Complete
users.properties and groups.properties was created in the /opt/kylo folder with the dladmin user. For more information on configuring users and groups please see the "Configure Access Control" page in the Kylo Docs
If this is the first time installing Kylo, or you made hive/database related changes, you will need to modify those settings in the /opt/kylo/kylo-services/conf/application.properties file
8.kylo数据库连接配置修改
vi /opt/kylo/kylo-services/conf/application.properties
spring.datasource.url=jdbc:mysql://localhost:3306/kylo
spring.datasource.username=root
spring.datasource.password=root
spring.datasource.maxActive=30
spring.datasource.validationQuery=SELECT 1
spring.datasource.testOnBorrow=true
spring.datasource.driverClassName=com.mysql.jdbc.Driver
spring.jpa.database-platform=org.hibernate.dialect.MySQL5InnoDBDialect
spring.jpa.open-in-view=true
因为换了mysql驱动,所以需要添加mysql对应版本的驱动包
http://central.maven.org/maven2/mysql/mysql-connector-java/5.1.47/mysql-connector-java-5.1.47.jar
cp /opt/software/mysql-connector-java-5.1.47.jar /opt/kylo/kylo-services/lib/
初始化数据库
cd /opt/kylo/setup/sql/mysql
./setup-mysql.sh localhost root root
参数为ip、用户名、密码
初始化数据库后,需要执行修正语句,否则会启动不成功
ALTER TABLE kylo.FEED MODIFY COLUMN modified_time timestamp NOT NULL DEFAULT '1970-01-01 08:00:01';
9.检查依赖程序状态并启动
ps -ef | grep elasticsearch
ps -ef | grep activemq
ps -ef | grep nifi
若没有启动
service elasticsearch start
service activemq start
service nifi start
10.启动kylo
cd /opt/kylo
sh start-kylo-apps.sh
可能会提示
[root@localhost kylo]# sh start-kylo-apps.sh
Starting kylo-ui ...
Starting kylo-services ...
Unable to locate core-site.xml. Please define HADOOP_CONF_DIR for kylo service account
编辑启动文件,将core-site.xml文件的检查先注释掉,重新启动:
vi /opt/kylo/kylo-services/bin/run-kylo-services.sh
if ! [ -f $HADOOP_CONF_DIR/core-site.xml ]; then
  >&2 echo "Unable to locate core-site.xml.  Please define HADOOP_CONF_DIR for kylo service account"
  # exit 1
fi
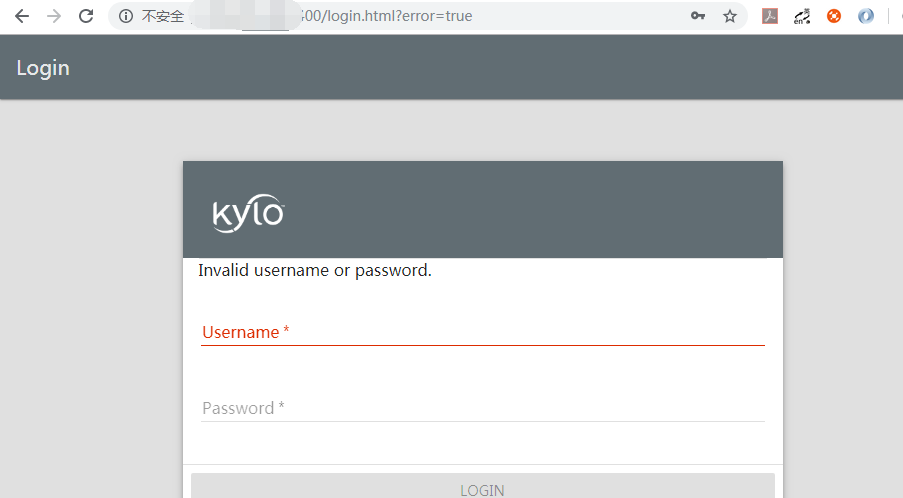
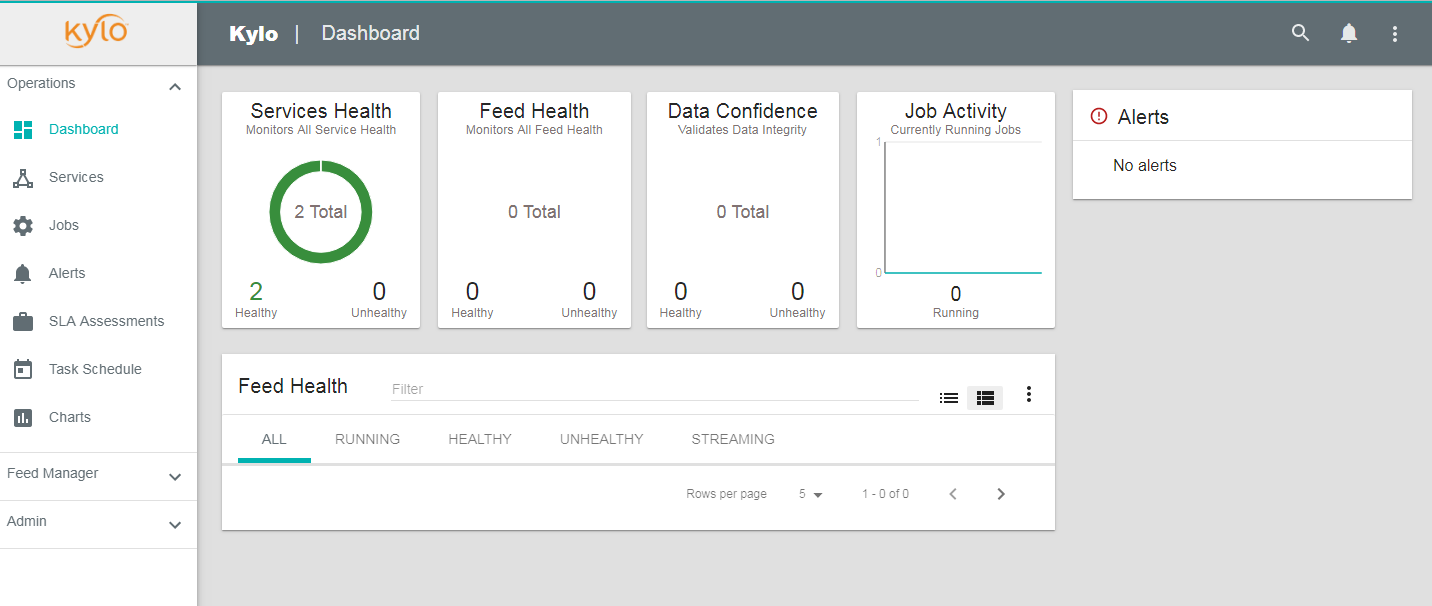
11.访问系统
activemq: http://ip:8161/
nifi: http://ip:8079/nifi/
kylo: http://ip:8400
如果系统遇到问题可以到
/var/log目录下查看对应的日志
