

1.zookeeper的安装和配置
下载:http://zookeeper.apache.org/releases.html
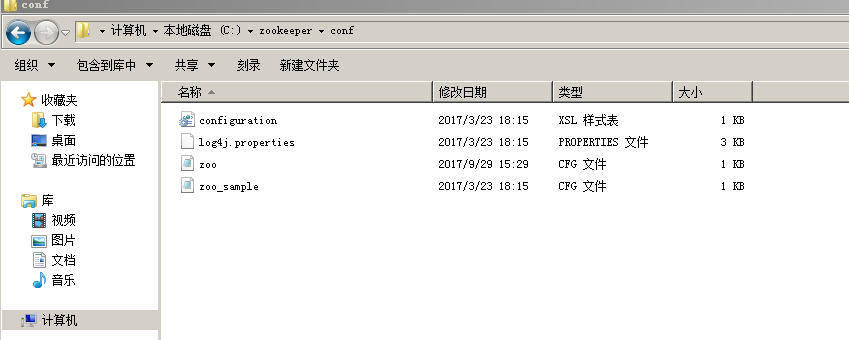
把conf目录下的zoo_sample.cfg改名成zoo.cfg,这里我是先备份了zoo_sample.cfg再改的名。
把zoo.cfg里面的内容改成:
# The number of milliseconds of each tick

tickTime=2000

# The number of ticks that the initial

# synchronization phase can take

initLimit=10

# The number of ticks that can pass between

# sending a request and getting an acknowledgement

syncLimit=5

# the directory where the snapshot is stored.

# do not use /tmp for storage, /tmp here is just

# example sakes.

dataDir=D:\\zookeeper-3.4.7\\data

dataLogDir=D:\\zookeeper-3.4.7\\log

# the port at which the clients will connect

clientPort=2181

# the maximum number of client connections.

# increase this if you need to handle more clients

#maxClientCnxns=60

#

# Be sure to read the maintenance section of the

# administrator guide before turning on autopurge.

#

# http://zookeeper.apache.org/doc/current/zookeeperAdmin.html#sc_maintenance

#

# The number of snapshots to retain in dataDir

#autopurge.snapRetainCount=3

# Purge task interval in hours

# Set to "0" to disable auto purge feature

#autopurge.purgeInterval=1
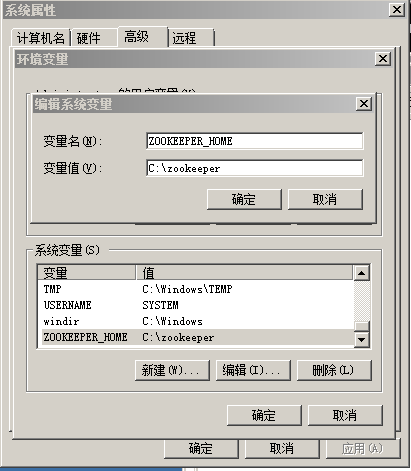
我们再配置一下这个环境变量就可以运行zookeeper了。(本文基于Windows已经配置过JAVA_HOME并且配置正确)
新增环境变量:ZOOKEEPER_HOME
变量值:C:\zookeeper (变量值要根据你下的zookeeper包的放置位置)
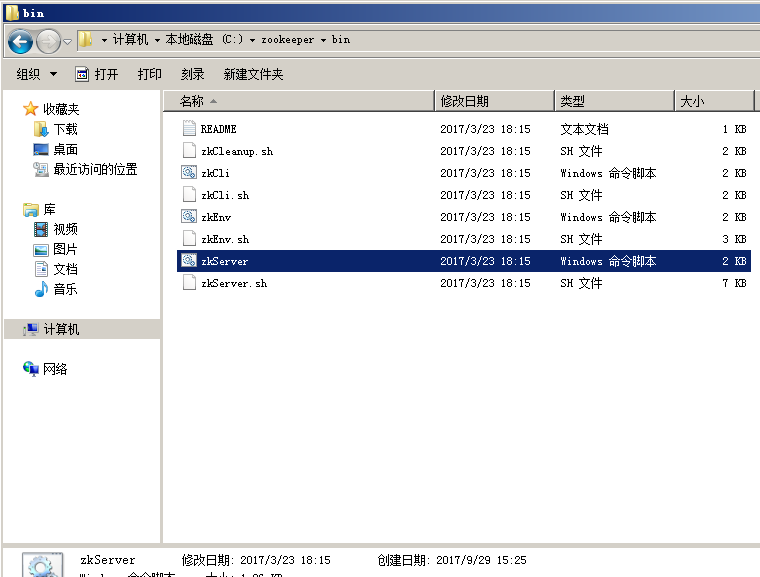
再在系统变量path最后添加: ;%ZOOKEEPER_HOME%/bin; %ZOOKEEPER_HOME%/conf 并保存就可以了

这个时候就可以验证我们到底有没有安装成功了
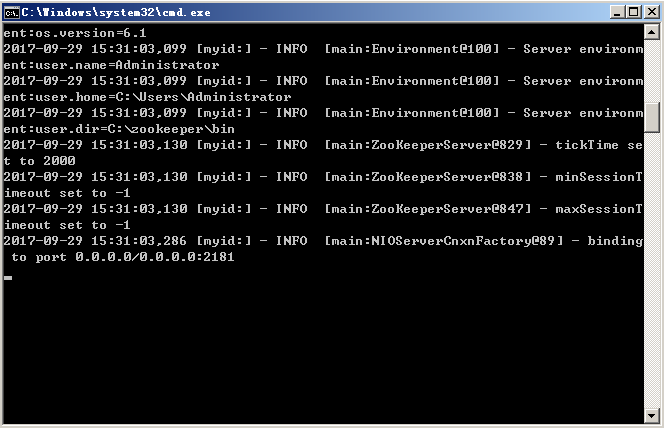
说明成功了!
