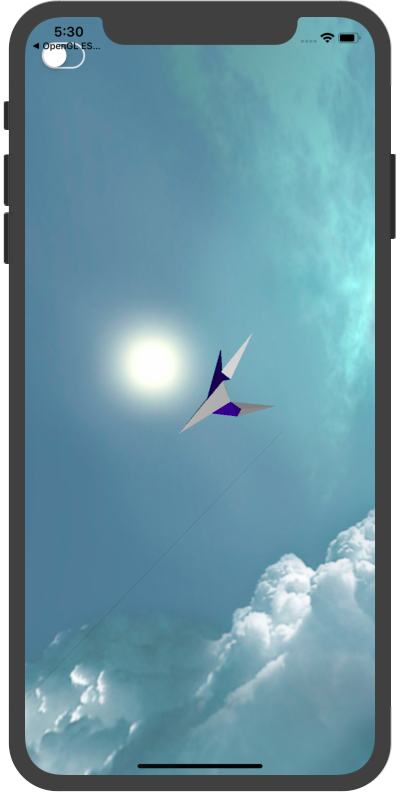
OpenGL ES天空盒子效果
一、理解
利用GLKBaseEffect,自定义顶点着色器和片元着色器,结合天空盒子,展示效果
二、技术代码
CCSkyBoxEffect:天空盒子效果类;
CCSkyboxShader.vsh:顶点着色器;
CCSkyboxShader.fsh:片元着色器;
//立方体场景贴图纹理处理及顶点数据处理
- (id)init
{
    self = [super init];
    if (self) {
        _textureCubeMap = [[GLKEffectPropertyTexture alloc] init];
        //是否使用原始纹理
        _textureCubeMap.enabled = YES;
        //采样纹理的opengl名称
        _textureCubeMap.name = 0;
        //设置纹理类型:立方体贴图
        _textureCubeMap.target = GLKTextureTargetCubeMap;
        /*纹理用于计算其输出片段颜色的模式
         GLKTextureEnvModeReplace, 输出颜色由从纹理获取的颜色.忽略输入的颜色
         GLKTextureEnvModeModulate, 输出颜色是通过将纹理颜色与输入颜色来计算所得
         GLKTextureEnvModeDecal,输出颜色是通过使用纹理的alpha组件来混合纹理颜色和输入颜色来计算的。
         */
        _textureCubeMap.envMode = GLKTextureEnvModeReplace;

        _transform = [[GLKEffectPropertyTransform alloc] init];
        self.center = GLKVector3Make(0, 0, 0);
        self.xSize = 1.0;
        self.ySize = 1.0;
        self.zSize = 1.0;

        //立方体的8个顶点
        const float vertices[CCSkyboxNumCoords] = {
            -0.5, -0.5,  0.5,
            0.5, -0.5,  0.5,
            -0.5,  0.5,  0.5,
            0.5,  0.5,  0.5,
            -0.5, -0.5, -0.5,
            0.5, -0.5, -0.5,
            -0.5,  0.5, -0.5,
            0.5,  0.5, -0.5
        };
        //创建缓存对象,并返回标志符
        glGenBuffers(1, &vertexBufferID);
        //绑定缓存对象到指定缓存区:顶点
        glBindBuffer(GL_ARRAY_BUFFER, vertexBufferID);
        //将数据拷贝到缓存对象中
        glBufferData(GL_ARRAY_BUFFER, sizeof(vertices), vertices, GL_STATIC_DRAW);

        //绘制立方体的三角形带索引
        const GLubyte indices[CCSkyboxNumVertexIndices] = {
            1, 2, 3, 7, 1, 5, 4, 7, 6, 2, 4, 0, 1, 2
        };
        //开辟索引缓存并复制索引数据到缓存区
        glGenBuffers(1, &indexBufferID);
        glBindBuffer(GL_ELEMENT_ARRAY_BUFFER, indexBufferID);
        glBufferData(GL_ELEMENT_ARRAY_BUFFER, sizeof(indices), indices, GL_STATIC_DRAW);
    }
    return self;
}
//坐标实时调整
- (void)setMatrixs
{
    const GLfloat aspectRatio = (GLfloat)(self.view.bounds.size.width)/(GLfloat)(self.view.bounds.size.height);

    self.baseEffect.transform.projectionMatrix = GLKMatrix4MakePerspective(GLKMathDegreesToRadians(85.0), aspectRatio, 0.1, 20.0);

    //获取世界坐标系到矩阵中
    self.baseEffect.transform.modelviewMatrix = GLKMatrix4MakeLookAt(self.eyePosition.x, self.eyePosition.y, self.eyePosition.z, self.lookAtPosition.x, self.lookAtPosition.y, self.lookAtPosition.z, self.upVector.x, self.upVector.y, self.upVector.z);

    //增加飞机旋转角度
    self.angle += 0.01;
    //调整脑袋位置
    self.eyePosition = GLKVector3Make(-5.0*sinf(self.angle), -5.0, -5.0*cosf(self.angle));
    //调整物体位置
    self.lookAtPosition = GLKVector3Make(0.0, 1.5+-5.0*sinf(0.3*self.angle), 0.0);
}
三、效果图


