从来不做笔记_day09_kvm_Demo version(待完善)
一.概念与安装
1.查看cpu是否支持硬件虚拟化技术
[root@localhost ~]# cat /proc/cpuinfo |grep vmx
flags        : fpu vme de pse tsc msr pae mce cx8 apic sep mtrr pge mca cmov pat pse36 clflush mmx fxsr sse sse2 ss ht syscall nx pdpe1gb rdtscp lm constant_tsc arch_perfmon nopl xtopology tsc_reliable nonstop_tsc eagerfpu pni pclmulqdq vmx ssse3 fma cx16 pcid sse4_1 sse4_2 x2apic movbe popcnt tsc_deadline_timer aes xsave avx f16c rdrand hypervisor lahf_lm abm 3dnowprefetch tpr_shadow vnmi ept vpid fsgsbase tsc_adjust bmi1 hle avx2 smep bmi2 invpcid rtm mpx rdseed adx smap clflushopt xsaveopt xsavec arat
flags        : fpu vme de pse tsc msr pae mce cx8 apic sep mtrr pge mca cmov pat pse36 clflush mmx fxsr sse sse2 ss ht syscall nx pdpe1gb rdtscp lm constant_tsc arch_perfmon nopl xtopology tsc_reliable nonstop_tsc eagerfpu pni pclmulqdq vmx ssse3 fma cx16 pcid sse4_1 sse4_2 x2apic movbe popcnt tsc_deadline_timer aes xsave avx f16c rdrand hypervisor lahf_lm abm 3dnowprefetch tpr_shadow vnmi ept vpid fsgsbase tsc_adjust bmi1 hle avx2 smep bmi2 invpcid rtm mpx rdseed adx smap clflushopt xsaveopt xsavec arat
一台虚拟机 虚拟机配置文件 和 虚拟机镜像文件img
#虚拟机配置文件
[root@localhost qemu]# cd /etc/libvirt/qemu/
[root@localhost qemu]# ll
总用量 16
-rw-------. 1 root root 4432 10月 15 14:42 centos7.0.xml
drwx------. 3 root root   42 9月  26 23:21 networks
-rw-------. 1 root root 4441 10月 15 14:59 new_clone_centos.xml
#虚拟机镜像文件
[root@localhost /]# ll /var/lib/libvirt/images/
总用量 10676704
-rw-------. 1 root root 10244784128 10月 16 08:54 centos7.0.qcow2
-rw-------. 1 root root  6443696128 10月 16 10:44 centos7.4.img
-rw-r--r--. 1 qemu qemu  4470079488 10月 15 14:28 CentOS-7-x86_64-DVD-1804.iso
-rw-------. 1 root root  1470758912 10月 16 09:30 new_centos7.0.img
-rw-r--r--. 1 root root  9663676416 10月 16 10:19 new_centos7.0.raw
查看虚拟机镜像格式
[root@localhost qemu]# qemu-img info /var/lib/libvirt/images/new_os.img
image: /var/lib/libvirt/images/new_os.img
file format: qcow2
virtual size: 9.0G (9663676416 bytes)
disk size: 1.4G
cluster_size: 65536
Format specific information:
    compat: 1.1
    lazy refcounts: true
二·.给虚拟机创建一个快照
创建快照 时 给起一个名字
[root@localhost /]# virsh snapshot-create-as centos7.0 httpd
已生成域快照 httpd
查看 某一个虚拟机的 快照
[root@localhost /]# virsh snapshot-list centos7.0
 名称               生成时间              状态
------------------------------------------------------------
 1539588360           2018-10-15 15:26:00 +0800 running
 httpd                2018-10-15 15:29:06 +0800 shutoff
[root@localhost /]# virsh snapshot-list new_clone_centos
 名称               生成时间              状态
------------------------------------------------------------
 1539588399           2018-10-15 15:26:39 +0800 running
使用 中文名字 创建一个快照
查看 最新的 快照
[root@localhost /]# virsh snapshot-current centos7.0
<domainsnapshot>
  <name>httpd</name> #名字啊
  <state>shutoff</state>
  <parent>
    <name>1539588360</name>
  </parent>
  <creationTime>1539588546</creationTime>
  <memory snapshot='no'/>
  <disks>
    <disk name='vda' snapshot='internal'/>
    <disk name='hda' snapshot='no'/>
  </disks>
  <domain type='kvm'>
    <name>centos7.0</name>
    <uuid>01c475cc-9a02-4b94-9469-033c7f62dea4</uuid>
    <memory unit='KiB'>1048576</memory>
    <currentMemory unit='KiB'>1048576</currentMemory>
    <vcpu placement='static'>1</vcpu>
    <os>
      <type arch='x86_64' machine='pc-i440fx-rhel7.0.0'>hvm</type>
      <boot dev='hd'/>
    </os>
快照的配置文件
[root@localhost /]# ll /var/lib/libvirt/qemu/snapshot/centos7.0/
总用量 16
-rw-------. 1 root root 5308 10月 15 15:29 1539588360.xml
-rw-------. 1 root root 4981 10月 15 15:29 httpd.xml
查看 快照的占用空间大小
[root@localhost /]# qemu-img info /var/lib/libvirt/images/new_os.img
image: /var/lib/libvirt/images/new_os.img
file format: qcow2
virtual size: 9.0G (9663676416 bytes)
disk size: 2.1G
cluster_size: 65536
Snapshot list: ##这里啊
ID        TAG                 VM SIZE                DATE       VM CLOCK
1         1539588399             275M 2018-10-15 15:26:39   00:20:04.686
Format specific information:
    compat: 1.1
    lazy refcounts: true
[root@localhost /]# qemu-img info /var/lib/libvirt/images/centos7.0.qcow2
image: /var/lib/libvirt/images/centos7.0.qcow2
file format: qcow2
virtual size: 9.0G (9663676416 bytes)
disk size: 1.6G
cluster_size: 65536
Snapshot list:
ID        TAG                 VM SIZE                DATE       VM CLOCK
1         1539588360             270M 2018-10-15 15:26:00   00:14:42.068
2         httpd                     0 2018-10-15 15:29:06   00:00:00.000
Format specific information:
    compat: 1.1
    lazy refcounts: true
恢复虚拟机快照
必须关闭kvm中的虚拟机的电源啊。
查看虚拟机的当前状态
[root@localhost /]# virsh domstate centos7.0
关闭
[root@localhost /]# virsh domstate new_clone_centos
running

[root@localhost /]#
恢复虚拟机 快照
[root@localhost /]# virsh snapshot-revert centos7.0 httpd
查看
[root@localhost /]# virsh snapshot-current centos7.0
<domainsnapshot>
  <name>httpd</name>
  <state>shutoff</state>
  <parent>
    <name>1539588360</name>
  </parent>
[root@localhost /]# virsh snapshot-revert centos7.0 1539588360

[root@localhost /]# virsh snapshot-current centos7.0
<domainsnapshot>
  <name>1539588360</name> ####这里啊
  <state>running</state>
  <creationTime>1539588360</creationTime>
  <memory snapshot='internal'/>
  <disks>
    <disk name='vda' snapshot='internal'/>
    <disk name='hda' snapshot='no'/>
  </disks>
  <domain type='kvm'>
二.
删除快照
[root@localhost /]# virsh snapshot-delete centos7.0 httpd
已删除域快照 httpd

[root@localhost /]# qemu-img info /var/lib/libvirt/images/centos7.0.qcow2
image: /var/lib/libvirt/images/centos7.0.qcow2
file format: qcow2
virtual size: 9.0G (9663676416 bytes)
disk size: 1.6G
cluster_size: 65536
Snapshot list:
ID        TAG                 VM SIZE                DATE       VM CLOCK
1         1539588360             270M 2018-10-15 15:26:00   00:14:42.068
Format specific information:
    compat: 1.1
    lazy refcounts: true
[root@localhost /]#
测试使用
1539588360 这个快照 开机
[root@localhost /]# virsh start centos7.0
域 centos7.0 已开始

[root@localhost /]#
开机创建快照
[root@localhost /]# virsh snapshot-create-as centos7.0 http-start
已生成域快照 http-start
[root@localhost /]#
查看开机创建的快照占用的磁盘空间
[root@localhost /]# qemu-img info /var/lib/libvirt/images/centos7.0.qcow2
image: /var/lib/libvirt/images/centos7.0.qcow2
file format: qcow2
virtual size: 9.0G (9663676416 bytes)
disk size: 2.4G
cluster_size: 65536
Snapshot list: #快照大小
ID        TAG                 VM SIZE                DATE       VM CLOCK
1         1539588360             270M 2018-10-15 15:26:00   00:14:42.068
2         http-start             266M 2018-10-16 08:32:43   00:01:22.958
Format specific information:
    compat: 1.1
    lazy refcounts: true
[root@localhost /]#
virsh常用的命令
查看已经打开虚拟机列表
[root@localhost /]# virsh  list
 Id    名称                         状态
----------------------------------------------------
 6     centos7.0                      running

[root@localhost /]#
查看所有的虚拟机列表
[root@localhost /]# virsh list --all
 Id    名称                         状态
----------------------------------------------------
 6     centos7.0                      running
 -     new_clone_centos               关闭

[root@localhost /]#
查看virsh的版本
[root@localhost /]# virsh version
根据库编译:libvirt 3.9.0
使用库:libvirt 3.9.0
使用的 API: QEMU 3.9.0
运行管理程序: QEMU 1.5.3
启动 某一个虚拟机
[root@localhost /]# virsh start new_clone_centos #域
域 new_clone_centos 已开始
关闭一个虚拟机
[root@localhost /]# virsh shutdown centos7.0
域 centos7.0 被关闭
导出虚拟机的配置文件
[root@localhost /]# virsh dumpxml centos7.0 >centos7.0.xml
[root@localhost /]# ll
总用量 34
lrwxrwxrwx.   1 root root    7 9月  26 19:05 bin -> usr/bin
dr-xr-xr-x.   6 root root 4096 10月 15 14:17 boot
-rw-r--r--.   1 root root 4329 10月 16 08:39 centos7.0.xml #这里
#取消 定义之前 记得 备份 一下 虚拟机的 配置文件啊
[root@localhost images]# virsh dumpxml new_centos7.0 >/new_centos7.0.xml
#取消new_clone_centos定义 ??相当于虚拟机 在 列表 中 删除它,没有删除镜像文件!可以通过 配置文件恢复
[root@localhost images]# virsh undefine new_centos7.0
域 new_centos7.0 已经被取消定义
#取消定义后 配置文件不存在了
[root@localhost images]# ls /etc/libvirt/qemu
autostart  centos7.0.xml  networks #没有new_clone
#定义,需要 提前 有 配置文件啊
[root@localhost images]# virsh define /new_centos7.0.xml
定义域 new_centos7.0(从 /new_centos7.0.xml)
强制关闭虚拟机
[root@localhost /]# virsh destroy new_clone_centos
域 new_clone_centos 被删除

[root@localhost /]#
设置开机自启动
[root@localhost /]# virsh autostart centos7.0
域 centos7.0标记为自动开始
取消虚拟机随宿主机启动
[root@localhost /]# virsh autostart --disable centos7.0
域 centos7.0取消标记为自动开始
挂起虚拟机
[root@localhost /]# virsh suspend centos7.0
域 centos7.0 被挂起

[root@localhost /]#
恢复虚拟机
[root@localhost /]# virsh resume centos7.0
域 centos7.0 被重新恢复
控制台管理虚拟机
[root@localhost /]# virsh console centos7.0
连接到域 centos7.0
换码符为 ^]
实战:qcow2 转换为 raw(不支持快照)
语法:
qemu-img convert -f 源镜像的格式 -O 目标镜像的格式 源镜像的存储位置 目标镜像的存储位置
#关闭虚拟机
[root@localhost ~]# virsh shutdown new_centos7.0
域 centos7.0 被关闭

[root@localhost ~]#
#转换格式
[root@localhost images]# qemu-img convert -f qcow2 -O raw /var/lib/libvirt/images/new_centos7.0.img new_centos7.0.raw
#查看信息
[root@localhost images]# qemu-img info new_centos7.0.raw
image: new_centos7.0.raw
file format: raw
virtual size: 9.0G (9663676416 bytes)
disk size: 1.3G
#修改配置文件,使用raw格式镜像文件来启动虚拟机
[root@localhost images]# virsh edit new_centos7.0
编辑了域 new_centos7.0 XML 配置。
编辑哪一行呢?
[root@localhost images]# cat /etc/libvirt/qemu/new_centos7.0.xml | grep "source file"
      <source file='/var/lib/libvirt/images/new_centos7.0.raw'/>
以及 上面的 那一行
改 type='raw'
重启 服务
[root@localhost /]# systemctl restart libvirtd.service
[root@localhost /]#
用新 镜像重启
[root@localhost /]# virsh start new_centos7.0
域 new_centos7.0 已开始
其他格式转换
将vmdk 转换为 qcow2
qemu-img convert -f vmdk -O qcow2 source.vmdk target.qcow2
将qcow2转换为 vmdk
[root@localhost ~]# qemu-img convert -f qcow2 -O vmdk source.qcow2 target.vmdk^C
[root@localhost ~]#
三.使用命令行 给kvm虚拟机安装操作系统
#挂载 /dev/sdb1
[root@localhost images]# mount /dev/sdb1 /var/lib/libvirt/images/
#上传 centos7系统镜像 到 上面目录
#安装vnc客户端软件
[root@localhost images]# yum -y install tigervnc
已加载插件:fastestmirror, langpacks
Determining fastest mirrors
yum                                                             | 3.6 kB  00:00:00
(1/2): yum/group_gz                                             | 166 kB  00:00:00
(2/2): yum/primary_db
#安装virt-viewer
[root@localhost images]# yum -y install virt-viewer
已加载插件:fastestmirror, langpacks
Loading mirror speeds from cached hostfile
正在解决依赖关系
#查看 virt-viewer 的作用?
[root@localhost images]# yum info virt-viewer.x86_64
已加载插件:fastestmirror, langpacks
Loading mirror speeds from cached hostfile
已安装的软件包
名称    :virt-viewer
架构    :x86_64
版本    :5.0
发布    :10.el7
大小    :1.5 M
源    :installed
来自源:yum
简介    : Virtual Machine Viewer #虚拟机 查看器
网址    :https://virt-manager.org/
协议    : GPLv2+
描述    : Virtual Machine Viewer provides a graphical console client for connecting 提供一个图形化客户端 去 连接
         : to virtual machines. It uses the GTK-VNC or SPICE-GTK widgets to provide
         : the display, and libvirt for looking up VNC/SPICE server details.
#查看 libvirtd服务 是否开启
[root@localhost images]# systemctl status libvirtd
● libvirtd.service - Virtualization daemon
   Loaded: loaded (/usr/lib/systemd/system/libvirtd.service; enabled; vendor preset: enabled)
   Active: active (running) since 二 2018-10-16 09:45:01 CST; 10min ago
     Docs: man:libvirtd(8)
           https://libvirt.org
#安装kvm相关软件
[root@localhost images]# yum install qemu-kvm libvirt libguestfs-tools virt-install virt-manager libvirt-python -y
已加载插件:fastestmirror, langpacks
Loading mirror speeds from cached hostfile
软件包 10:qemu-kvm-1.5.3-156.el7.x86_64 已安装并且是最新版本
软件包 libvirt-3.9.0-14.el7.x86_64 已安装并且是最新版本
通过命令安装虚拟机
命令:virt-install
常用选项:
-n name,--name=Name
-r mem,--ram=mem
--vcpus=num
--disk path=指定虚拟机存放的路径,size=num(指定磁盘的大小 ,单位是G)
--accelerate kvm或者 是 qemu内核加速器,选项默认 是添加的,另外 如果 系统 kvm和 qemu加速器 都支持,那么 优先 使用 kvm加速器
-c CDROM ,--cdrom=CDROM ,指定虚拟光驱
--network 指定网卡模式
-x EXTRA,--extra-args=EXTRA 用来加载 kernel 和 initrd 提供额外的内核命令行参数,比如无人 值守安装系统
[root@localhost images]# virt-install --name centos7.4 --ram 1024 --vcpus=1 --disk path=/var/lib/libvirt/images/centos7.4.img,size=6 --accelerate --cdrom /var/lib/libvirt/images/CentOS-7-x86_64-DVD-1804.iso --network bridge=br0 --graphics vnc

开始安装......
正在分配 'centos7.4.img'                                                                                                                                                                | 6.0 GB  00:00:00

(virt-viewer:14141): Gtk-WARNING **: Allocating size to VncDisplay 0x565047ff0220 without calling gtk_widget_get_preferred_width/height(). How does the code know the size to allocate?
#安装完毕,连接到 操作系统
[root@localhost images]# virt-viewer
#或者
但是 报错?什么原因?
[root@localhost images]# vncviewer 127.0.0.1

TigerVNC 查看器 64 位 v1.8.0
构建于:2018-04-11 06:05
版权所有 1999-2017 TigerVNC 团队及众多开发者(参见 README.txt)
访问 http://www.tigervnc.org 以获取更多关于 TigerVNC 的信息。

Tue Oct 16 10:39:08 2018
 DecodeManager: Detected 2 CPU core(s)
 DecodeManager: Creating 2 decoder thread(s)
 CConn:       unable connect to socket: 拒绝连接 (111)
Allocating size #分配大小 to VncDisplay 0x565047ff0220 without calling gtk_widget_get_preferred_width/height(). How does the code know the size to allocate? # 代码如何知道要分配的大小
四。命令行 无人值守 安装 kvm操作系统
#搭建yum源
[root@localhost /]# cat /etc/yum.repos.d/my.repo
[yum]
name=yum
baseurl=file:///mycdrom
enable=1
gpgcheck=0
#安装httpd
[root@localhost /]# yum -y install httpd.x86_64
已加载插件:fastestmirror, langpacks
Loading mirror speeds from cached hostfile
正在解决依赖关系
--> 正在检查事务
---> 软件包 httpd.x86_64.0.2.4.6-80.el7.centos 将被 安装
--> 正在处理依赖关系 httpd-tools = 2.4.6-80.el7.centos,它被软件包 httpd-2.4.6-80.el7.centos.x86_64 需要
--> 正在处理依赖关系 /etc/mime.types,它被软件包 httpd-2.4.6-80.el7.centos.x86_64 需要
--> 正在处理依赖关系 libaprutil-1.so.0()(
#开启服务
[root@localhost /]# systemctl start httpd.service

[root@localhost /]# systemctl status httod
Unit httod.service could not be found.
[root@localhost /]# systemctl status httpd.service
● httpd.service - The Apache HTTP Server
   Loaded: loaded (/usr/lib/systemd/system/httpd.service; disabled; vendor preset: disabled)
   Active: active (running) since 二 2018-10-16 10:43:23 CST; 24s ago
     Docs: man:httpd(8)
#创建一个目录
[root@localhost /]# cd /var/www/html/
[root@localhost html]# ll
总用量 0
[root@localhost html]# mkdir centos7
#在该目录 挂载 一个 镜像
[root@localhost html]# mount /dev/cdrom /var/www/html/centos7/
mount: /dev/sr0 写保护,将以只读方式挂载
[root@localhost html]# ll
#关闭防火墙
[root@localhost centos7]# systemctl stop firewalld.service
[root@localhost centos7]# iptables -F
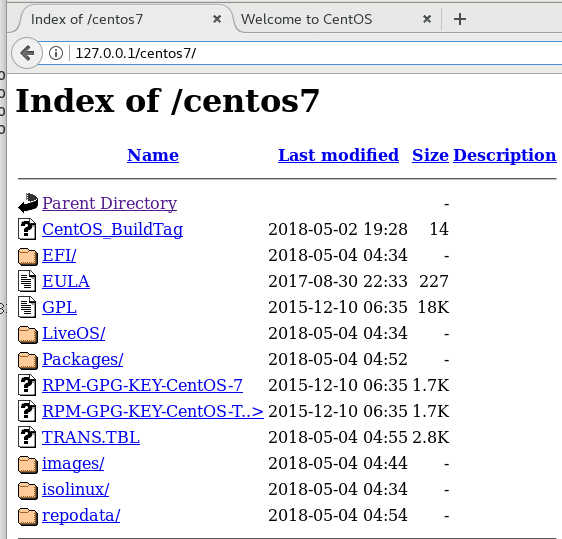
#浏览器 访问 http服务器
http://127.0.0.1/centos7/
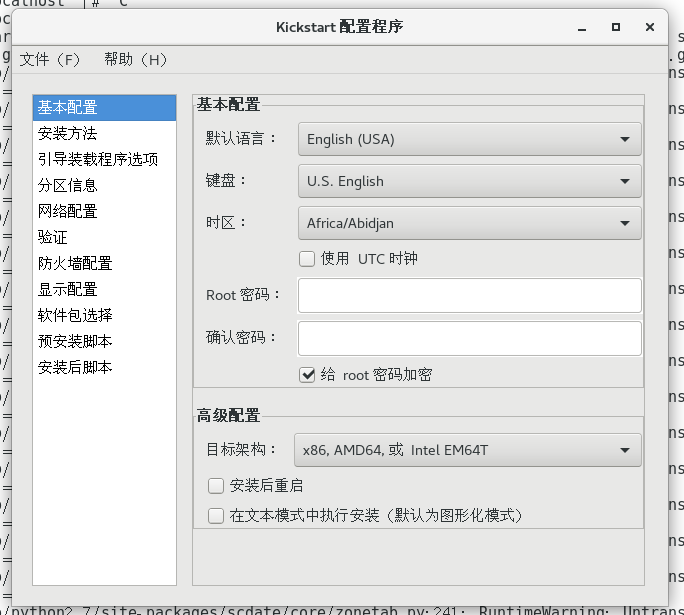
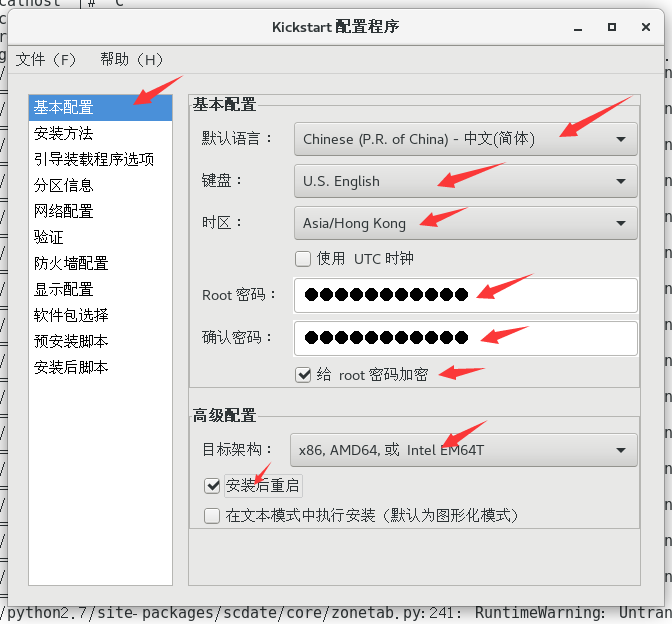
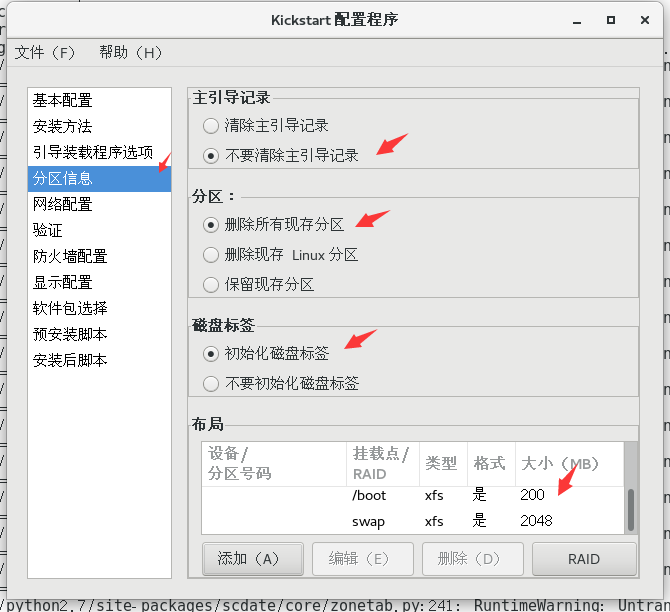
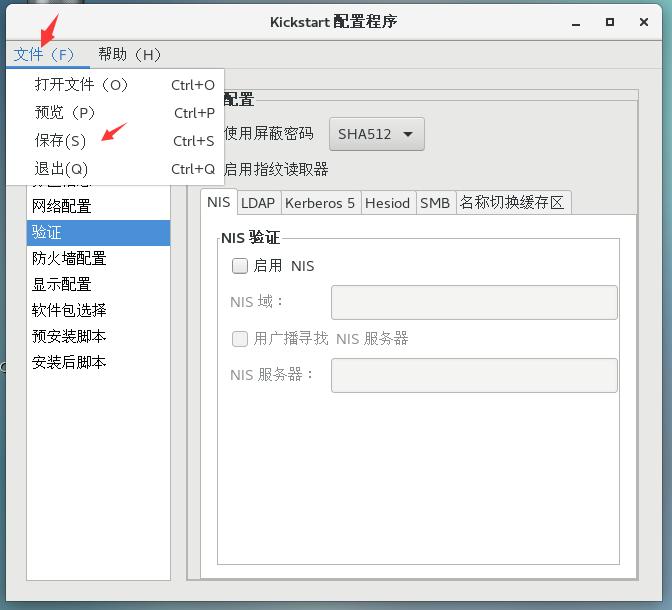
生成 ks.cfg文件
[root@localhost ~]# yum -y install system-config-kickstart
已加载插件:fastestmirror, langpacks
Loading mirror speeds from cached hostfile
[root@localhost ~]# system-config-kickstart
/usr/share/system-config-kickstart/kickstartGui.py:104: GtkWarning: GtkSpinButton: setting an adjustment with non-zero page size is deprecated
  xml = gtk.glade.XML ("/usr/share/system-config-kickstart/system-config-kickstart.glade", domain="system-config-kickstart")

#上传 ks.cfg 到 /var/www/html下
ks.cfg 的作用:系统安装时 应答文件,可以实现无交互安装系统
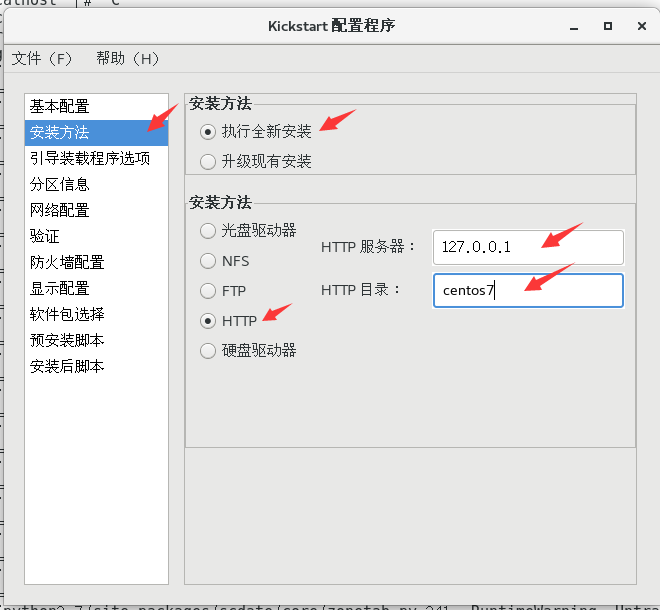
#开始安装
[root@localhost ~]# virt-install --name centos7-ks --ram 1024 --vcpus=1 --disk path=/var/lib/libvirt/images/centos7-ks.qcow2,size=10 --accelerate --location=http://192.168.1.63/centos7/ --network bridge=br0 -x "ks=http://192.168.1.63/ks.cfg"

开始安装......
搜索文件 vmlinuz......                                                                                                                                                                  | 5.9 MB  00:00:00
搜索文件 initrd.img......                                                                                                                                                               |  50 MB  00:00:00
正在分配 'centos7-ks.qcow2'                                                                                                                                                             |  10 GB  00:00:00

(virt-viewer:16647): Gtk-WARNING **: Allocating size to SpiceDisplay 0x5642f27a2330 without calling gtk_widget_get_preferred_width/height(). How does the code know the size to allocate?
失败:无法 读取 ks/.cfg文件 ?原因 不详,暂时跳过!
