


idea下ActiveMQ+Spring的简单demo
本文使用的是intellij idea工具。
下面主要介绍一个简单的activeMQ的demo。
本文主要是spring风格的实现。
先来看下包结构:
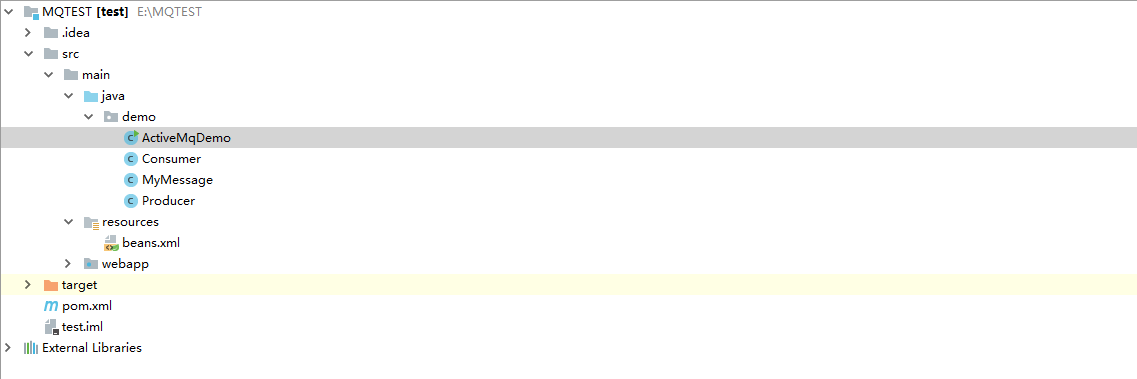
demo包含一个生产者,一个消费者,一个包含main方法的ActiveMaDemo类执行程序,还有一个自定义的类MyMessage作为消息传递的类型。所有的bean配置都放在beans.xml。
各个类的代码如下:
 1 public class Producer {
 2     private JmsTemplate template;
 3     private Destination destination;
 4
 5     public void produce(MyMessage message){
 6         template.convertAndSend(destination, message);
 7     }
 8
 9     public JmsTemplate getTemplate() {
10         return template;
11     }
12
13     public void setTemplate(JmsTemplate template) {
14         this.template = template;
15     }
16
17     public Destination getDestination() {
18         return destination;
19     }
20
21     public void setDestination(Destination destination) {
22         this.destination = destination;
23     }
24 }
 1 public class Consumer {
 2     private int num;
 3
 4     public void consume(MyMessage message) {
 5         System.out.println(num+"号消费"+message);
 6     }
 7
 8     public int getNum() {
 9         return num;
10     }
11
12     public void setNum(int num) {
13         this.num = num;
14     }
15 }
 1 public class MyMessage implements Serializable {
 2     private static final long serialVersionUID = -4360789240260037588L;
 3
 4     private String text;
 5
 6     public String getText() {
 7         return text;
 8     }
 9
10     public void setText(String text) {
11         this.text = text;
12     }
13
14     public String toString(){
15         return text;
16     }
17 }
 1 import org.apache.xbean.spring.context.ClassPathXmlApplicationContext;
 2 import org.springframework.context.ApplicationContext;
 3
 4 public class ActiveMqDemo {
 5
 6     public static void main(String[] args){
 7         ApplicationContext context = new ClassPathXmlApplicationContext("beans.xml");
 8         Producer producer = (Producer) context.getBean("producer");
 9         for(int i=0;i<10;i++){
10             MyMessage myMessage = new MyMessage();
11             System.out.println("生产第"+i+"条消息!");
12             myMessage.setText("第"+i+"条消息!");
13             producer.produce(myMessage);
14         }
15     }
16 }
pom需要的依赖如下:
<dependency>
          <groupId>org.apache.activemq</groupId>
          <artifactId>activemq-all</artifactId>
          <version>5.14.5</version>
</dependency>
接下来看下配置文件
 1 <?xml version="1.0" encoding="UTF-8"?>
 2 <beans xmlns="http://www.springframework.org/schema/beans"
 3        xmlns:xsi="http://www.w3.org/2001/XMLSchema-instance" xmlns:amq="http://activemq.apache.org/schema/core"
 4        xsi:schemaLocation="http://www.springframework.org/schema/beans
 5        http://www.springframework.org/schema/beans/spring-beans.xsd
 6        http://activemq.apache.org/schema/core
 7        http://activemq.apache.org/schema/core/activemq-core-5.8.0.xsd">
 8
 9     <!--ActiveMQ 连接工厂方法1-->
10     <!--<amq:connectionFactory id="jmsConnectionFactory" brokerURL="tcp://localhost:61616" userName="admin" password="admin" />-->
11
12     <!-- ActiveMQ 连接工厂方法2 -->
13     <!-- 真正可以产生Connection的ConnectionFactory,由对应的 JMS服务厂商提供-->
14     <!-- 如果连接网络:tcp://ip:61616;未连接网络:tcp://localhost:61616 以及用户名,密码-->
15     <bean id="jmsConnectionFactory" class="org.apache.activemq.ActiveMQConnectionFactory">
16         <property name="brokerURL" value="tcp://localhost:61616" />
17         <property name="userName" value="admin" />
18         <property name="password" value="admin" />
19         <property name="trustedPackages">
20             <list>
21                 <value>demo</value>
22             </list>
23         </property>
24     </bean>
25
26     <!--定义消息队列方法1-->
27     <!--<amq:queue name="destination" physicalName="queue" />-->
28
29     <!--定义消息队列方法2-->
30     <bean id="destination" class="org.apache.activemq.command.ActiveMQQueue">
31         <constructor-arg>
32             <value>queue</value>
33         </constructor-arg>
34     </bean>
35
36     <!-- 定义JmsTemplate-->
37     <bean id="jmsTemplate" class="org.springframework.jms.core.JmsTemplate">
38         <property name="connectionFactory" ref="jmsConnectionFactory"/>
39     </bean>
40
41     <!--定义生产者-->
42     <bean id="producer" class="demo.Producer">
43         <property name="template" ref="jmsTemplate" />
44         <property name="destination" ref="destination"/>
45     </bean>
46
47     <!--定义消费者-->
48     <bean id="consumer" class="demo.Consumer">
49         <property name="num" value="1"/>
50     </bean>
51
52     <!--定义监听器-->
53     <bean id="mqListener" class="org.springframework.jms.listener.adapter.MessageListenerAdapter">
54         <constructor-arg ref="consumer" />
55         <property name="defaultListenerMethod" value="consume" />
56     </bean>
57
58     <!--定义监听器容器-->
59     <bean id="listenerContainer" class="org.springframework.jms.listener.DefaultMessageListenerContainer">
60         <property name="connectionFactory" ref="jmsConnectionFactory" />
61         <property name="destination" ref="destination" />
62         <property name="messageListener" ref="mqListener" />
63     </bean>
64 </beans>
其中 jmsConnectionFactory 的 trustedPackages 属性用来把我自定义的MyMessage添加到白名单,因为ActiveMQ不认识这个类型~, 同时,在自定义传递消息的类时要注意实现序列化,不然会报错。
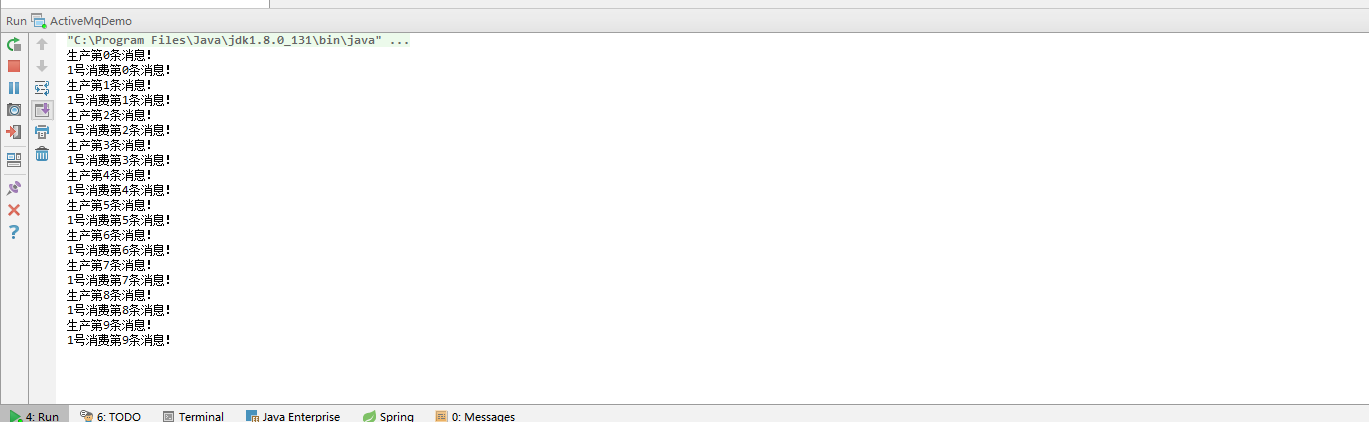
接下来运行 ActiveMqDemo 的main函数就行了,结果如下:
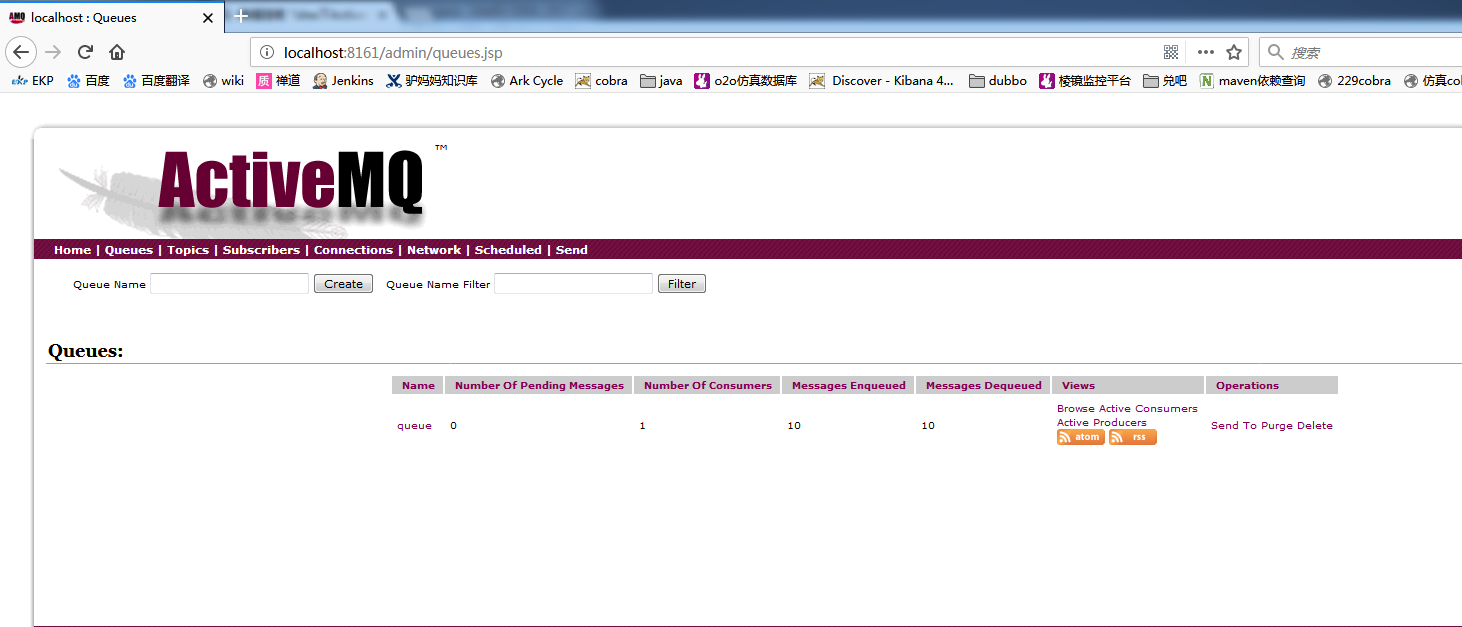
同时,打开http://localhost:8161/admin/queues.jsp,我们也可以看到ActiveMQ的消息产生和消费情况。
完!
