
如何使用 HTML5 Canvas 制作水波纹效果
今天,我们继续分享 JavaScript 实现的效果例子,这篇文章会介绍使用 JavaScript 实现水波纹效果。水波效果以图片为背景,点击图片任意位置都会触发。有时候,我们使用普通的 Javascript 就可以创建一个很有趣的解决功能。
Step 1. HTML
和以前一样,首先是 HTML 代码:
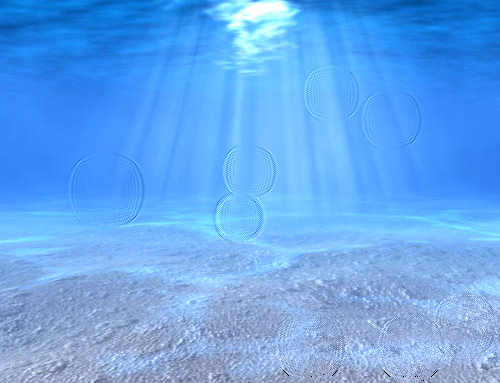
1 2 3 4 5 6 7 8 9 10 11 12 13 14 15 16 17 18 19 20 21 22 | <!DOCTYPE html><html> <head> <meta charset=utf-8 /> <title>Water drops effect</title> <link rel="stylesheet" href="css/main.css" type="text/css" /> <script src="js/vector2d.js" type="text/javascript" charset="utf-8"></script> <script src="js/waterfall.js" type="text/javascript" charset="utf-8"></script> </head> <body> <div class="example"> <h3><a href="#">Water drops effect</a></h3> <canvas id="water">HTML5 compliant browser required</canvas> <div id="switcher"> <img onclick='watereff.changePicture(this.src);' src="data_images/underwater1.jpg" /> <img onclick='watereff.changePicture(this.src);' src="data_images/underwater2.jpg" /> </div> <div id="fps"></div> </div> </body></html> |
Step 2. CSS
这是用到的 CSS 代码:
1 2 3 4 5 6 7 8 9 10 11 12 13 14 15 16 17 18 19 | body{background:#eee;margin:0;padding:0}.example{background:#FFF;width:600px;border:1px #000 solid;margin:20px auto;padding:15px;-moz-border-radius: 3px;-webkit-border-radius: 3px}#water { width:500px; height:400px; display: block; margin:0px auto; cursor:pointer;}#switcher { text-align:center; overflow:hidden; margin:15px;}#switcher img { width:160px; height:120px;} |
Step 3. JS
下面是主要的 JavaScript 代码:
1 2 3 4 5 6 7 8 9 10 11 12 13 14 15 16 17 18 19 20 21 22 23 24 25 26 27 28 29 30 31 32 33 34 35 36 37 38 39 40 41 42 43 44 45 46 47 48 49 50 51 52 53 54 55 56 57 58 59 60 61 62 63 64 65 66 67 68 69 70 71 72 73 74 75 76 77 78 79 80 81 82 83 84 85 86 87 88 89 90 91 92 93 94 95 96 97 98 99 100 101 102 103 104 105 106 107 108 109 110 111 112 113 114 115 116 117 118 119 120 121 122 123 124 125 126 127 128 129 130 131 | function drop(x, y, damping, shading, refraction, ctx, screenWidth, screenHeight){ this.x = x; this.y = y; this.shading = shading; this.refraction = refraction; this.bufferSize = this.x * this.y; this.damping = damping; this.background = ctx.getImageData(0, 0, screenWidth, screenHeight).data; this.imageData = ctx.getImageData(0, 0, screenWidth, screenHeight); this.buffer1 = []; this.buffer2 = []; for (var i = 0; i < this.bufferSize; i++){ this.buffer1.push(0); this.buffer2.push(0); } this.update = function(){ for (var i = this.x + 1, x = 1; i < this.bufferSize - this.x; i++, x++){ if ((x < this.x)){ this.buffer2[i] = ((this.buffer1[i - 1] + this.buffer1[i + 1] + this.buffer1[i - this.x] + this.buffer1[i + this.x]) / 2) - this.buffer2[i]; this.buffer2[i] *= this.damping; } else x = 0; } var temp = this.buffer1; this.buffer1 = this.buffer2; this.buffer2 = temp; } this.draw = function(ctx){ var imageDataArray = this.imageData.data; for (var i = this.x + 1, index = (this.x + 1) * 4; i < this.bufferSize - (1 + this.x); i++, index += 4){ var xOffset = ~~(this.buffer1[i - 1] - this.buffer1[i + 1]); var yOffset = ~~(this.buffer1[i - this.x] - this.buffer1[i + this.x]); var shade = xOffset * this.shading; var texture = index + (xOffset * this.refraction + yOffset * this.refraction * this.x) * 4; imageDataArray[index] = this.background[texture] + shade; imageDataArray[index + 1] = this.background[texture + 1] + shade; imageDataArray[index + 2] = 50 + this.background[texture + 2] + shade; } ctx.putImageData(this.imageData, 0, 0); }}var fps = 0;var watereff = { // variables timeStep : 20, refractions : 2, shading : 3, damping : 0.99, screenWidth : 500, screenHeight : 400, pond : null, textureImg : null, interval : null, backgroundURL : 'data_images/underwater1.jpg', // initialization init : function() { var canvas = document.getElementById('water'); if (canvas.getContext){ // fps countrt fps = 0; setInterval(function() { document.getElementById('fps').innerHTML = fps / 2 + ' FPS'; fps = 0; }, 2000); canvas.onmousedown = function(e) { var mouse = watereff.getMousePosition(e).sub(new vector2d(canvas.offsetLeft, canvas.offsetTop)); watereff.pond.buffer1[mouse.y * watereff.pond.x + mouse.x ] += 200; } canvas.onmouseup = function(e) { canvas.onmousemove = null; } canvas.width = this.screenWidth; canvas.height = this.screenHeight; this.textureImg = new Image(256, 256); this.textureImg.src = this.backgroundURL; canvas.getContext('2d').drawImage(this.textureImg, 0, 0); this.pond = new drop( this.screenWidth, this.screenHeight, this.damping, this.shading, this.refractions, canvas.getContext('2d'), this.screenWidth, this.screenHeight ); if (this.interval != null){ clearInterval(this.interval); } this.interval = setInterval(watereff.run, this.timeStep); } }, // change image func changePicture : function(url){ this.backgroundURL = url; this.init(); }, // get mouse position func getMousePosition : function(e){ if (!e){ var e = window.event; } if (e.pageX || e.pageY){ return new vector2d(e.pageX, e.pageY); } else if (e.clientX || e.clientY){ return new vector2d(e.clientX, e.clientY); } }, // loop drawing run : function(){ var ctx = document.getElementById('water').getContext('2d'); watereff.pond.update(); watereff.pond.draw(ctx); fps++; }}window.onload = function(){ watereff.init();} |
正如你所看到的,这里使用 Vector2D 函数,这个函数在 vector2d.js 里提供了。另一个很难的方法是使用纯数学实现,感兴趣的可以自己实验一下。
您可能感兴趣的相关文章


【推荐】编程新体验,更懂你的AI,立即体验豆包MarsCode编程助手
【推荐】凌霞软件回馈社区,博客园 & 1Panel & Halo 联合会员上线
【推荐】抖音旗下AI助手豆包,你的智能百科全书,全免费不限次数
【推荐】博客园社区专享云产品让利特惠,阿里云新客6.5折上折
【推荐】轻量又高性能的 SSH 工具 IShell:AI 加持,快人一步
· 浏览器原生「磁吸」效果!Anchor Positioning 锚点定位神器解析
· 没有源码,如何修改代码逻辑?
· 一个奇形怪状的面试题:Bean中的CHM要不要加volatile?
· [.NET]调用本地 Deepseek 模型
· 一个费力不讨好的项目,让我损失了近一半的绩效!
· 在鹅厂做java开发是什么体验
· 百万级群聊的设计实践
· WPF到Web的无缝过渡:英雄联盟客户端的OpenSilver迁移实战
· 永远不要相信用户的输入:从 SQL 注入攻防看输入验证的重要性
· 全网最简单!3分钟用满血DeepSeek R1开发一款AI智能客服,零代码轻松接入微信、公众号、小程
2013-09-14 40款很奇异的名片设计,吸引你的眼球《下篇》
2011-09-14 75佳精美的 CSS 网页设计作品欣赏(系列一)
2011-09-14 10个奇特的 HTML5 Canvas 应用试验