
php的xdebug扩展使用vagrant
wget http://xdebug.org/files/xdebug-2.4.0rc4.tgz
tar xvzf xdebug-2.4.0rc4.tgz
cd xdebug-2.4.0RC4
phpize
./configure --enable-xdebug --with-php-config=/usr/local/php/bin/php-config
红色配置自己的php-config目录
make
make install
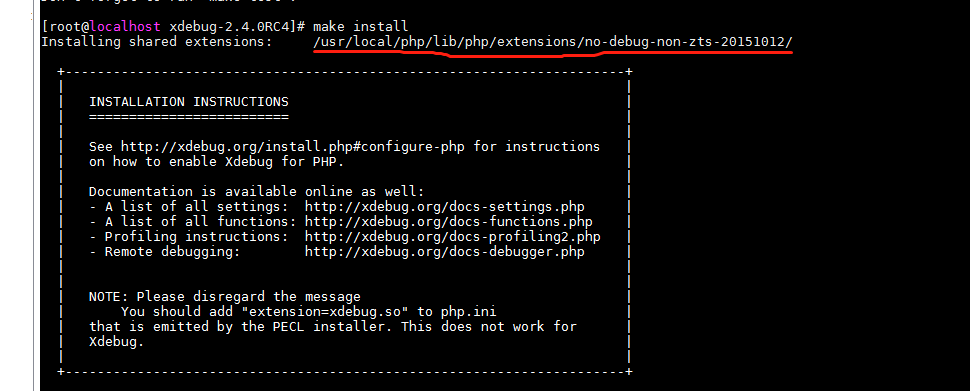
Installing shared extensions: /usr/local/php/lib/php/extensions/no-debug-non-zts-20131226/
成功编译安装后,Xdebug会显示编译完成的.so文件目录,我们要记录下这个目录,让当前的PHP环境支持Xdebug调试。
编辑php.ini,加入下面配置,一般的功能都打开了
[xdebug]
zend_extension=/usr/local/php/lib/php/extensions/no-debug-non-zts-20100525/xdebug.so
xdebug.idekey=PHPSTORM
xdebug.auto_trace=1
xdebug.remote_enable=1
xdebug.remote_host=172.16.3.61 #本地ip地址
xdebug.remote_port=9000
xdebug.remote_autostart=1
xdebug.remote_mode=req
xdebug.remote_handler=dbgp
xdebug 3.0 以后版本的配置
[xdebug]
zend_extension=xdebug.so
xdebug.mode = debug
xdebug.start_with_request = yes
xdebug.client_port = 9003
xdebug.client_host=192.168.1.196 #使用的电脑ip
xdebug.remote_handler=dbgp
xdebug.idekey=PHPSTORM
