[Android] 04 - Map and GPS
本文使用google map。
Ref:
Ref: Google Maps & Google Places Android Course 【还有代码链接】
Open: 入门指南【API for Map on Android】
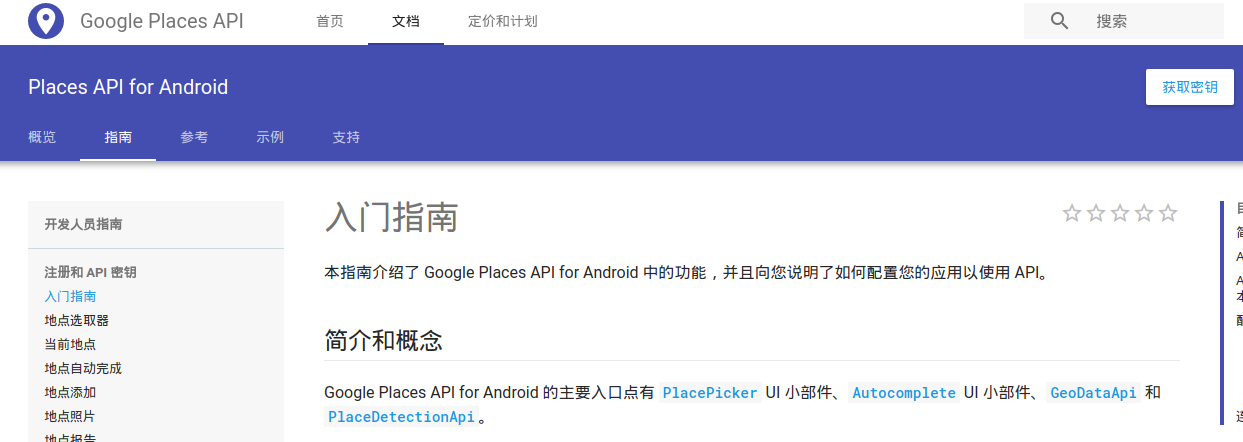
Open: 入门指南【API for Android】
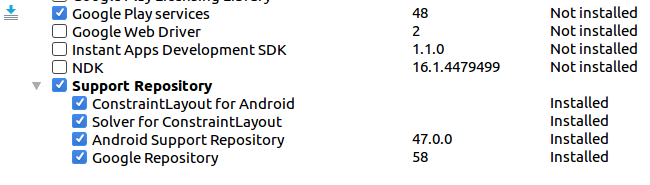
确保配置好Google Play services:
进入控制台:https://console.developers.google.com/apis
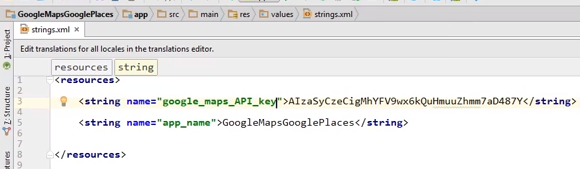
- 建立api key
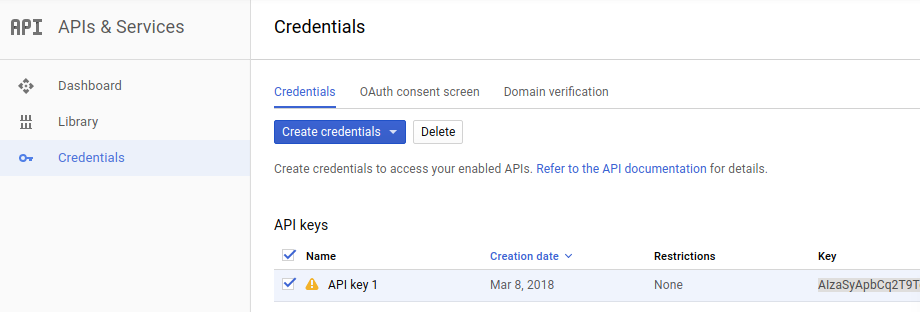
- 生效api key
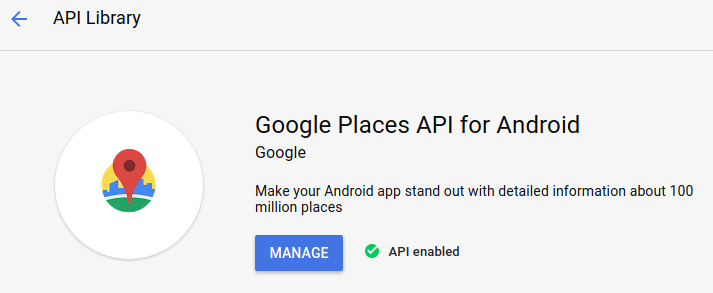
- 链接api key
- 在这里也有获得秘钥的按钮:https://developers.google.com/places/android-api/start【右上角】
通过代码对比学习,直观明显
https://github.com/mitchtabian/Google-Maps-Google-Places
基础代码
MapActivity.java ----> 只是加载了一个layout而已。
package codingwithmitch.com.googlemapsgoogleplaces;

import android.os.Bundle;
import android.support.annotation.Nullable;
import android.support.v7.app.AppCompatActivity;

/**
 * Created by User on 10/2/2017.
 */

public class MapActivity extends AppCompatActivity {

    private static final String TAG = "MapActivity";

    @Override
    protected void onCreate(@Nullable Bundle savedInstanceState) {
        super.onCreate(savedInstanceState);
        setContentView(R.layout.activity_map);
    }
}
MainActivity.java ----> 只要连接上Google Play Service就好了。
package codingwithmitch.com.googlemapsgoogleplaces;

import android.app.Dialog;
import android.content.Intent;
import android.support.v7.app.AppCompatActivity;
import android.os.Bundle;
import android.util.Log;
import android.view.View;
import android.widget.Button;
import android.widget.Toast;

import com.google.android.gms.common.ConnectionResult;
import com.google.android.gms.common.GoogleApiAvailability;

public class MainActivity extends AppCompatActivity {

    private static final String                  TAG = "MainActivity";
    private static final int    ERROR_DIALOG_REQUEST = 9001;


    @Override
    protected void onCreate(Bundle savedInstanceState) {
        super.onCreate(savedInstanceState);
        setContentView(R.layout.activity_main);

        if(isServicesOK()){
            init();      // 主要是渲染了一个按钮界面
        }
    }

/*************************************************************************************/

    private void init(){
        Button btnMap = (Button) findViewById(R.id.btnMap);
        btnMap.setOnClickListener(new View.OnClickListener() {
            @Override
            public void onClick(View view) {
                Intent intent = new Intent(MainActivity.this, MapActivity.class);
                startActivity(intent);
            }
        });
    }

    public boolean isServicesOK(){
        Log.d(TAG, "isServicesOK: checking google services version");

        int available = GoogleApiAvailability.getInstance().isGooglePlayServicesAvailable(MainActivity.this);

        if(available == ConnectionResult.SUCCESS){
            //everything is fine and the user can make map requests
            Log.d(TAG, "isServicesOK: Google Play Services is working");
            return true;
        }
        else if(GoogleApiAvailability.getInstance().isUserResolvableError(available)){
            //an error occured but we can resolve it
            Log.d(TAG, "isServicesOK: an error occured but we can fix it");
            Dialog dialog = GoogleApiAvailability.getInstance().getErrorDialog(MainActivity.this, available, ERROR_DIALOG_REQUEST);
            dialog.show();
        }else{
            Toast.makeText(this, "You can't make map requests", Toast.LENGTH_SHORT).show();
        }

        return false;
    }
}
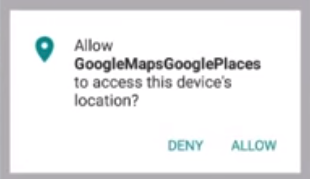
- 思路
onMapReady()
onRequestPermissionsResult()
    private void getLocationPermission(){
        Log.d(TAG, "getLocationPermission: getting location permissions");

        String[] permissions = {Manifest.permission.ACCESS_FINE_LOCATION, Manifest.permission.ACCESS_COARSE_LOCATION};

        if(ContextCompat.checkSelfPermission(this.getApplicationContext(),FINE_LOCATION) == PackageManager.PERMISSION_GRANTED){
            if(ContextCompat.checkSelfPermission(this.getApplicationContext(),COURSE_LOCATION) == PackageManager.PERMISSION_GRANTED){
                mLocationPermissionsGranted = true;
            }else{
                ActivityCompat.requestPermissions(this, permissions, LOCATION_PERMISSION_REQUEST_CODE);
            }

        }else{
            ActivityCompat.requestPermissions(    this, permissions, LOCATION_PERMISSION_REQUEST_CODE);
        }
    }
class MapActivity extends AppCompatActivity implements OnMapReadyCallback
    @Override
    public void onMapReady(GoogleMap googleMap) {
        Toast.makeText(this, "Map is Ready", Toast.LENGTH_SHORT).show();
        Log.d(TAG, "onMapReady: map is ready");
        mMap = googleMap;  // <----
    }


    private void initMap(){
        Log.d(TAG, "initMap: initializing map");
        SupportMapFragment mapFragment = (SupportMapFragment) getSupportFragmentManager().findFragmentById(R.id.map);

        mapFragment.getMapAsync(MapActivity.this);
    }

    @Override
    public void onRequestPermissionsResult(int requestCode, @NonNull String[] permissions, @NonNull int[] grantResults) {
        Log.d(TAG, "onRequestPermissionsResult: called.");
        mLocationPermissionsGranted = false;

        switch(requestCode){
            case LOCATION_PERMISSION_REQUEST_CODE:{

                if(grantResults.length > 0){

                    /* 需要保证grantResults数组的正确性 */
                    for(int i = 0; i < grantResults.length; i++){
                        if(grantResults[i] != PackageManager.PERMISSION_GRANTED){
                            mLocationPermissionsGranted = false;
                            Log.d(TAG, "onRequestPermissionsResult: permission failed");
                            return;
                        }
                    }
                    Log.d(TAG, "onRequestPermissionsResult: permission granted");
                    mLocationPermissionsGranted = true;

                    /* Initialize our map */
                    initMap();
                }
            }
        }
    }
一种java新特性。
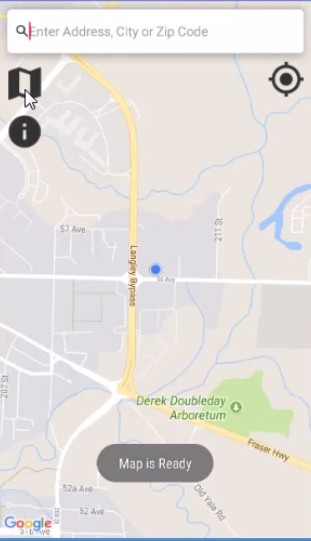
- Result:
- 思路
implements OnMapReadyCallback
--> onMapReady()
|--> getDeviceLocation()
    @Override
    public void onMapReady(GoogleMap googleMap) {
        Toast.makeText(this, "Map is Ready", Toast.LENGTH_SHORT).show();
        Log.d(TAG, "onMapReady: map is ready");
        mMap = googleMap;

        /*
         * 关键是添加了以下代码部分
         */
        if (mLocationPermissionsGranted) {
            getDeviceLocation();  // ---->

            if (ActivityCompat.checkSelfPermission(this, Manifest.permission.ACCESS_FINE_LOCATION)   != PackageManager.PERMISSION_GRANTED &&
                ActivityCompat.checkSelfPermission(this, Manifest.permission.ACCESS_COARSE_LOCATION) != PackageManager.PERMISSION_GRANTED) {
                return;
            }
            mMap.setMyLocationEnabled(true);                         // 设置为true,表示显示定位层并可触发定位
            mMap.getUiSettings().setMyLocationButtonEnabled(false);  // 设置默认定位按钮是否显示
} }
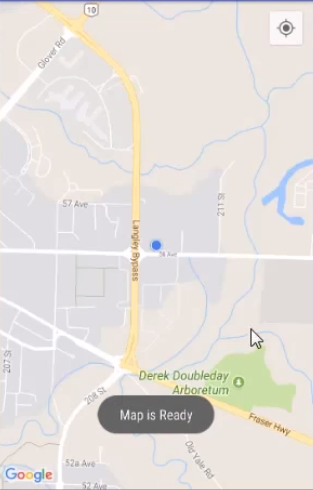
其实就是获得GPS定位信息,然后把camera的focus移动过去。
    private void moveCamera(LatLng latLng, float zoom){
        Log.d(TAG, "moveCamera: moving the camera to: lat: " + latLng.latitude + ", lng: " + latLng.longitude );
        mMap.moveCamera(CameraUpdateFactory.newLatLngZoom(latLng, zoom));
    }


    private void getDeviceLocation(){
        Log.d(TAG, "getDeviceLocation: getting the devices current location");

        mFusedLocationProviderClient = LocationServices.getFusedLocationProviderClient(this);

        try{
            if(mLocationPermissionsGranted){

                final Task location = mFusedLocationProviderClient.getLastLocation();
                location.addOnCompleteListener(new OnCompleteListener() {
                    @Override
                    public void onComplete(@NonNull Task task) {
                        if(task.isSuccessful()){
                            Log.d(TAG, "onComplete: found location!");
                            Location currentLocation = (Location) task.getResult();
                            moveCamera(new LatLng(currentLocation.getLatitude(), currentLocation.getLongitude()), DEFAULT_ZOOM);

                        }else{
                            Log.d(TAG, "onComplete: current location is null");
                            Toast.makeText(MapActivity.this, "unable to get current location", Toast.LENGTH_SHORT).show();
                        }
                    }
                });
            }
        }catch (SecurityException e){
            Log.e(TAG, "getDeviceLocation: SecurityException: " + e.getMessage() );
        }
    }
- Result:
- 思路
支持用户输入自定义地址进行搜索。
将搜索的结果存在的list中。
    @Override
    public void onMapReady(GoogleMap googleMap) {

        Toast.makeText(this, "Map is Ready", Toast.LENGTH_SHORT).show();
        Log.d(TAG, "onMapReady: map is ready");
        mMap = googleMap;

        if (mLocationPermissionsGranted) {
            getDeviceLocation();

            if (ActivityCompat.checkSelfPermission(this, Manifest.permission.ACCESS_FINE_LOCATION)
                    != PackageManager.PERMISSION_GRANTED && ActivityCompat.checkSelfPermission(this,
                    Manifest.permission.ACCESS_COARSE_LOCATION) != PackageManager.PERMISSION_GRANTED) {
                return;
            }
            mMap.setMyLocationEnabled(true);
            mMap.getUiSettings().setMyLocationButtonEnabled(false);

            init();  //
        }
    }
只有如何list中的结果,之后可以再进一步斟酌。
    private void init(){
        Log.d(TAG, "init: initializing");

        mSearchText.setOnEditorActionListener(new TextView.OnEditorActionListener() {  // 在我们编辑完之后点击软键盘上的回车键才会触发
            @Override
            public boolean onEditorAction(TextView textView, int actionId, KeyEvent keyEvent) {
                if(        actionId             == EditorInfo.IME_ACTION_SEARCH
                        || actionId             == EditorInfo.IME_ACTION_DONE
                        || keyEvent.getAction() == KeyEvent.ACTION_DOWN
                        || keyEvent.getAction() == KeyEvent.KEYCODE_ENTER){

                    //execute our method for searching ----> 开始搜索
                    geoLocate();
                }

                return false;
            }
        });
    }


    private void geoLocate(){
        Log.d(TAG, "geoLocate: geolocating");

        String searchString = mSearchText.getText().toString();

        Geocoder geocoder  = new Geocoder(MapActivity.this);
        List<Address> list = new ArrayList<>();
        try{
            list = geocoder.getFromLocationName(searchString, 1);
        }catch (IOException e){
            Log.e(TAG, "geoLocate: IOException: " + e.getMessage() );
        }

        if(list.size() > 0){
            Address address = list.get(0);  // 应该是得到的优先级第一个搜索结果

            Log.d(TAG, "geoLocate: found a location: " + address.toString());
            //Toast.makeText(this, address.toString(), Toast.LENGTH_SHORT).show();

        }
    }
- 思路
将list中的内容以marker的形式表现出来。
获得结果list后,移动到第一个结果的位置。
moveCamera(new LatLng(address.getLatitude(), address.getLongitude()), DEFAULT_ZOOM, address.getAddressLine(0));
以默认的图标/方式添加了markers。
private void moveCamera(LatLng latLng, float zoom, String title){
  Log.d(TAG, "moveCamera: moving the camera to: lat: " + latLng.latitude + ", lng: " + latLng.longitude );
  mMap.moveCamera(CameraUpdateFactory.newLatLngZoom(latLng, zoom));

  if(!title.equals("My Location")){
    MarkerOptions options = new MarkerOptions().position(latLng).title(title);  //options里一堆的搜索结果
    mMap.addMarker(options);
  }

  hideSoftKeyboard();  // ---->
}
private void hideSoftKeyboard(){
  this.getWindow().setSoftInputMode(WindowManager.LayoutParams.SOFT_INPUT_STATE_ALWAYS_HIDDEN);
}
- Result:
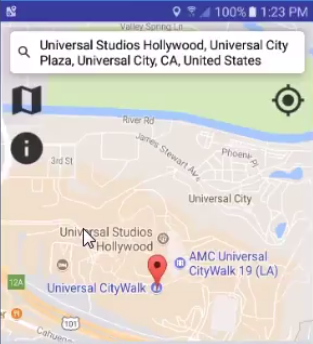
- 思路
可以拷贝google sample中的自动补全的类来实现。
public class MapActivity extends AppCompatActivity implements OnMapReadyCallback, GoogleApiClient.OnConnectionFailedListener{

    @Override
    public void onConnectionFailed(@NonNull ConnectionResult connectionResult) {

    }

}
Ref: AutoCompleteTextView自动补全文本框
mSearchText的获取是通过google API,然后结合自动补全的文本框。
PlaceAutocompleteAdapter:android-play-places/PlaceCompleteAdapter/Application/src/main/java/com/example/google/playservices/placecomplete/
mGoogleApiClient = new GoogleApiClient
                .Builder(this)
                .addApi(Places.GEO_DATA_API)
                .addApi(Places.PLACE_DETECTION_API)
                .enableAutoManage(this, this)
                .build();

mPlaceAutocompleteAdapter = new PlaceAutocompleteAdapter(this, mGoogleApiClient, LAT_LNG_BOUNDS, null);

mSearchText.setAdapter(mPlaceAutocompleteAdapter);
- Result:

- 思路
自动补全的列表需要有点击事件,所以应该不增加单独的clickListerner: mAutocompleteClickListener
    /*
        --------------------------- google places API autocomplete suggestions -----------------
     */

    private AdapterView.OnItemClickListener mAutocompleteClickListener = new AdapterView.OnItemClickListener() {
        @Override
        public void onItemClick(AdapterView<?> adapterView, View view, int i, long l) {
            hideSoftKeyboard();

            final AutocompletePrediction item = mPlaceAutocompleteAdapter.getItem(i);
            final String placeId = item.getPlaceId();

            PendingResult<PlaceBuffer> placeResult = Places.GeoDataApi.getPlaceById(mGoogleApiClient, placeId);
            placeResult.setResultCallback(mUpdatePlaceDetailsCallback);
        }
    };


    private ResultCallback<PlaceBuffer> mUpdatePlaceDetailsCallback = new ResultCallback<PlaceBuffer>() {
        @Override
        public void onResult(@NonNull PlaceBuffer places) {
            if(!places.getStatus().isSuccess()){
                Log.d(TAG, "onResult: Place query did not complete successfully: " + places.getStatus().toString());
                places.release();
                return;
            }
            final Place place = places.get(0);

            try{
                mPlace = new PlaceInfo();    // ---->

                /*
                 * place --> mPlace
                 */
                mPlace.setName(place.getName().toString());
                Log.d(TAG, "onResult: name: " + place.getName());
                mPlace.setAddress(place.getAddress().toString());
                Log.d(TAG, "onResult: address: " + place.getAddress());
//                mPlace.setAttributions(place.getAttributions().toString());
//                Log.d(TAG, "onResult: attributions: " + place.getAttributions());
                mPlace.setId(place.getId());
                Log.d(TAG, "onResult: id:" + place.getId());
                mPlace.setLatlng(place.getLatLng());
                Log.d(TAG, "onResult: latlng: " + place.getLatLng());
                mPlace.setRating(place.getRating());
                Log.d(TAG, "onResult: rating: " + place.getRating());
                mPlace.setPhoneNumber(place.getPhoneNumber().toString());
                Log.d(TAG, "onResult: phone number: " + place.getPhoneNumber());
                mPlace.setWebsiteUri(place.getWebsiteUri());
                Log.d(TAG, "onResult: website uri: " + place.getWebsiteUri());

                Log.d(TAG, "onResult: place: " + mPlace.toString());
            }catch (NullPointerException e){
                Log.e(TAG, "onResult: NullPointerException: " + e.getMessage() );
            }

            moveCamera(new LatLng(place.getViewport().getCenter().latitude,
                    place.getViewport().getCenter().longitude), DEFAULT_ZOOM, mPlace.getName());

            places.release();
        }
    };
设置了PlaceInfo类,专门处理位置信息,之后会用到。
- 思路
init()中再添加点击事件:位置泡泡信息显示。当然也需要添加相应的布局。
那么,就要自定义一个custom_info_window.xml。
        mInfo.setOnClickListener(new View.OnClickListener() {
            @Override
            public void onClick(View view) {
                Log.d(TAG, "onClick: clicked place info");
                try{
                    if(mMarker.isInfoWindowShown()){
                        mMarker.hideInfoWindow();
                    }else{
                        Log.d(TAG, "onClick: place info: " + mPlace.toString());
                        mMarker.showInfoWindow();
                    }
                }catch (NullPointerException e){
                    Log.e(TAG, "onClick: NullPointerException: " + e.getMessage() );
                }
            }
        });
点击泡泡后,镜头要移动一下。
    private void moveCamera(LatLng latLng, float zoom, PlaceInfo placeInfo){
        Log.d(TAG, "moveCamera: moving the camera to: lat: " + latLng.latitude + ", lng: " + latLng.longitude );
        mMap.moveCamera(CameraUpdateFactory.newLatLngZoom(latLng, zoom));

        mMap.clear();

        if(placeInfo != null){
            try{
                String snippet = "Address: " + placeInfo.getAddress()     + "\n" +
                            "Phone Number: " + placeInfo.getPhoneNumber() + "\n" +
                            "Website: "      + placeInfo.getWebsiteUri()  + "\n" +
                            "Price Rating: " + placeInfo.getRating()      + "\n";

                MarkerOptions options = new MarkerOptions()
                        .position(latLng)
                        .title(placeInfo.getName())
                        .snippet(snippet);
                mMarker = mMap.addMarker(options);

            }catch (NullPointerException e){
                Log.e(TAG, "moveCamera: NullPointerException: " + e.getMessage() );
            }
        }else{
            mMap.addMarker(new MarkerOptions().position(latLng));
        }

        hideSoftKeyboard();
    }
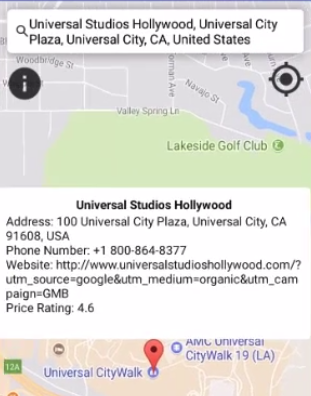
- 思路:
但这个泡泡需要自定义,因为文字显示可能不全。
所以,我们设计一个自己的CustomInfoWindowAdapter类。
mMap.setInfoWindowAdapter(new CustomInfoWindowAdapter(MapActivity.this));
其实就是对这个自定义泡泡新布局如何填充的问题。
package codingwithmitch.com.googlemapsgoogleplaces;

import android.content.Context;
import android.view.LayoutInflater;
import android.view.View;
import android.widget.TextView;

import com.google.android.gms.maps.GoogleMap;
import com.google.android.gms.maps.model.Marker;

/**
 * Created by User on 10/2/2017.
 */

public class CustomInfoWindowAdapter implements GoogleMap.InfoWindowAdapter {

    private final View mWindow;
    private Context mContext;

    public CustomInfoWindowAdapter(Context context) {
        mContext = context;
        mWindow = LayoutInflater.from(context).inflate(R.layout.custom_info_window, null);
    }

    private void rendowWindowText(Marker marker, View view){

        String title = marker.getTitle();
        TextView tvTitle = (TextView) view.findViewById(R.id.title);

        if(!title.equals("")){
            tvTitle.setText(title);
        }

        String snippet = marker.getSnippet();
        TextView tvSnippet = (TextView) view.findViewById(R.id.snippet);

        if(!snippet.equals("")){
            tvSnippet.setText(snippet);
        }
    }

    @Override
    public View getInfoWindow(Marker marker) {
        rendowWindowText(marker, mWindow);
        return mWindow;
    }

    @Override
    public View getInfoContents(Marker marker) {
        rendowWindowText(marker, mWindow);
        return mWindow;
    }
}
- Result:
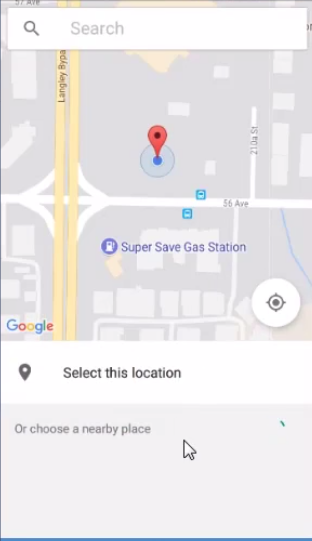
- 思路:
发现周边地理位置信息。
    <ImageView
        android:layout_width="40dp"
        android:layout_height="40dp"
        android:id="@+id/place_picker"
        android:layout_marginLeft="10dp"
        android:layout_marginTop="15dp"
        android:scaleType="centerCrop"
        android:layout_below="@+id/relLayout1"
        android:src="@drawable/ic_map"/>

    <ImageView
        android:layout_width="40dp"
        android:layout_height="40dp"
        android:layout_below="@+id/place_picker"
        android:layout_marginLeft="10dp"
        android:layout_marginTop="15dp"
        android:scaleType="centerCrop"
        android:id="@+id/place_info"
        android:src="@drawable/ic_info"/>
import com.google.android.gms.location.places.ui.PlacePicker;

mInfo        = (ImageView) findViewById(R.id.place_info);
mPlacePicker = (ImageView) findViewById(R.id.place_picker);
init()中再添加触发事件:
        mPlacePicker.setOnClickListener(new View.OnClickListener() {
            @Override
            public void onClick(View view) {

                PlacePicker.IntentBuilder builder = new PlacePicker.IntentBuilder();

                try {
                    startActivityForResult(builder.build(MapActivity.this), PLACE_PICKER_REQUEST);

                } catch (GooglePlayServicesRepairableException e) {
                    Log.e(TAG, "onClick: GooglePlayServicesRepairableException: " + e.getMessage() );
                } catch (GooglePlayServicesNotAvailableException e) {
                    Log.e(TAG, "onClick: GooglePlayServicesNotAvailableException: " + e.getMessage() );
                }
            }
        });
    protected void onActivityResult(int requestCode, int resultCode, Intent data) {

        if (requestCode == PLACE_PICKER_REQUEST) {
            if (resultCode == RESULT_OK) {
                Place place = PlacePicker.getPlace(this, data);

                PendingResult<PlaceBuffer> placeResult = Places.GeoDataApi.getPlaceById(mGoogleApiClient, place.getId());
                placeResult.setResultCallback(mUpdatePlaceDetailsCallback);
            }
        }
    }
- Result: