在web浏览器上显示室内温度(nodeJs+arduino+socket.io)
上次的nodejs操作arduino入门篇中实现了如何连接arduino。这次我们来实现通过arduino测量室内温度并在浏览器上显示出来。
【所需材料】
硬件:LM35温度传感器,arduino uno板,面包板,若干导线。
软件:socket.io , cylonJs , express等
【准备-硬件部分】
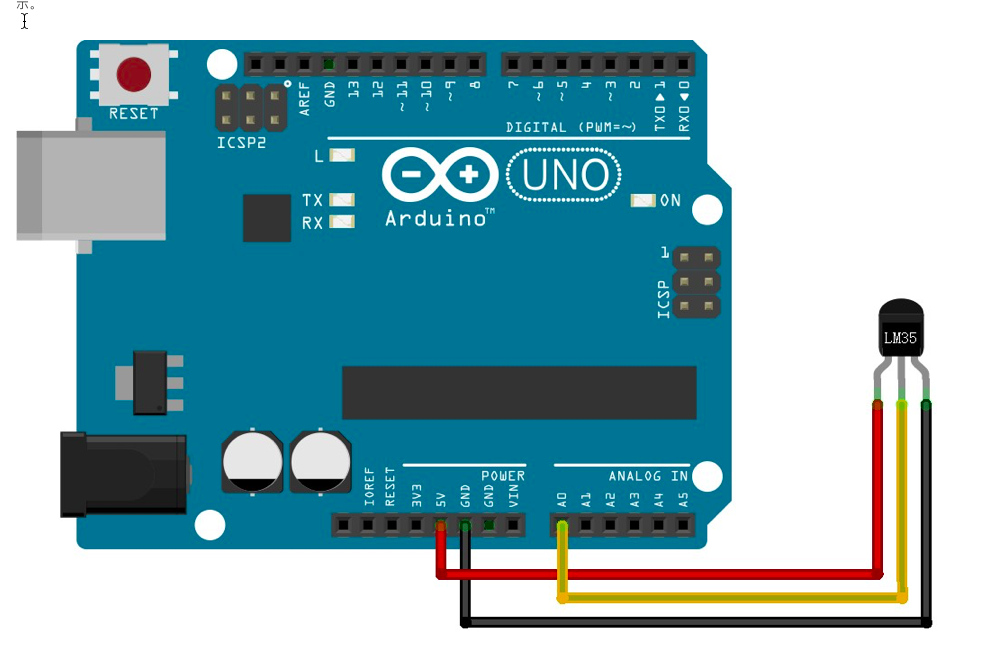
1、首先当然是连接电路板:

注意这个ANALOG IN是传感器的输入,就是读取温度的入口。
看看我连的:


2、然后按照 nodejs操作arduino入门篇先连接上arduino试试吧。
【准备-软件部分】
1、安装socket.io,express,package.json中这样写:
{
  "name": "robot",
  "version": "1.0.0",
  "description": "robot",
  "main": "main.js",
  "scripts": {
    "test": "echo \"Error: no test specified\" && exit 1"
  },
  "author": "yourname",
  "license": "ISC",
  "devDependencies": {
    "cheerio": "^0.22.0",
    "cylon-firmata": "*"
  },
  "dependencies": {
    "cylon-firmata": "^0.24.0",
    "cylon-gpio": "^0.29.0",
    "cylon-i2c": "^0.26.1",
    "express": "^4.14.0",
    "socket.io": "^1.5.0"
  }
}
执行npm install安装依赖包
2、编写主文件,就是读取温度,在main.js中写入:
var Cylon = require('cylon');
var express = require('express');
var http = require('http');
var app = express();
var server = http.Server(app);
var io = require('socket.io')(server);
var port = 3000;
app.use(express.static(__dirname+'/'));//设置静态文件目录

app.get('/',function(req,res){
      res.sendFile('index.html');//渲染一个html文件,在这个html文件中来展示温度
});


server.listen(port,function(){
  console.log("正在监听%d端口...",port);
});

Cylon.api('http');
Cylon.robot({
  connections: {
    arduino: { adaptor: 'firmata', port: '/dev/cu.wchusbserial1420' }
  },

  devices: {
    sensor: { driver: 'analog-sensor', pin: 2, lowerLimit: 100, upperLimit: 900 }//2号analog in口,后面是最低和最高读取值
  },

  work: function(my) {
      var analogValue = 0;
      io.on('connection', function(socket){
        every((1).second(), function() {//频率是1Hz,就是1秒读取一次温度
          analogValue = my.sensor.analogRead();//读取传感器数值
          io.emit('news', (analogValue*500/1023).toFixed(1));//analogValue*500/1023是将传感器数值转换成摄氏度。取一位小数
          //用socket.io把数值绑定在news这个名字上,前端也会用这个名字来读取这个值
        });
        console.log('a user connected');
        socket.on('disconnect', function(){
          console.log('user disconnected');
        });
    });
  }
}).start();
3、前端代码--index.html:
<!DOCTYPE html>
<html lang="en">
<head>
    <meta charset="UTF-8">
    <title>温度</title>
    <script src="http://cdn.bootcss.com/jquery/2.2.2/jquery.min.js"></script>
    <link rel="stylesheet" href="./css/index.css">
</head>
<body>
    <div class="temperature">
        <div class="t-val">
            当前温度是:<span id="t">--</span>
        </div>
    </div>
</body>
<script src="./lib/socket.io.js"></script>
<script>
  var socket = io();
  socket.on('news',function(msg){
      $('#t').text(msg+'\'C');
  });
</script>
</html>
抱歉上面花屏了:
var socket = io();
  socket.on('news',function(msg){
      $('#t').text(msg+'\'C');
  });
然后执行node main.js,在浏览器中输入localhost:3000应该就能看到效果,再贴上css代码:
html,body{
    margin: 0;
    padding: 0;
    background-color: #242424;
}
.temperature{
    color: white;
    width: 400px;
    height: 400px;
    position: absolute;
    margin: auto;
    left: 0;
    right: 0;
    top: 0;
    bottom: 0;
    text-align: center;
    line-height: 400px;
}
.t-val {
    font-size: 40px;
    font-family: KaiTi;
}
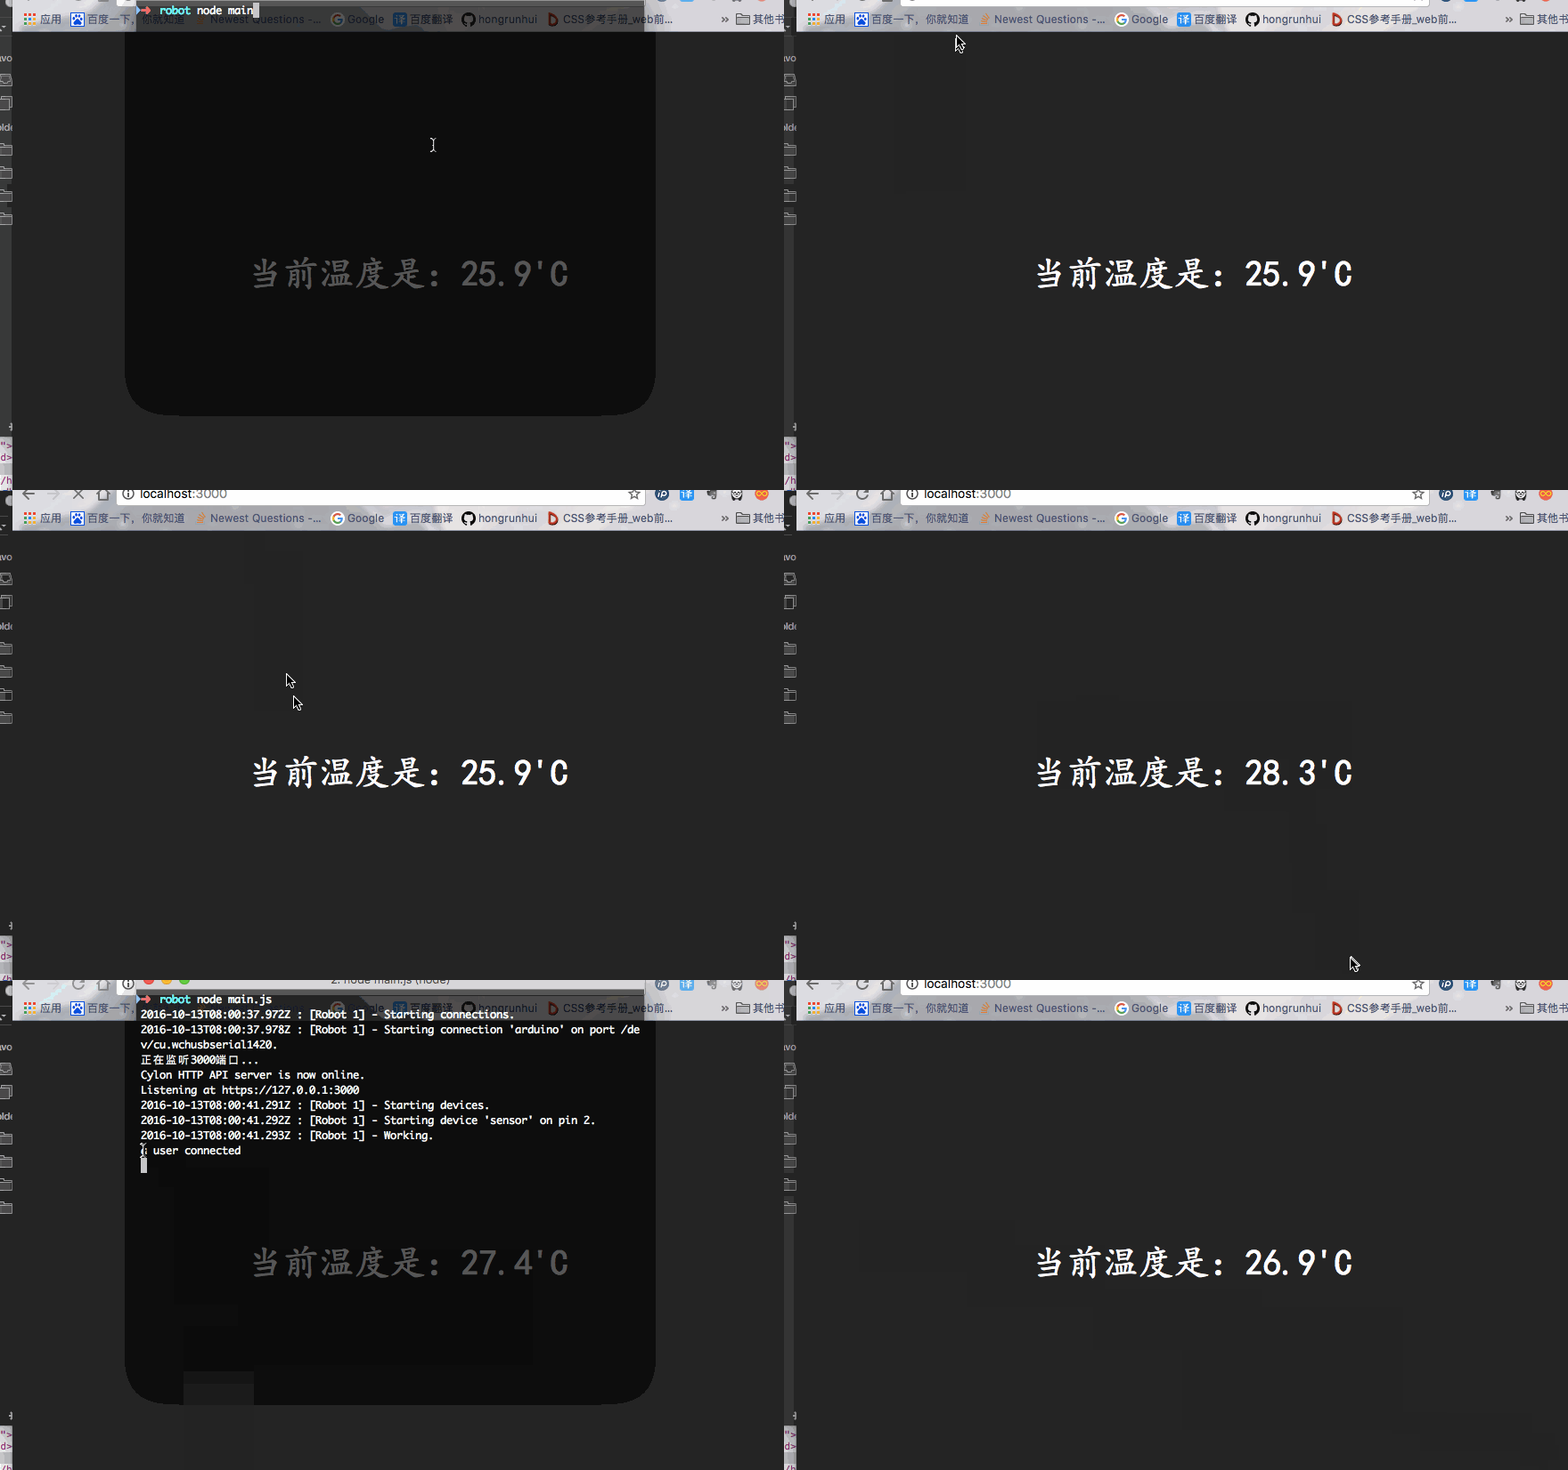
然后看执行效果:页面刷新之后我就用手指捏住传感器,所以温度上升,松开又下降了。
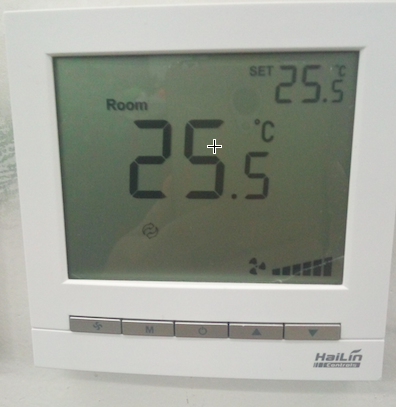
然后我去看了看公司的空调设置温度是25.5(传感器一开始显示的是25.4),有图为证:

目前只是实现了在本地,之后我再研究研究怎么连接到服务器,初步的思路有:
1、使用树莓派,将arduino连接树莓派,再在树莓派上搭建服务器,再用花生棒或者其他端口映射的方法连接到公网,这样就能在公网上看到数据。
2、通过Ethernet扩展板实现网络远程访问
3、使用 wifi模块,再连接路由器实现网络访问(网上说的是推荐 esp8266模块,经济实惠)
4、GPRS模块,这个可以让arduino移动到任何地方,但是感觉如果要做到一直测的话,电话卡的流量得很多啊,这个我也只是瞎猜,没用过。
恩,差不多就这些了,过程很简单,目前我需要做的就是慢慢上手,争取用做一些有意思的东西出来。
最后说一下硬件的大概价格吧(没仔细记价格):
arduino30多块,面包板好像5块吧,线2块钱足够了,LM35传感器2块5好像,也就是说加起来一共不到50块,感兴趣的可以买来玩玩。
有问题或建议欢迎留言。


