CXF简介
Apache CXF = Celtix + XFire,开始叫 Apache CeltiXfire,后来更名为 Apache CXF 了,以下简称为 CXF。CXF 继承了 Celtix 和 XFire 两大开源项目的精华,提供了对 JAX-WS 全面的支持,并且提供了多种 Binding 、DataBinding、Transport 以及各种 Format 的支持,并且可以根据实际项目的需要,采用代码优先(Code First)或者 WSDL 优先(WSDL First)来轻松地实现 Web Services 的发布和使用。Apache CXF已经是一个正式的Apache顶级项目。
使用CXF开发WebService服务端
1、使用eclipse新建一个服务端java工程

2、使用CXF开发WebService服务端需要导入相应的jar包,所以这一步先下载cxf的jar包,官网:http://cxf.apache.org/
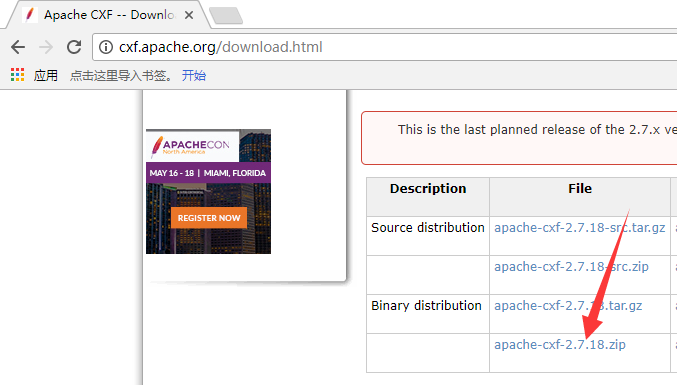
解压下载的cxf文件如下:
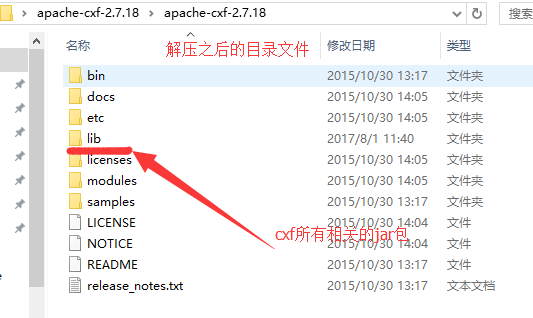
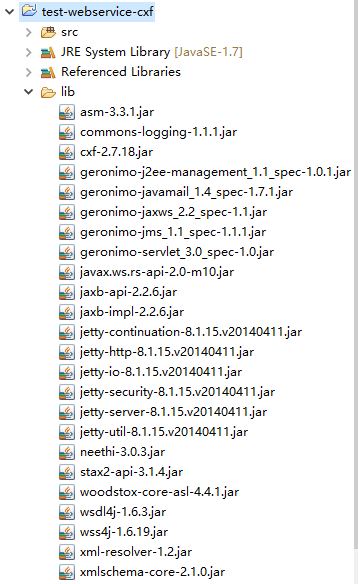
3、在解压后的lib目录中,有很多cxf相关的jar包,有些jar包不一定要使用,本例选出一些必要的jar包,拷贝到java工程里面(当然也可以拷贝lib目录下的所有jar包)。
在工程下新建lib目录,并把jar包拷贝到此目录,同时添加引用关系。如下图:
4、新建一个接口,使用@WebService(SEI和SEI的实现类)注解标注接口,使用@WebMethod(SEI中的所有方法)注解标注接口中定义的所有方法,如下:
 1 package com.test.ws;
 2
 3 import javax.jws.WebMethod;
 4 import javax.jws.WebService;
 5
 6 /**
 7  * 定义SEI(WebService EndPoint Interface)终端
 8  * @author H__D
 9  * @date 2017年7月28日 上午11:35:34
10  *
11  */
12 //使用@WebService注解标注WebServiceI接口
13 @WebService
14 public interface HelloWS {
15
16     //使用@WebMethod注解标注WebServiceI接口中的方法
17     @WebMethod
18     public String sayHello(String name);
19
20 }
5、编写一个接口实现类,使用@WebService注解标注实现类,如下:
 1 package com.test.ws;
 2
 3 import javax.jws.WebService;
 4
 5 /**
 6  * SEI的具体实现
 7  * @author H__D
 8  * @date 2017年7月28日 上午11:37:43
 9  *
10  */
11 //使用@WebService注解标注
12 @WebService
13 public class HelloWSImpl implements HelloWS{
14
15     @Override
16     public String sayHello(String name) {
17         System.out.println("WebService sayHello : " + name);
18         return "Hello : " + name;
19     }
20 }
6、使用Endpoint(终端)类发布webservice,如下:
 1 package com.test.ws.server;
 2
 3 import javax.xml.ws.Endpoint;
 4
 5 import com.test.ws.HelloWSImpl;
 6
 7 /**
 8  * 发布Web Service
 9  * @author H__D
10  * @date 2017年7月28日 上午11:40:48
11  *
12  */
13 public class ServerTest {
14
15     public static void main(String[] args) {
16
17         //定义WebService的发布地址,这个地址就是提供给外界访问Webervice的URL地址,URL地址格式为:http://ip:端口号/xxxx
18         String address = "http://127.0.0.1:8989/test-webservice/hellows";
19         //使用Endpoint类提供的publish方法发布WebService,发布时要保证使用的端口号没有被其他应用程序占用
20         Endpoint.publish(address, new HelloWSImpl());
21         System.out.println("发布webservice成功!");
22
23     }
24 }
7、运行SeverTest类的main方法,使用浏览器进行访问,访问地址:http://127.0.0.1:8989/test-webservice/hellows,如下:
控制台输出:

使用CXF开发WebService客户端
1、使用eclipse新建一个客服端java工程

2、使用cxf包中的wsdl2java.bat工具(在cxf包中的bin目录中)生成客户端代码,如下:
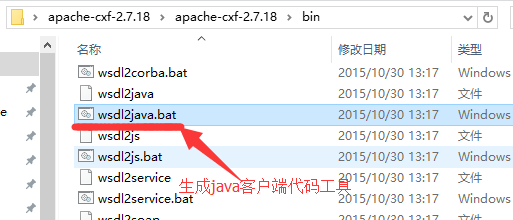
执行命令:wsdl2java -d location(输入目录,生成.java文件会在该目录) -all url(url为wsdl文件的路径)
参数说明:
-p 也就是package 对应Java中的包
-d 输入目录,生成.java文件会在该目录,会自动添加-p参数配置的包路径
-client 生成客户端测试web service的代码.
-server 生成服务器启动web service的代码.
-impl 生成web service的实现代码.
-ant 生成build.xml文件.
-all 生成上面-client -server -impl -ant 对应的所有文件.
打开cmd命令窗口--》进入cxf包中的bin目录--》执行命令。如下:

刷新工程即可看到生成的代码。
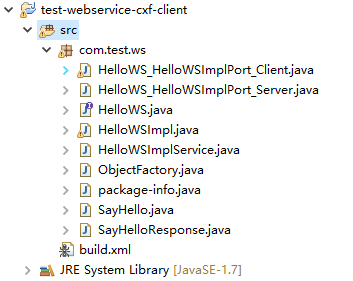
3、编写调用WebService对外提供的方法,如下:
 1 package com.test.ws.client;
 2
 3 import com.test.ws.HelloWS;
 4 import com.test.ws.HelloWSImpl;
 5 import com.test.ws.HelloWSImplService;
 6
 7 /**
 8  * 调用WebService的客户端
 9  * @author H__D
10  * @date 2017年7月28日 下午2:39:24
11  *
12  */
13 public class WSClient {
14
15     public static void main(String[] args) {
16         //创建一个用于产生WebServiceImpl实例的工厂,WebServiceImplService类是wsimport工具生成的
17         HelloWSImplService factory = new HelloWSImplService();
18         //通过工厂生成一个WebServiceImpl实例,WebServiceImpl是wsimport工具生成的
19         HelloWS helloWS = factory.getHelloWSImplPort();
20         System.out.println(helloWS.getClass());
21
22         //调用WebService的sayHello方法
23         String result = helloWS.sayHello("Jack");
24         System.out.println(result);
25     }
26
27 }
4、控制台输出,如下:


