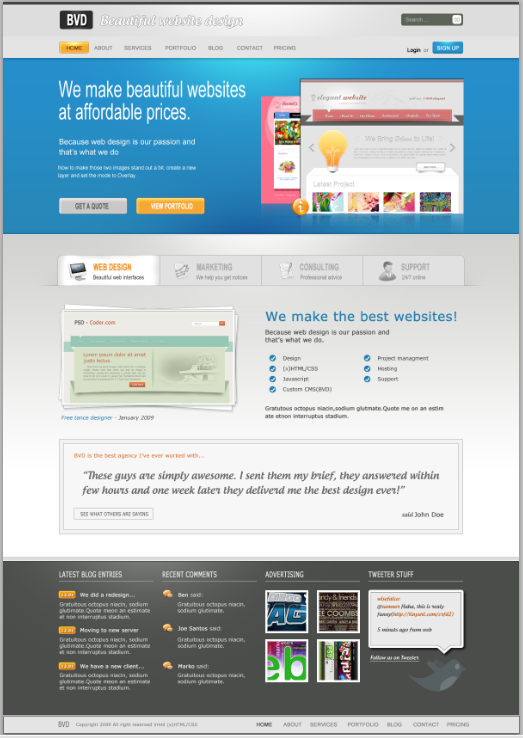
PS网页设计教程XXIV——从头设计一个漂亮的网站
作为编码者,美工基础是偏弱的。我们可以参考一些成熟的网页PS教程,提高自身的设计能力。套用一句话,“熟读唐诗三百首,不会作诗也会吟”。
本系列的教程来源于网上的PS教程,都是国外的,全英文的。本人尝试翻译这些优秀的教程。因为翻译能力有限,翻译的细节上还有待推敲,希望广大网友不吝赐教。
约定:
1、本文的软件是Photoshop CS5版本
2、原教程的截图是英文的,本人在重新制作的基础上,重新截了中文版的图
3、原文中有些操作没有给出参数。本人在反复测试的情况下测定了一些参数,以红色的文字显示。有些错误的参数,直接以红色文字显示正确的参数
例如:(90,22,231,77),表示矩形的左上角的坐标是(90,22),宽231,高77
例如:(90,22),表示矩形的左上角的坐标是(90,22),矩形的其他两个参数教程里已经指定
4、在教程的最后会附上本人的心得。有些是对教程中的一些步骤的优化等。
Have you ever wanted to design a beautiful website but just didn’t know how? To be honest, a few years ago, that happened to me too. While browsing the web, I saw so many nice looking websites and wished I had the skills to create such designs. Today I can and I’m going to teach you how to do so too! Essentially, it requires a few Photoshop skills and an eye for detail. Through this tutorial, I will point out these tiny details which make a website design look beautiful. Fire up Photoshop and let’s get going!
你曾否想过设计一个漂亮的网页,但是却不知道如何入手?实话说,以前我也是这样。当我浏览网页的时候我看到这么多好看的网页,我就希望自己有技术创作这样的作品。今天,我将教你怎么做这样的设计!实际上,它需要一点PS技能和把握细节的能力。在本教程中,我将会指出这些细微的细节之处,而这些细节将使你的网页设计看起来很漂亮。打开PS,让我们开始吧!
Step 1 - Download the 960 Grid System Template
步骤1:下载960网格布局模版
The designs I create are nearly all based on the 960 Grid System. So, before we begin we need to download the grid system Photoshop templates. You can find them on the 960.gs official website. Simply unpack the zip file and look for PSD templates. You will see that there are two different types of templates: one is 12_col and the other one is 16_col. The difference between these two are, as the name suggests, one is made with 12 columns and the other one with 16 columns. To explain it a bit more, if you have 3 boxes in your design you would choose the 12_col grid, because 12 is divisable by 3; or if you have 4 boxes in your design, you would choose either 12_col or 16_col grid because 12 and 16 are divisable by 4. If you follow this tutorial, you will see this in action.
我的设计几乎都是基于960网格系统。所以,在我们开始之前,我们需要下载960网格系统的PS模板。你可以在960.gs官方网站上找到他们。解压zip文件,找到PSD模板。你会看到两种不同类型的模板:一个是12_col的,另一种是16_col的。这两者之间的差异,正如其名所示,一个是12列而另一个16列的。为了更好解释这一点,如果在你的设计中有3个方块,你会选择12_col的,因为12能被3整除的,或者如果你的设计有4个方块,你会选择12_col或16_col的,因为12和16都能被4整除。如果按照本教程中,您将看到这个动作。
Step 2 - Defining the Structure
步骤2:定义网页结构
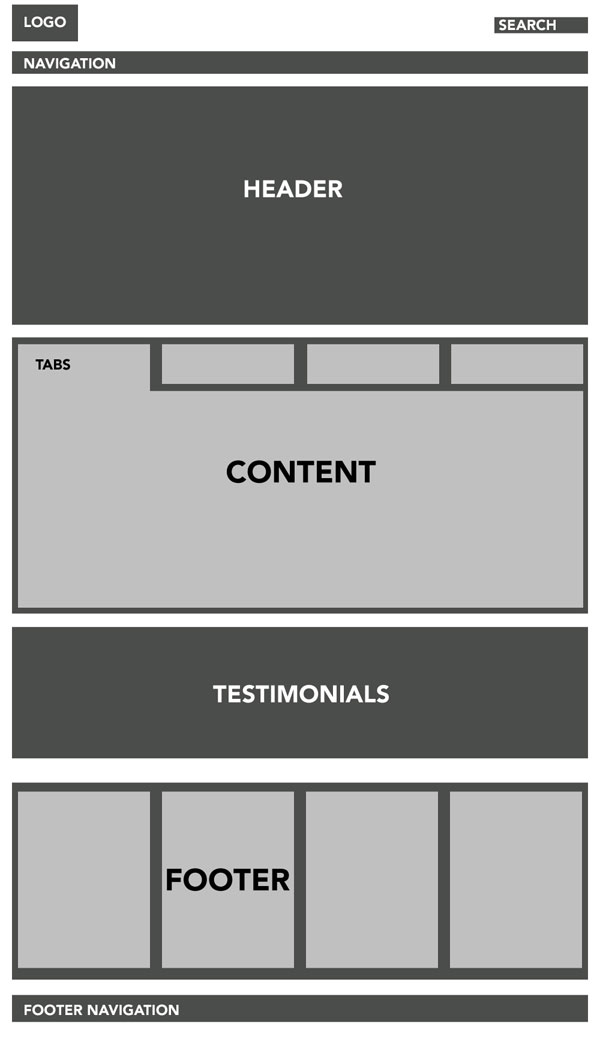
Before we open our PSD grid template and begin drawing, we first need to define the structure of our site. This is a bit more of a complicated structure because we have a layout inside a layout. You can see this exemplified in the image above.
在我们打开PSD网格模板并开始绘制前,我们首先需要定义我们的网站的布局结构。你可以看到上面的图片显示的例子。这是一个比较复杂的结构,是因为我们每一个布局都还有各自的布局。
Step 3
步骤3
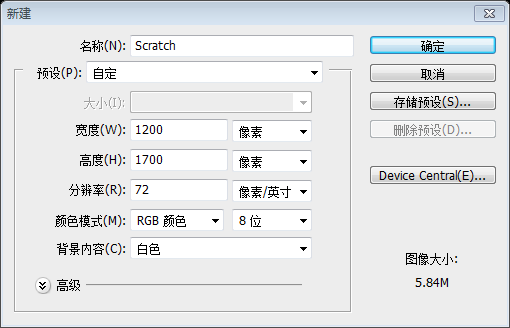
After we’ve defined our site structure we’re ready to move on. Open your 16_col.psd template. Go to Image > Canvas size . Set the canvas to 1200px wide and 1700px high. Set the background color to #ffffff.
在定义好我们网站的结构之后继续。打开16_col.psd模版。点击:图像 > 画布大小。设置画布为1200px宽和1700px高。并设置背景颜色: #ffffff
由于本翻译教程不下载960布局系统,故本步改为新建文档,尺寸:1200px*1700px。背景色: #ffffff
Step 4
步骤4
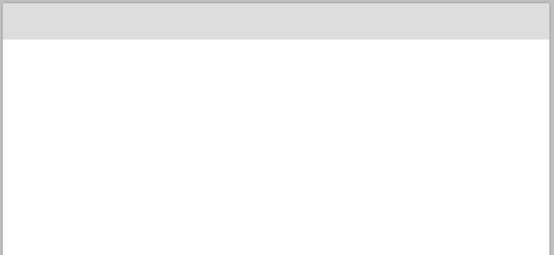
Now pick the Rectangle Tool and draw in a rectangle the full canvas width and about 80px high. Fill it with the color #dddddd.
现在用矩形工具画一个矩形(0,0,1200,80),宽度为整个画布,高度为80px。填充的颜色: #dddddd
Step 5
步骤5
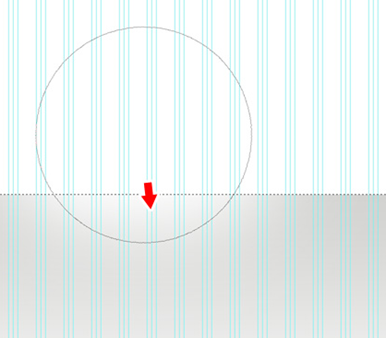
Create a new layer above the rectangle and set Layer mode to Overlay. Ctrl+click the rectangle layer. Now the rectangle will be selected. Choose a 600px soft brush, set the color to white, and click a few times with the edge of the brush just a bit over the selection, like shown on the image. This way you create a nice, subtle light effect. Additionally you can link these two layers.
在矩形的上方新建图层,图层的混合模式选择叠加。Ctrl+click点击矩形图层。会出现该矩形的选区。选择一个600px的软刷,设置颜色为白色,然后用笔刷的底部贴近选区的上方点击几次。通过这个你画出了一个细微的光亮的效果。现在可以把这两层链接起来了。
Step 6
步骤6
New layer. Choose the Rectangle tool again and draw in a thin dark grey rectangle, as shown in the image.
新建图层。再次选择矩形工具,如上图所示画一个瘦长的深灰色矩形(0,0,1200,6),颜色: #454545
Step 7
步骤7
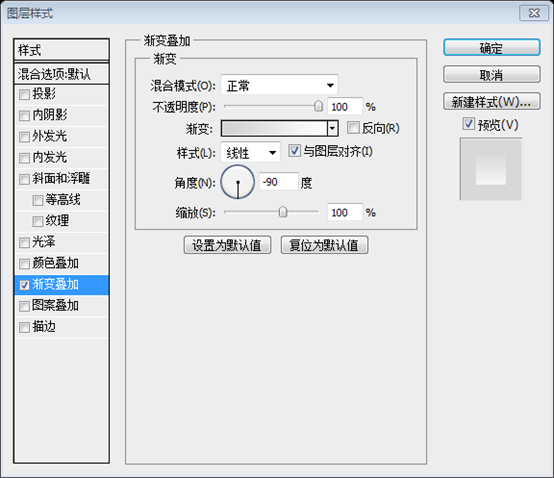
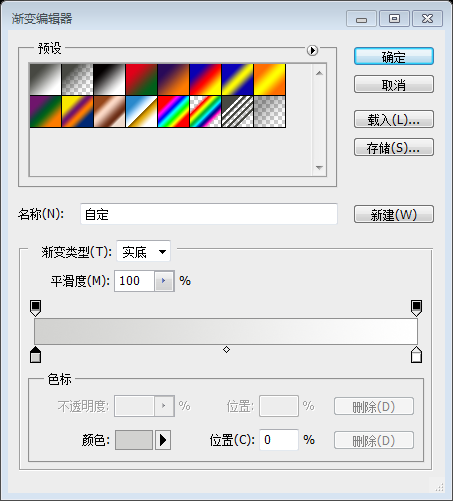
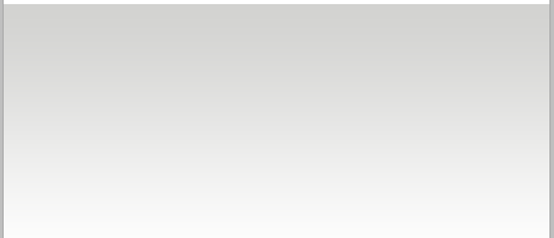
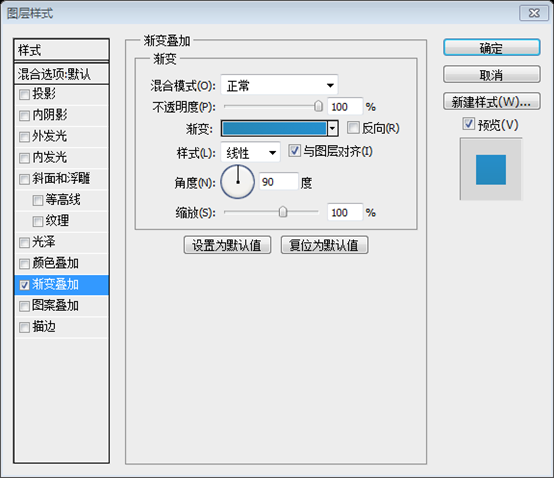
With the Rectangle tool selected, draw in a big box around 500px underneath the top rectangle. Make it 575px high and give it a Linear Gradient overlay from #d2d2d0 to #ffffff, direction -90, Scale 100%.
继续选择矩形工具,在距离上端长方形500px处画一个高575px的长方形(0,540,1200,575)。注:原文的尺寸似乎是约数,不是很精细,有误差,故在本文中作了修正。设置渐变叠加图层样式,颜色由#d2d2d0到#ffffff 的渐变色,角度为-90,缩放为100%。
Step 8
步骤8
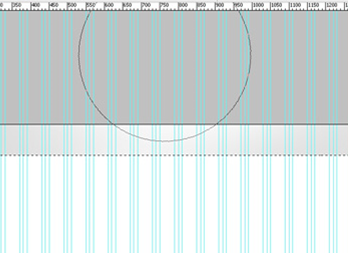
Now we are going to create the same light effect as described in Step 5. We will be using this technique a lot; so next time I will just refer you to Step 5 for the effect.
现在我们要象步骤5一样添加相同的光照效果。我们将多次使用这种技术,所以下一次,我将提示使用步骤5的效果。
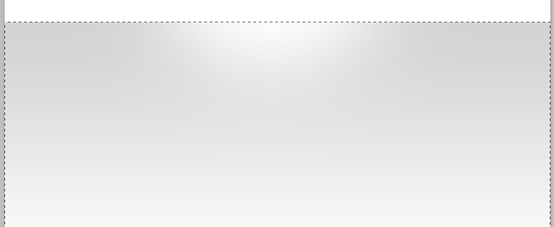
Create a new layer above all the current layers. Ctrl+click the big rectangle. Choose a 600px soft brush, set the color to white, and click a few times with the edge of the brush just a bit over the selection, as shown in the image.
在本层上新建图层。Ctrl+Click这个大的矩形。选择一个600px的软刷,设置颜色为白色,然后用笔刷的底部贴近选区的上方点击几次。如图所示,通过这个你画出了一个细微的光亮的效果。
Step 9
步骤9
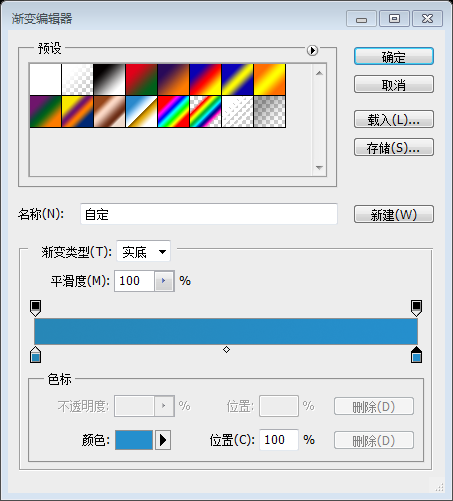
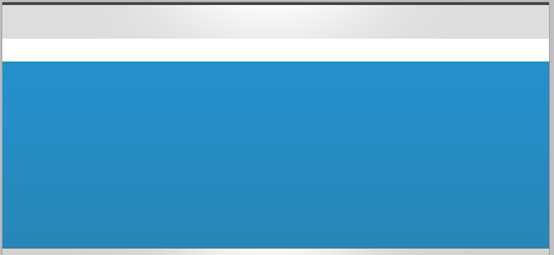
Create a new layer and draw in a big rectangle about 400px high. This one is used for our header. Fill it with a nice blue gradient from #2787b7 to #258fcd.
See how subtle the color change is?
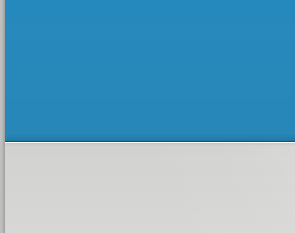
新建一个图层并画一个大的高400px的矩形(0,130,1200,410)。这个将用于我们的页头。用一个漂亮的蓝色渐变去填充它,颜色从 #2787b7到 #258fcd
以下展示颜色的微妙变化:
Step 10
步骤10
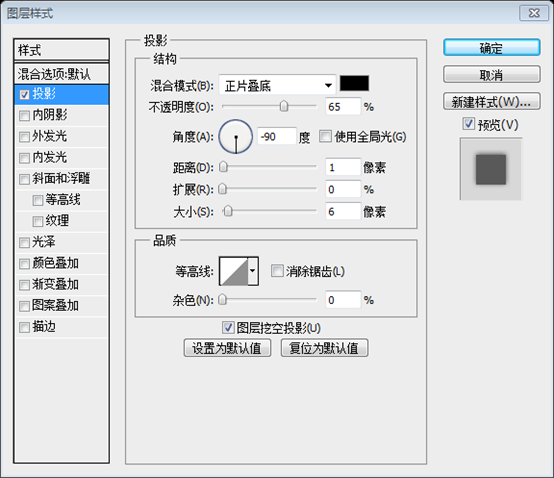
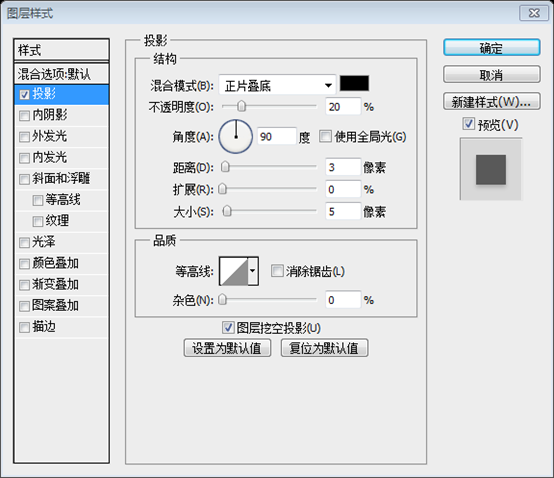
Add a dark blue 1px line on the bottom of the header box, apply the Drop shadow effect. For drop shadow use Blend mode: Multiply, Opacity: 65%, Angle: -90, Distance: 1px and Size: 6px. Next, create a new layer above and draw another 1px white line under the dark blue one. This way we create sharp edges for our content box. Basically you can apply this border technique on every box in your design just with different colors.
在页首长方块底端画一条1px的暗蓝色(0,539,1200,1)的线,颜色: #0e517e,添加投影效果。混合模式:正片叠底,不透明度:65%,方向:-90,距离:1px,大小:6px。之后再建一个新层,在暗蓝色线下面画一条1px的白线(0,540,1200,1)。通过这种方式,我们就可以创建一个轮廓鲜明的边缘。你可以在你的设计中把这个技巧用于其他色块。
Step 11
步骤11
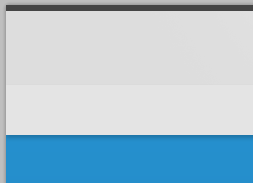
Create a new layer, and with the Rectangle Tool, draw a 50px high rectangle in the top part of the canvas, just as shown in the image. This will be used for our navigation.
新建图层,在画布的顶部区域,用矩形工具画一个高50px的矩形(0,80,1200,50),颜色: #e4e4e4,如图所示。这个将用于我们的导航栏。
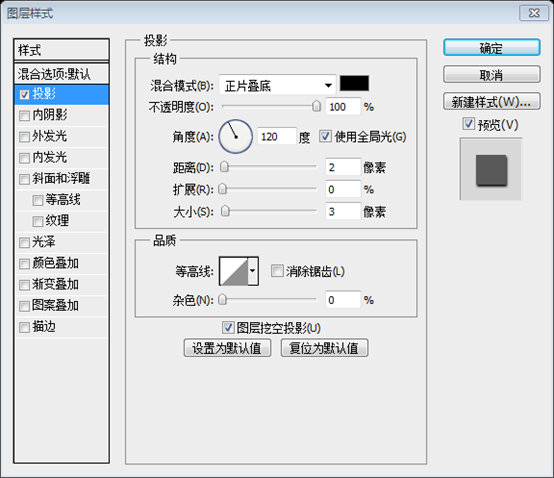
Apply a Drop shadow. Use the values shown in the image.
添加投影效果,如图所示设置参数。
Step 12
步骤12
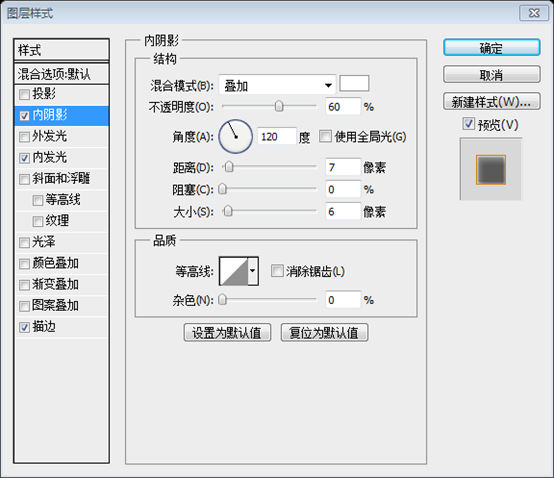
Time for the navigation. Use the Rounded Rectangle Tool and set the radius to 5px. Draw a rectangle, fill it with #f6a836, and apply the following effects:
Inner Shadow – color: #ffffff, Blend mode: overlay, Opacity: 60%, Angle: 120*, Distance: 7px, Size: 6px.
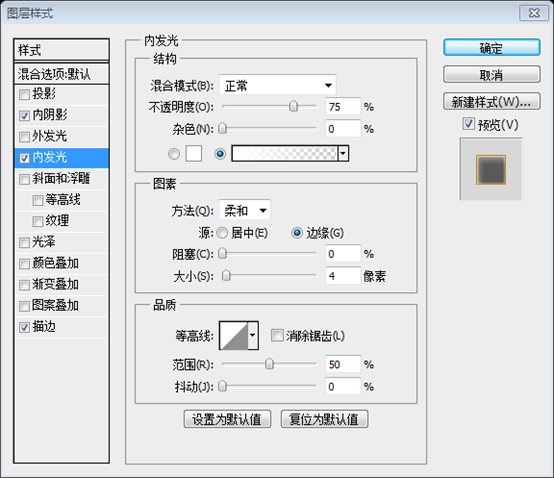
Inner glow – Blend mode: normal, color: #ffffff, Size: 4px. Everything else leave default.
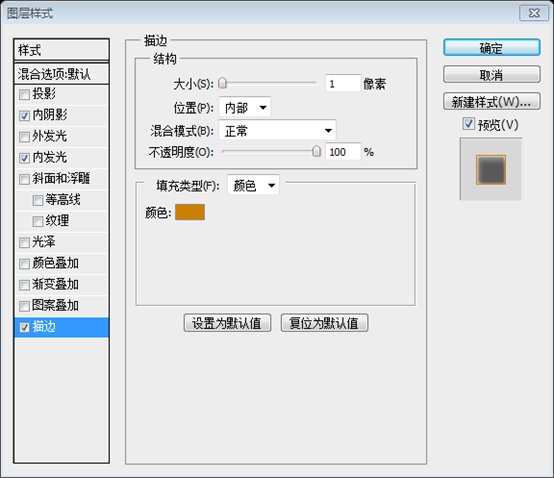
Stroke – Size: 1px, Position: inside, color: #ce7e01.
开始制作导航栏。用圆角矩形工具,设置半径为5px,画一个圆角矩形(130,92,70,27),颜色: #f6a836,之后给他添加以下效果:
1、内阴影—颜色: #ffffff,混合模式:叠加,不透明度:60%,角度:120,距离:7px,大小:6px。
2、内发光—混合模式:正常,颜色: #ffffff,大小:4px。其他参数默认设置。
3、描边—大小:1px,位置:内部,颜色: #ce7e01。
Now select the rectangle with Ctrl+click. Go to Select > Modify > Contract and enter 1px.
按Ctrl+click选择圆角矩形。点击:选择 > 修改 > 收缩,输入1px确定
Create a new layer above, set the Blend mode to Overlay and create the same effect described in the Step 5 using a smaller brush size this time. Then add the navigation text. I used Arial for navigation links, all caps and Antialias set to “none”.
在上面新建图层, 把混合模式设置成叠加,然后依照步骤5那样加照亮效果,不过这次用的是小笔刷。然后增加导航栏文字.我用Arial字体作为导航的链接字体,所有效果设置为“无”。
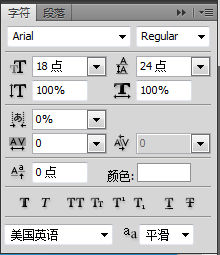
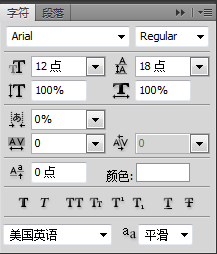
字体:Arial,字号:12点,活动链接的文字颜色: #7b3600,非活动链接的文字颜色: #838383
Step 13
步骤13
Now let’s create the search box. With the Rounded Rectangle Tool, radius 5px, create a search box positioned on the right side of the grid layout and in the middle of the top gray stripe from Step 4. Add these layer styles:
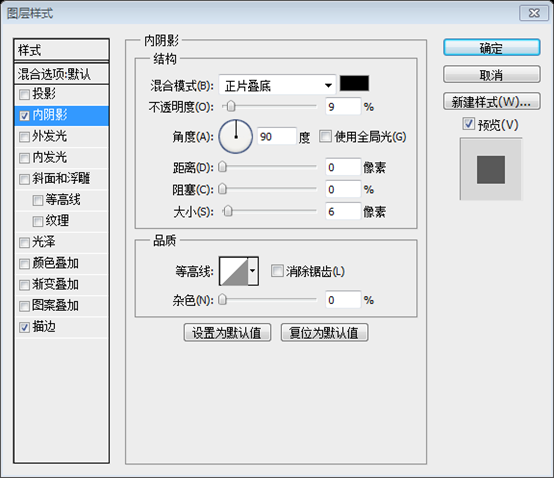
Inner Shadow – color: #000000, Blend mode: Multiply, Opacity: 9%, Angle: 90*, Distance: 0px, Size: 6px.
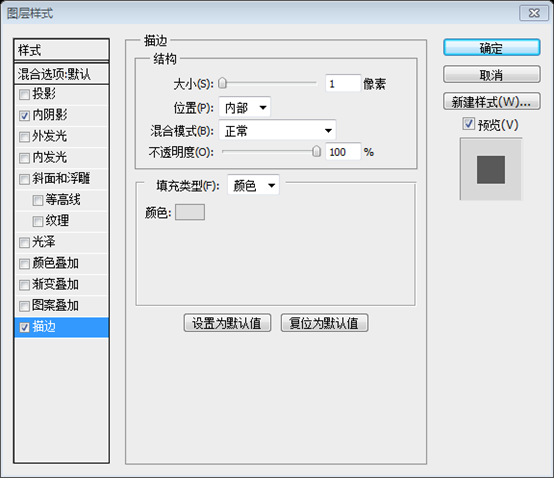
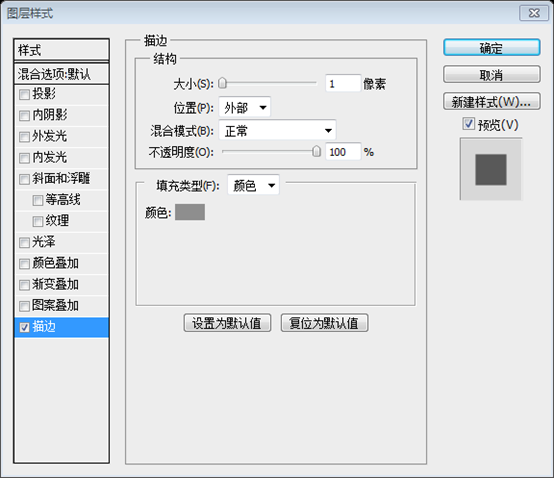
Stroke – Size: 1px, Position: inside, color: #dfdfdf.
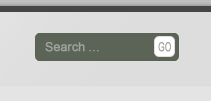
现在开始创建搜索框,用圆角矩形工具,半径5px,在网格布局的右侧、步骤4中创建的顶端灰色矩形中部创建一个用于搜索的矩形(925,26,142,30),颜色: #5c6457。添加以下样式:
内阴影—颜色: #000000,混合模式:正片叠底,不透明度:9%,角度:90,距离:0px,大小:6px。
描边—大小:1px,位置:内部,颜色:#dfdfdf。
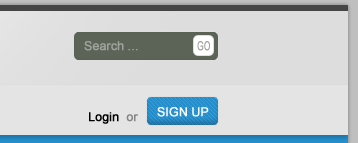
I added the “search” text and a light gray “GO” button. This is how it should look.
在上面添加search的文本和一个亮灰色的GO按钮。如下图所示:
文字的颜色: #a0a39c。白色的圆角矩形的描边和搜索框的描边一样。
So far we have a lot of layers and need to organize things a bit so we will create a new Layer folder and name it “search”. Select all layers that make the search field and just Click + drag inside the new folder. Later we’re going to organize other content inside the folders so we have a nice organized layer palette.
到目前为止已经创建了很多图层,为了条理清楚,我们建立search组。 把所有和搜索相关的层一并拖到这个组里面去。迟点,我们都会这样组织其他部分的内容。这样我们拥有一个漂亮组织合理的图层面板。
Step 14
步骤14
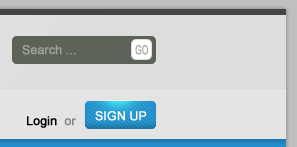
Now create a new layer and draw a “Sign Up” button the same way we created the search field – just half the width. Place it under the search field in the middle of the navigation stripe.
新建图层,用创建搜索框同样的方法画一个Sign Up按钮(998,91,73,30),颜色: #258dca——只有一半的宽度。把它摆放在搜索框的下面的导航区域的中部。
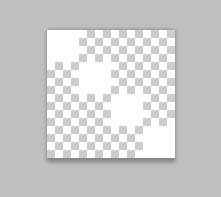
用PS新建文档,尺寸:4px*4px,背景透明,用画笔从左上角到右下角点4个白点
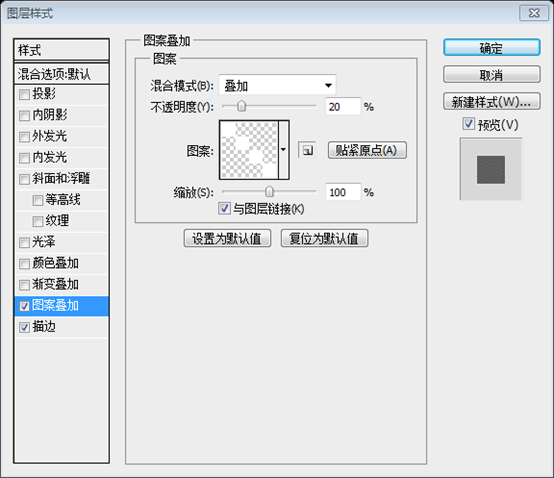
然后定义图案,关闭新建的文档。回到主文档,给该按钮添加图案叠加的样式
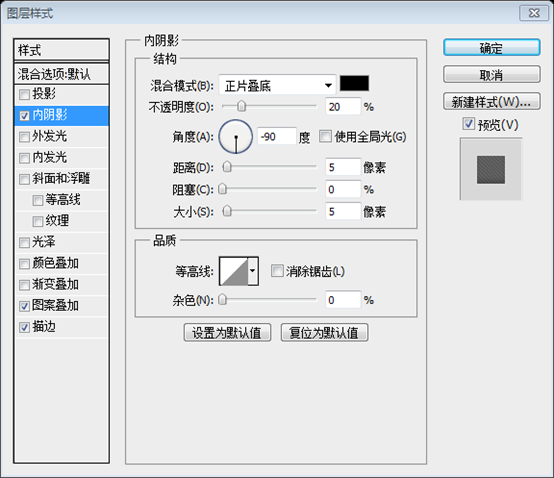
添加和搜索框一样的描边样式,并按照下图添加内阴影样式
在按钮上添加SIGN UP文字,文字颜色白色。在按钮的左侧添加Login(黑色) or(灰色)的文字
Again we’re creating the effect from Step 5.
我们再次创建步骤5中的特效
Use a smaller soft brush size. In this case it was 45px.
Step 15
步骤15
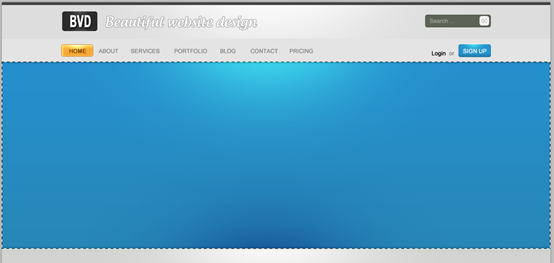
After adding the logo and the Tagline this is how our site should look like now.
加了LOGO和网站描述之后,我们的网页就如下所示。
LOGO的制作:
用圆角矩形工具新建一个圆角矩形(132,20,77,43),颜色: #2c2c2c
用步骤5的方法在圆角矩形的上方和下方添加高亮效果
用文字工具添加文字BVD,和导航栏的文字字体、字号相同。文字纵向缩放300%,水平缩放180%,文字颜色: #ffffff。给它添加如下的投影样式
在LOGO的右侧,添加文字Beautiful website design。字体:Androgyne,字号:30点,颜色:fdfdfd。添加描边样式:描边的颜色: #8e8e8e
Step 16
步骤16
Now we’re coming back to our layer organization mentioned a few steps earlier. Create a new empty layer folder and name it “top_bar”. Move all graphics from the top of the layout inside this folder (logo, tagline, search field, sign up button, navigation and backgrounds).
现在回到我们之前一些步骤提到的图层结构。创建一个新组top_bar。移动所有的图层到这个组里面(包括LOGO,说明文字,搜索框,SIGN UP按钮,导航栏和背景)。
Create another empty layer folder and name it “header”. This is where we will put our header graphics. This is how it should look.
创建另外一个组并命名为header。这里用于放置头部图层。如图所示
Step 17
步骤17
Our header looks a bit plain right now so we’re going to add the same light effect everywhere else on the site. Select the header box (blue). Create a new empty layer above and set the mode to Overlay.
头部看起来有的平淡,因此我们可以在任意位置加相同的亮光效果。选中蓝色的头部区域。在它上面创建一个新层并设置其混合样式为叠加。
Pick a large soft brush 600px, color #ffffff and click a few times in the area under the navigation. Furthermore, to gain more depth, we can switch the color to black and do the same thing just in the bottom part of the header. Give it a try!
选一个600px的大软刷,颜色: #ffffff。然后在导航栏的下方点击几次。如果想更有层次感,你还可以把颜色调为黑色,然后在头部区底部重复同样操作。试一试
Step 18
步骤18
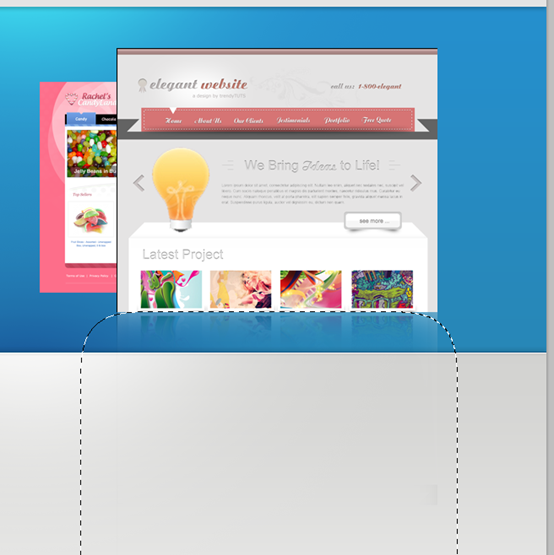
In this step I will explain to you how I created the reflection for the header images. Take two images of your choice, I used Safari screenshots of my two other templates, scale one down and place it behind the bigger one. Copy both layers, and with the Free Transform Tool, flip the first image and then the other one. Shift both images a few pixels down. Now make a selection from outside the bottom part to middle of the first flipped image with the Rectangular Marquee Tool. Go to Select > Modify > Feather and type 30px or more. You should have a selection similar to the shown in the image. Press the delete key a few times and you will create a nice faded reflection from the original image. Repeat this step for the second image.
在这步,我将向你展示如何创建头部区域的图像的反光效果。选择你的两张图片,我用的是我的其他模版的Safari的屏幕快照(我这里用之前的两个网页快照),缩放其中一张并摆放在大的图片的后方。复制所有的图层,并用自由变换工具,翻转第一张图片和另一张图片。按住Shift键,并将图片下移一些像素。用矩形选框工具创建一个从第一张翻转图片的底部的外边到图片中部的选区。点击:选择 > 修改 > 羽化,输入30px或者更多。你将获得如下图所示的相似选区。按Delete键几次,你会创建一个漂亮的原始图像的淡出反光效果。对第二张图片重复这些步骤。
Now to make those two images stand out a bit, create a new layer and set the mode to Overlay. Create the effect described in Step 5.
为了让两个图片更加突出,可以新建一层,设置该层混合模式为叠加,重复步骤5的添加效果。(这一步是否是必须,还得视情况而定,我用了这两张图片后,反而觉得这一步是多余的)
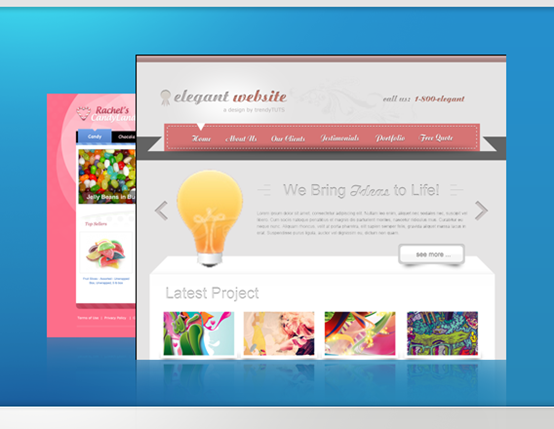
This is how our header should look after adding a nice tagline and some buttons. Don’t forget to put all these graphics inside the “header” layer
folder to keep things organized here ;)
在添加了一些按钮和漂亮的文字之后,头部区域就是如图所示。不要忘记把图层都放在header组里面。
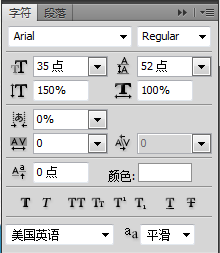
左侧第一段文字的字体如下设置
左侧第二段文字的字体设置如下
左侧第三段文字的字体设置如下
下面的两个按钮,右侧的按钮(310,455,159,38),颜色: #f6a836,样式复制导航栏的左边按钮的样式。文字的颜色: #ffffff
左侧的按钮(130,455,159,38),颜色: #c8c8c8,样式复制刚才右边的按钮,描边的颜色改为: #7d7d7d。文字的颜色: #5c5c5c
Step 19
步骤19
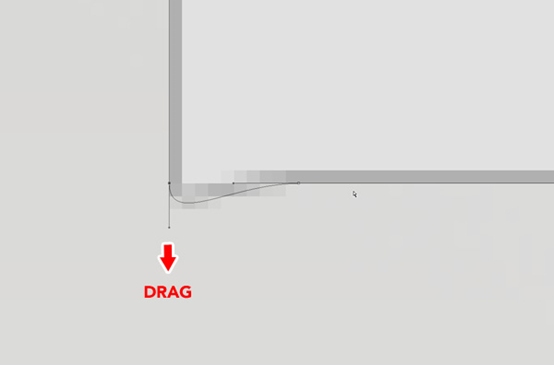
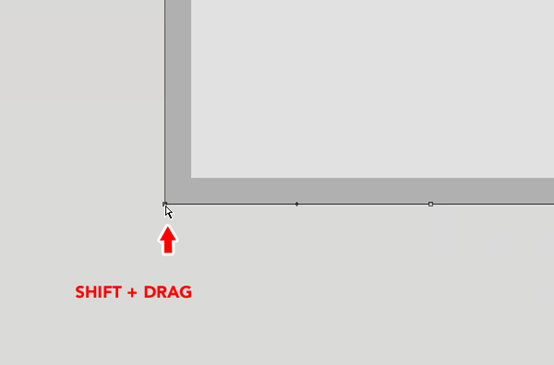
If you look at the final image preview, you can see that we have nice tabs in the content area. In order to create these tabs we’ll need to perform a few extra steps, but it’s definitely worth it. First, create a large rectangle shape with the Rounded Rectangle Tool. Make it 70px high and a radius of 10px or more if you wish. Now we have to get rid of the bottom radius and make a perfect corner out of it. Pick the Direct Selection Tool and click on the shape path. Click the vertical point and drag it down while holding the Shift key until it reaches the same level with the horizontal axis. So far so good but it’s still deformed. You see the little handle. Click on it and move it upwards to the point of the path.
如果你看最终效果图,你会看到在内容区域里面有很漂亮的切换页。为了创建这种切换页我们需要一些额外操作,但这是很有必要的。首先用圆角矩形工具创建一个高70px圆角半径为10px的圆角矩形(128,589,944,70),颜色: #e1e1e1。现在我们不要底部圆角,使它形成一个完美的角。用直接选择工具单击这个图形的路径,单击垂直方向的点然后按住shift键往下拉到水平坐标轴的高度。现在看起来不错了,但是还是比较简陋。然后你看见一个小的控制点。单击它并移动到路径上的点。
Now we have created a perfect corner. This is how it should look. Repeat this step for the right bottom corner.
现在我们创建一个完美的角。就像图中所示。在右下角也重复该步骤,并给它添加一个1px的描边,描边的颜色: #b0b0b0
Step 20
步骤20
Pick the Line tool and set it to 1px.
选取直线工具,并设置为1px
Step 21
步骤21
Draw in gray separators while holding the Shift key.
按住Shift键画一些分隔符(364,589,1,70)、(600,589,1,70)、(836,589,1,70),颜色: #b0b0b0
Step 22
步骤22
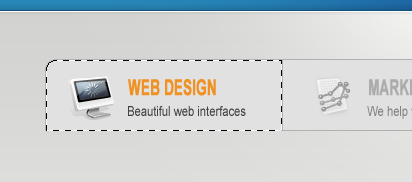
Place some icons, headings, and a description for each tab. I used Ray Cheung icons available from – WebAppers.com. Usually one tab is always active and the others are inactive. To make this clear in our design, we need to find a way to accomplish this. I desaturated the other icons and reduced the opacity for the headings and text while keeping the first active tab colorful and bright.
在每个切换页摆放一些图标、标题、和一些说明文字。我用的是Ray Cheung icons——来自WebAppers.com(并将其中一个图标放在头部区域的图片处)。通常一个标签页是活动的,而其他活动页是非活动的。要在我们的设计中明确说明这点,我们需要找到方法来实现它。我降低其他图标的饱和度(点击:图像 > 调整 > 去色)并且降低标题文字和描述文字的不透明度(60%)以保证活动的切换页处于高亮状态。
Step 23
步骤23
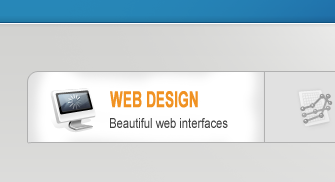
To make the active tab more obvious, we’re going to give it a faded white background. To do this first select the whole object and then subtract from the selection to get only the first tab selected.
为了使活动的切换页更加明显,我们将给它添加渐白的背景。为了达到这样的效果我们把整个对象选中然后裁切选区,最终使选中的范围只有第一个按钮。
This is what your selection should look like.
你的选区如下图所示
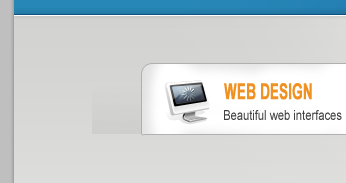
With a smaller soft brush, paint in a white background.
新建图层,用一个小的软刷,用白色涂抹背景
Step 24
步骤24
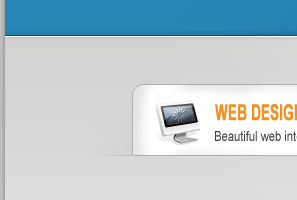
Add the shadow. Create a dark gray rectangle behind the tabs, as shown in the image.
添加投影。在切换页的背后创建一个深灰色的矩形(78,609,1044,50),颜色: #303030,如图所示
Add a vector mask by clicking the little icon in the bottom of the layer palette.
点击图层面板底部的小图标创建图层蒙版
Set the color to black, pick a large soft brush, and start deleting parts of the rectangle. As a result, we get a nice fake shadow effect behind our tabs.
设置颜色为黑色,选区一个大的软刷,然后开始删除矩形的部分。结果,我们创建了一个比较好看的阴影效果
也可以用渐变工具在蒙版内添加一个黑色到透明的渐变,如下图所示
Finaly the attention to detail. Draw in a 1px gray line on the bottom of the tabs. Mask the layer again like described earlier and with a big soft brush delete the left and right end of the line. Now we get a nicely faded line that follows our shadow behind the tabs.
最后我们加点细节。在切换页下方画一个1px的灰线(78,659,1044,1),颜色: #b0b0b0。然后如上一步一样的方式使左右两端产生渐变,也可以用上面所讲的用渐变来实现。现在我们就在切换页的后方紧挨着阴影的地方得到一条比较时尚好看的线。
This is how our tabs should look.
这就是我们切换页看起来的样子。
Step 25
步骤25
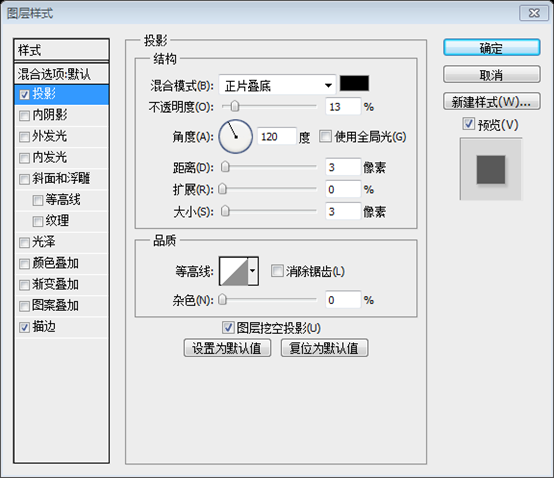
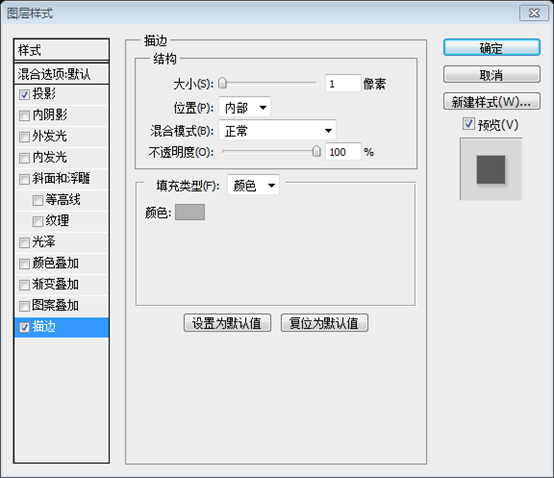
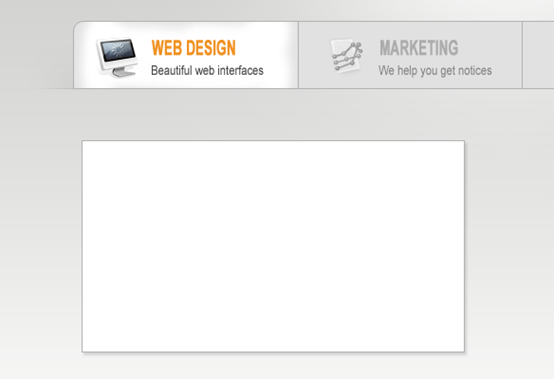
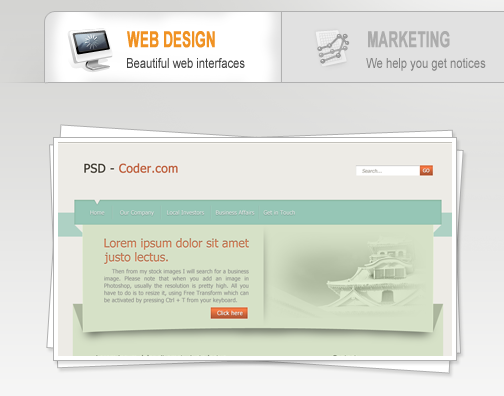
It’s time to design the content for our first tab. We need a featured design image, a nice heading and some text. First we will create the featured image. I thought that it would be nice to break the edginess of the design by creating a nice stacked photos effect for our featured design image. To do this, draw a white rectangle with a 1px light gray border, and a very subtle drop shadow effect.
是时候设计第一个切换页的内容了。我们需要一个有特色的设计图像,有好看的标题和一些文字内容。首先我们得创建这个有特色的图片。我想,这将是很好的打破尖锐棱角的设计的时候,我们为特色设计图像的创造一个好看的叠照片的效果。要做到这一点,绘制一个1px浅灰色(颜色: #b0b0b0)边框的白色矩形(136,714,404,224),和一个非常微妙的阴影效果。
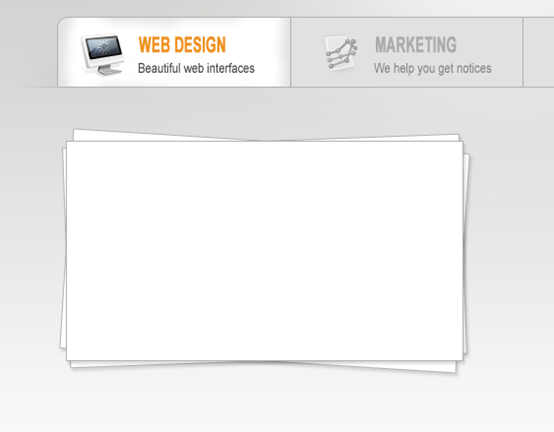
Now copy that layer and rotate it slightly with the Free Transform Tool. Do this one more time.
复制这一层并用自由变形工具稍微旋转。重复这个操作几次(3次比较好)
Import your featured image and place it over the white rectangles. Don’t worry if the image is flowing outside the boxes, we will fix that. Make a selection from the top rectangle, go to Select > Modify > Contract and insert 5px. With the featured image layer selected click the Quick Mask icon on the bottom of our layer palette. You will get nicely bordered image effect like shown in the image here.
把你选好的图片导进来,放在白色长方形上面。不用担心图片会超出方块,我们会修复它。按照最上面的矩形新建一个选区,点击:选择 > 修改 > 收缩,输入5px,确认。然后在图层管理区下方点击添加图层蒙版,这样图片就只显示选区范围。
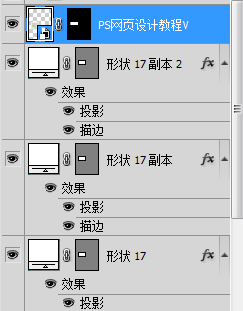
This is how your layer order should look like.
你现在的图层顺序看起来如下所示
Step 26
步骤26
Don’t forget to keep things organized. So create more layer folders and organize your palette. This is how I have done it.
不要忘记整理图层,这里新建图层夹把图层归类。
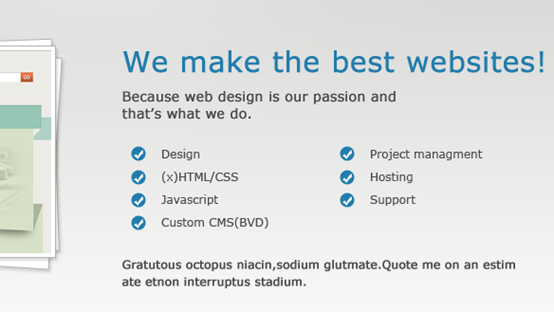
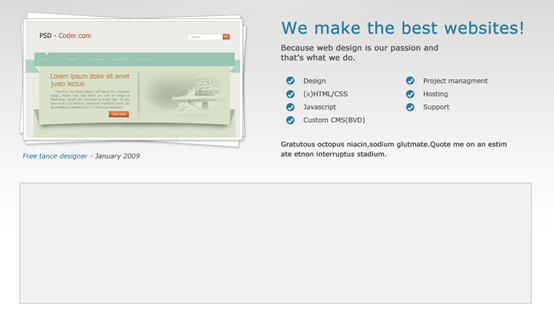
By adding a nice heading, some text, and bullet lists, our web design work is finished. Let’s move on.
增加一个漂亮的标题、一些文本和列表,我们的设计工作又完成一部分。现在继续下一步吧。
标题文字字体:Verdana;字号:30px,加粗;颜色: #227dac
副标题文字字体:Verdana;字号:14px,加粗;颜色: #494949
列表文字字体:Verdana;字号:12px;颜色: #494949
列表前的项目号,由圆和自定义形状中的勾这个形状组合起来的,圆的颜色: #227dac;勾的颜色: #ffffff
列表下的文字字体:Verdana;字号:12px,加粗;颜色: #494949
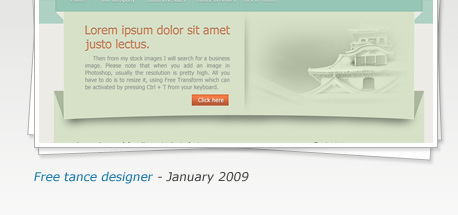
图片下方的字体:Verdana;字号:12px,倾斜;左侧文字颜色: #227dac,右侧文字颜色: #494949
And again some layer organization.
再组织一下图层
当前的结果:
Step 27: Testimonials
步骤27:感谢信
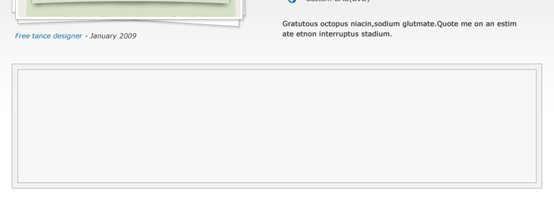
I thought this one should be huge; so I’ve put this in a big box right after the main section. First draw a big light gray rectangle about 220px high. Give it a 1px gray border.
我想这应该是巨大的,所以我把它放在一个在主要部分下方的大方块里。首先画一个大的高220px的亮灰色矩形(130,1016,940,222),颜色: #f2f2f2。给它一个1px的灰色(颜色: #b0b0b0)边框。
Then draw in another brighter rectangle by 10px smaller on all sides. Also add a 1px light gray border.
然后画另一个各边都缩进10px的亮一点的矩形(140,1116,920,202),颜色: #f7f7f7。也添加1px的灰色的边框
Finally add some text and we’re done!
最后添加一些文本完成这部分的制作
抬头文字的字体:Verdana;字号:12px,加粗;颜色: #de8d55
正文文字的字体:Androgyne;字号:24px;颜色: #696969
落款文字,左侧文字:Androgyne;字号:14px;颜色: #696969;右侧文字:Verdana;字号:14px,加粗;颜色: #494949
左侧按钮,圆角矩形(257,1190,186,27),圆角半径:3px,颜色: #f5f5f5,描边颜色: #b0b0b0
按钮文字的字体:Verdana,字号:12px;水平缩放80%;颜色: #494949
Step 28
步骤28
It’s time for the footer. Draw a big 400px high, dark gray rectangle.
现在开始制作页脚。画一个大的高400px深灰色(颜色: #4b4d4a)的矩形(0,1300,1200,400)
Step 29
步骤29
Add some light effect the same way as described in Step 5.
按照步骤5的做法添加一些光亮的效果
Step 30
步骤30
Next, draw a 10px high rectangle above the footer and add some subtle effect by adding two more lines on top and bottom like shown in the image.
下来,如图所示,在区域上方画一个10像素高的矩形(0,1290,1200,10),颜色: #dcdcdc,并且通过在顶端和底部各多加两条线增强细节处理。
四条线分别是:(0,1290,1200,1),颜色: #a3a3a3;(0,1291,1200,1),颜色: #ffffff;(0,1299,1200,1),颜色: #ffffff;(0,1300,1200,1),颜色: #3e3e3e
Step 31
步骤31
Create the very bottom part where the repeated navigation will be placed. You can copy the rectangle from the top where the navigation is placed, move it down and make it about 40px high. Place it at the very bottom of your canvas. Please note that you may need to expand your canvas at this point so that all your graphics fit. If you need to do that, then go to Image > Canvas size and set the height to fit the entire layout.
在最底部的地方创建重复导航栏。您可以复制放置顶部导航栏的矩形(0,1260,1200,40),将其移动,并使其40px的高。将其放置在你的画布的最底部,活动页的文字颜色改为: #494949。请注意,您可能需要扩大你的画布,以便让所有的图形适合。如果你需要,点击:图像 > 画布大小,设置合适的高度,以适应整个布局。在导航栏的左侧添加版权信息。
Step 32
步骤32
Attention to detail again. Add a 1px white line above the footer navigation box to give it a nice border effect.
再次强化细节。给页脚的导航区顶端加一条1px的白色边,这样有比较好的边框效果。
Step 33
步骤33
Add some footer content and separate it nicely within your grid.
给页脚增加内容,你可以依据网格合理安置它们。
用直线工具画四条直线(130,1346,220,1)、(370,1346,220,1)、(610,1346,220,1)、(850,1346,220,1),颜色: #acacac
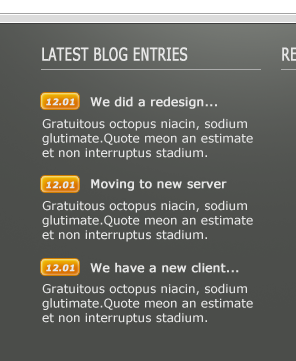
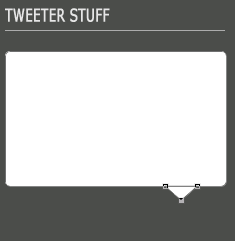
在直线的上方用文字工具添加LATEST BLOG ENTRIES、RECENT COMMENTS、ADVERTISING、TWEETER STUFF。文字字体:Verdana;字号:12px,垂直缩放150%;颜色: #e6e6e6
在第一列的下方,建立三个博客条目。左侧的按钮是用圆角矩形,半径5px,尺寸:40px*18px,颜色: #da7203。图层的样式复制上面导航栏中黄色按钮的图层样式
按钮文字的字体:Verdana Bold;字号:9px,加粗、倾斜;颜色: #e6e6e6
按钮右侧文字的字体:Verdana;字号:12px,加粗;颜色: #e6e6e6
下方文字的字体:Verdana;字号:12px;颜色: #e6e6e6
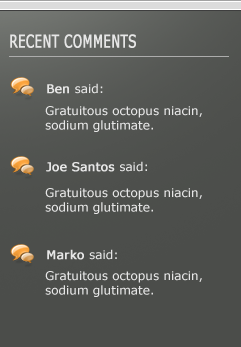
置入对话图片
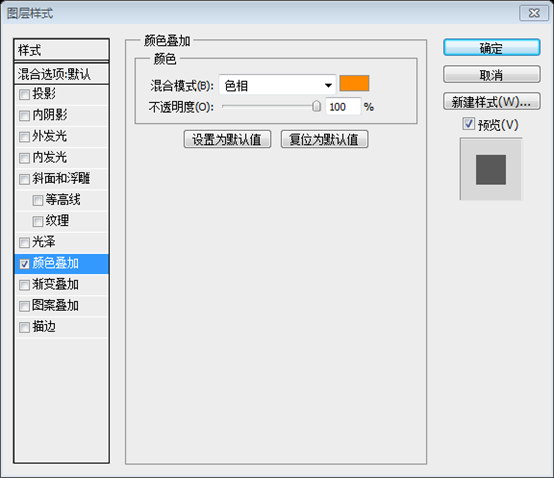
给它添加颜色叠加的图层样式,颜色: #ff8a00
每个列表前有刚才做好的对话图标,右侧的文字字体:Verdana;字号:12px;颜色: #e6e6e6。人名加粗
下面的留言文字字体:Verdana;字号:12px;颜色: #e6e6e6
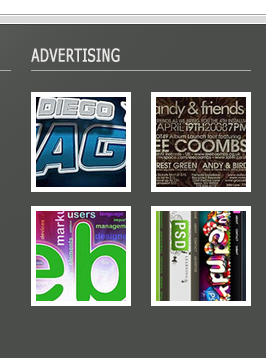
在第三列的下方,用矩形工具画四个矩形,尺寸:100px*100px,分别是(610,1368)、(730,1368)、(610,1482)、(730,1482)
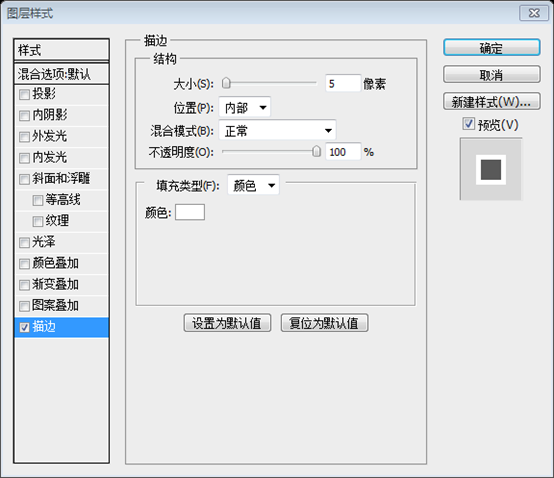
给他们添加白色的描边
然后添加合适的广告图片,移动每个图片到矩形的上方,右键选择创建剪贴蒙版
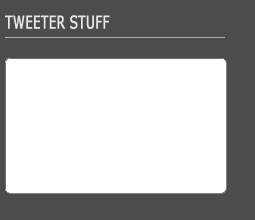
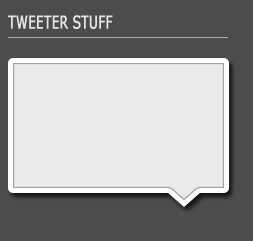
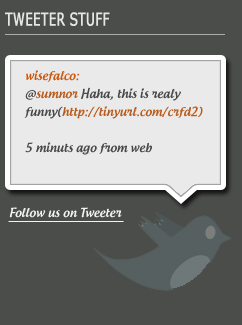
在第四列的下方,用圆角矩形工具新建一个圆角矩形(850,1367,221,135),圆角半径为5px
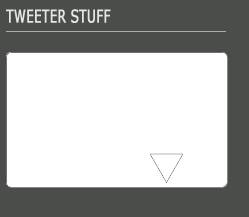
再用多边形工具创建一个正倒三角形
用路径选择工具选择这个三角形,并拖动到合适的位置
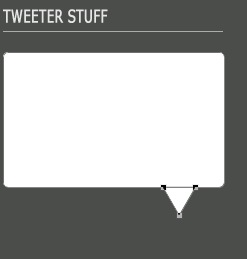
再用直接选择工具选择最下面的点,按住Shift,将点上移到合适的位置
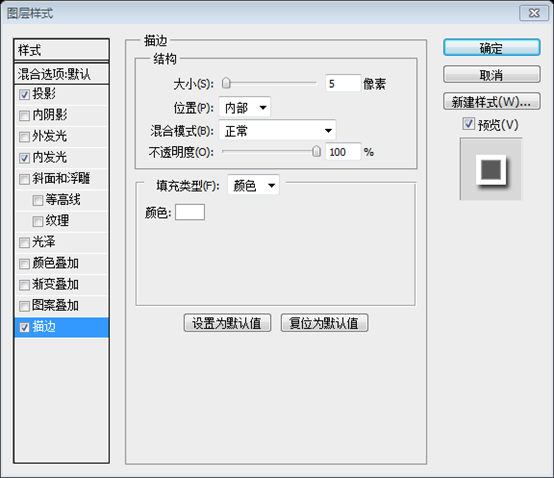
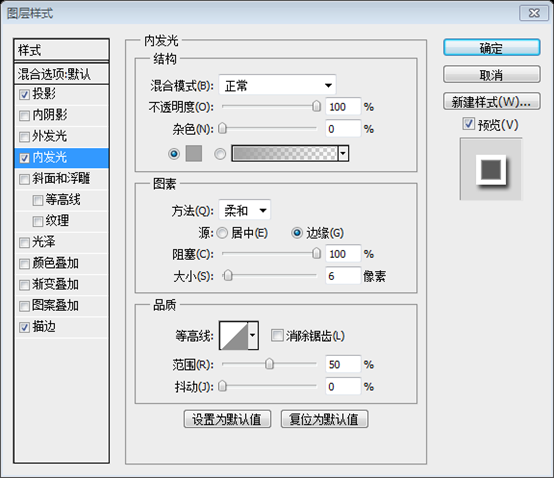
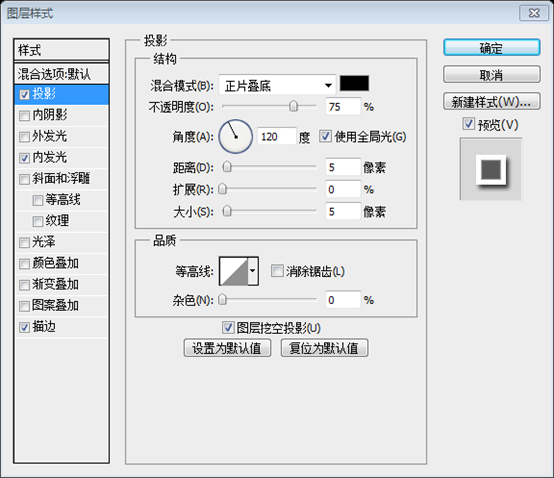
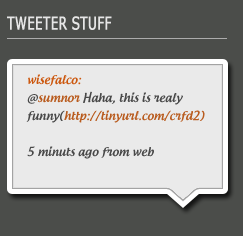
最后给该图层添加如下的图层样式
描边的颜色: #fbfbfb
内发光的颜色: #a3a3a3
再把该形状的填充色改成: #eaeaea
在该形状内添加文字,字体:Androgyne;字号:12px;颜色分别是: #cc580f,#b95cef,#494949
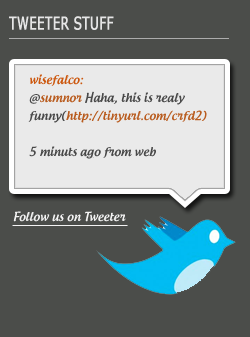
在下方添加文字和图标
文字字体:Androgyne;字号:12px;颜色是: #f3f3f3。在下面添加一条白线,颜色: #f3f3f3
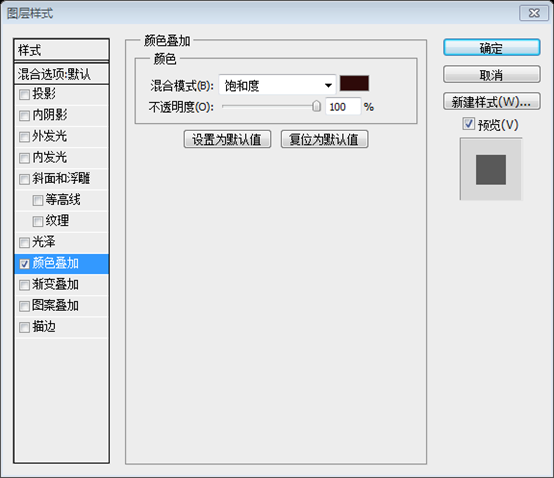
在右侧添加图片
给图片添加如下的图层样式,颜色: #2e0909,并将图层的不透明度改为28%
Step 34
步骤34
Finally organize all your layers inside the layer folders. This is how I’ve done it.
然后就是把相关的图层整合起来。
The Design
最终设计
后记:整个设计中规中矩。前面的步骤比较详细,后面的步骤就一笔带过了。为此,补充后面的设计过程花了不少的时间。整体来说,还是用到了一些技巧。例如,图标的灰化处理,图片的色相改变等等。我认为最后一个对话框设计(是根据原图补充步骤的)也是亮点。


 后记:整个设计中规中矩。前面的步骤比较详细,后面的步骤就一笔带过了。为此,补充后面的设计过程花了不少的时间。整体来说,还是用到了一些技巧。例如,图标的灰化处理,图片的色相改变等等。我认为最后一个对话框设计(是根据原图补充步骤的)也是亮点。
