[Some information relates to pre-released product which may be substantially modified before it's commercially released. Microsoft makes no warranties, express or implied, with respect to the information provided here.]
[涉及某信息预发布的版本可能在它的商业版本大幅修改。对于这里提供的信息,微软不作任何担保。]
在MSDN中,Windows 10 SDK 的东东上,都会声明这一句话,我也引过来吧啦,他不担保,我也保不了。
正文
在Win10 UWP开发中,新加入了一个关键字 x:Bind. 它好在哪?为什么要用他。
一、x:Bind 好在哪?


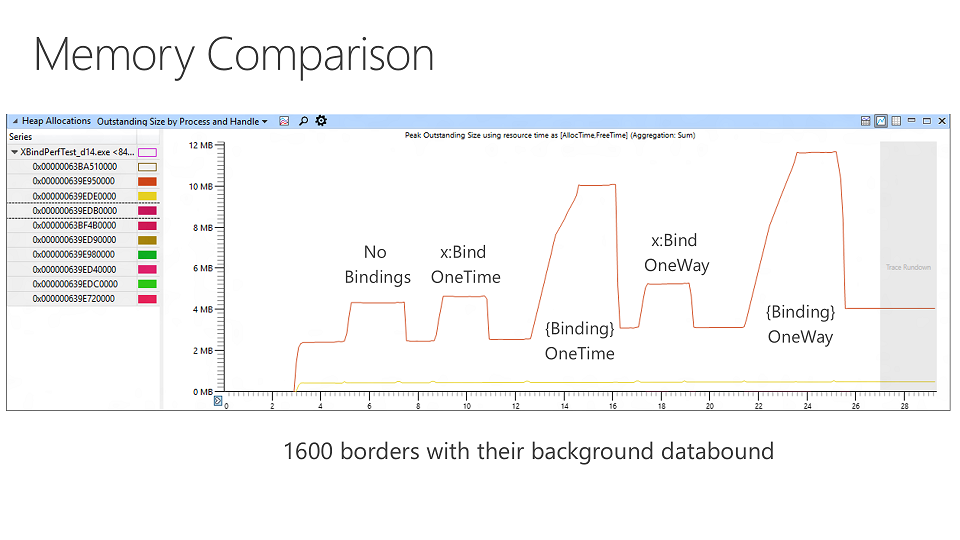
从这两张画可以看出来,x:Bind的性能要优于Binding。为什么?
这个绑定被称为 "compiled data bindings", 从字面上看 编译的数据绑定。
我们以前常用的Binding,是运行时(Run Time)的绑定,而这个 在编译时(Build Time)就已经决定。
好处就是效率高,速度快,绑定的错误在编译时就会提示出来,方便调试。
二、x:Bind
x:Bind 主要的几点:
1. 强类型
2.上下文为page 或 UserControl
3.绑定的默认Mode为OneTime
我们用Binding的时候,有的时候可以不用去考虑类型,因为有好多默认的转换(如,TypeConverter),但是使用x:Bind时,如果类型不匹配编译时,就会出错。
例如:
<CheckBox IsChecked="{x:Bind}" />
我们把当前的上下文绑定到 IsChecked(bool?) 上
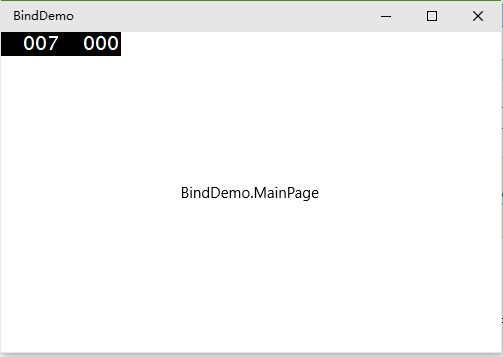
Invalid binding path '' : Cannot bind type 'BindDemo.MainPage' to 'System.Nullable(System.Boolean)' without a converter

结果就会这样子。当然,如果你绑到String类型的属性上是不会错的,他会帮你ToString()地。
而绑定的上下文,现在看来就是当前的类的本身了,就是继承自Page和UserControl的本身。
对于在初学的同学,再也不怕找不到对象了,也不用设置DataContext。
对于熟悉MVVM的同学,要用x:Bind 就要把ViewModel写到CodeBehand中一个,真心怪怪的说,好多框架可能也得调整啦。
三、小试牛刀
    <Grid Background="{ThemeResource ApplicationPageBackgroundThemeBrush}">
        <TextBlock Text="{x:Bind}"
                   VerticalAlignment="Center"
                   HorizontalAlignment="Center" />
    </Grid>
CodeBehand不做任何代码啦.
结果:
从这结果也可以看出来,他的上下文,是当前的这个页。
咱们在CodeBehand里加一Title的属性。
    public sealed partial class MainPage : Page
    {
        public string Title { get; set; } = "Bind Demo";

        public MainPage()
        {
            this.InitializeComponent();
        }
    }
    <Grid Background="{ThemeResource ApplicationPageBackgroundThemeBrush}">
        <TextBlock Text="{x:Bind Title}"
                   VerticalAlignment="Center"
                   HorizontalAlignment="Center" />
    </Grid>

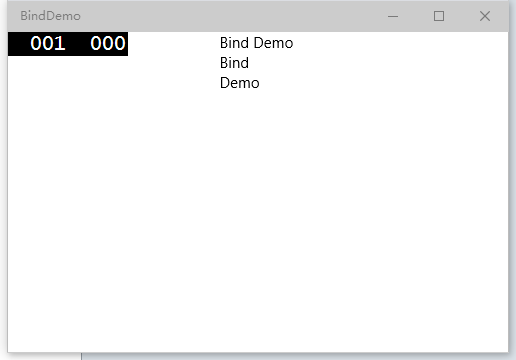
这里,熟悉MVVM的人就要想了,我们怎么绑定ViewModel呢。其实就是把ViewModel的对象,写在CodeBehand里一个就好啦。
    public class MainViewModel
    {
        public string Name { get; set; } = "Bind";

        public string Content { get; set; } = "Demo";
    }
    public sealed partial class MainPage : Page
    {
        public string Title { get; set; } = "Bind Demo";

        public MainViewModel ViewModel { get; set; } = new MainViewModel();

        public MainPage()
        {
            this.InitializeComponent();
        }
    }
    <Grid Background="{ThemeResource ApplicationPageBackgroundThemeBrush}">
        <StackPanel HorizontalAlignment="Center">
            <TextBlock Text="{x:Bind Title}" />
            <TextBlock Text="{x:Bind ViewModel.Name}" />
            <TextBlock Text="{x:Bind ViewModel.Content}" />
        </StackPanel>
    </Grid>
结果

四、数据模板中使用
因为x:Bind 是强类型,所以你在使用DataTemplate的时候,要指定x:DataType,我们改写一下上面的例子。
CodeBehand的代码不用变,我们直接变Xaml中的。加一个Key为TestDataTmpleate的数据模板,为了区别,我们给一个背景色,把顺序也换一下.
<Page x:Class="BindDemo.MainPage"
      xmlns="http://schemas.microsoft.com/winfx/2006/xaml/presentation"
      xmlns:x="http://schemas.microsoft.com/winfx/2006/xaml"
      xmlns:local="using:BindDemo"
      xmlns:d="http://schemas.microsoft.com/expression/blend/2008"
      xmlns:mc="http://schemas.openxmlformats.org/markup-compatibility/2006"
      mc:Ignorable="d">
    <Page.Resources>
        <DataTemplate x:Key="TestDataTemplate"
                      x:DataType="local:MainViewModel">
            <StackPanel Background="Orange">
                <TextBlock Text="{x:Bind Content}" />
                <TextBlock Text="{x:Bind Name}" />
            </StackPanel>
        </DataTemplate>
    </Page.Resources>

    <Grid Background="{ThemeResource ApplicationPageBackgroundThemeBrush}">
        <StackPanel HorizontalAlignment="Center">
            <TextBlock Text="{x:Bind Title}" />
            <ContentControl ContentTemplate="{StaticResource TestDataTemplate}"
                            Content="{x:Bind ViewModel}" />
        </StackPanel>
    </Grid>
</Page>
结果:
如果,我们不设置x:DataType呢。他就会告诉我们这个Error。

五、绑定事件到方法
x:Bind 是支持事件绑定到方法的,例如我给MainViewModel 加一个Test方法。然后在数据模板中加一个Button。
Click这个不用想都支持,我就随便试了一个PointerEntered事件啦。
绑定的这个方法,可以不写参数,也可以把事件的参数写全。
        <DataTemplate x:Key="TestDataTemplate"
                      x:DataType="local:MainViewModel">
            <StackPanel Background="Orange">
                <TextBlock Text="{x:Bind Content}" />
                <TextBlock Text="{x:Bind Name}" />
                <Button  PointerEntered="{x:Bind Test}" />
            </StackPanel>
        </DataTemplate>

完美进入断点。
六、总结
现在Binding也是可以一同使用的,至少不带表x:Bind可以全完替代Binding,至少在动态类型的绑定上,x:Bind是玩不转的。而且使用x:Bind 多少打乱一些我们已习惯的MVVM的结构。
但是x:Bind所带来的性能的提升,真心让人心动,可以的话,可以尽量的使用这个。
本文只是我的x:Bind的初步理解,也没找到什么文档,如果有不对的地方,请大家指出来。谢谢。
本文地址:http://www.cnblogs.com/gaoshang212/p/4534138.html


