
Ubuntu16.04+Anaconda3虚拟环境下配置caffe+opencv3.4.2+python3.5
本机Geforce gtx1060 驱动版本384.130, 已安装cuda-9.0,cudnn7.0.5,Anaconda3
常用命令:
find /|grep filename #寻找某个文件
ls -l  # 列出该文件夹下的所有文件信息
sudo gedit file
sudo chmod 777 filename
sudo cp filename1 filename2
sudo ln -s filename1 filename2 # 把filename1建立软链接为filename2
ldconfig -v  # 在默认搜寻目录(/lib和/usr/lib)以及动态库配置文件/etc/ld.so.conf内所列的目录下,搜索出可共享的动态链接库(格式如,lib*.so*),
进而创建出动态装入程序(ld.so), 所以往/lib和/usr/lib里面加东西,是不用修改/etc/ld.so.conf的,但是添加之后之后要运行一下 ldconfig

sudo gedit ~/.bashrc  # 添加环境变量需要,每个用户都有一个.bashrc文件,在用户目录下.
# /etc/bashrc或/etc/bash.bashrc:为每一个运行bash shell的用户执行此文件
source ~/.bashrc  #重新执行刚修改的初始化文件,使之立即生效,而不必注销并重新登录
第一步 安装caffe环境
按照https://www.jianshu.com/p/8d309dcc8b99的步骤一步一步走
安装caffe for python的虚拟环境--->安装基础依赖库--->克隆Caffe代码--->修改Makefile.config、Makefile
--->编译pycaffe--->拷贝编译后的libcaffe.so至caffe的虚拟环境。
我的最终版Makefile.config内容如下:
注意: 在没有安装opencv之前,我没有去取消23和108行的注释,是为了一步一步来,防止不知道问题出在caffe还是opencv。
对于该文件的修改,我还结合了这篇https://www.cnblogs.com/whb-20160329/p/10256766.html,哪里该注释掉还是取消注释,自己最好搞清楚,会有所收获。
  1 ## Refer to http://caffe.berkeleyvision.org/installation.html
  2 # Contributions simplifying and improving our build system are welcome!
  3
  4 # cuDNN acceleration switch (uncomment to build with cuDNN).
  5   USE_CUDNN := 1
  6
  7 # CPU-only switch (uncomment to build without GPU support).
  8 # CPU_ONLY := 1
  9
 10 # uncomment to disable IO dependencies and corresponding data layers
 11 # USE_OPENCV := 0
 12 # USE_LEVELDB := 0
 13 # USE_LMDB := 0
 14 # This code is taken from https://github.com/sh1r0/caffe-android-lib
 15 # USE_HDF5 := 0
 16
 17 # uncomment to allow MDB_NOLOCK when reading LMDB files (only if necessary)
 18 #    You should not set this flag if you will be reading LMDBs with any
 19 #    possibility of simultaneous read and write
 20 # ALLOW_LMDB_NOLOCK := 1
 21
 22 # Uncomment if you're using OpenCV 3
 23   OPENCV_VERSION := 3
 24
 25 # To customize your choice of compiler, uncomment and set the following.
 26 # N.B. the default for Linux is g++ and the default for OSX is clang++
 27 # CUSTOM_CXX := g++
 28
 29 # CUDA directory contains bin/ and lib/ directories that we need.
 30 CUDA_DIR := /usr/local/cuda-9.0
 31 # On Ubuntu 14.04, if cuda tools are installed via
 32 # "sudo apt-get install nvidia-cuda-toolkit" then use this instead:
 33 # CUDA_DIR := /usr
 34
 35 # CUDA architecture setting: going with all of them.
 36 # For CUDA < 6.0, comment the *_50 through *_61 lines for compatibility.
 37 # For CUDA < 8.0, comment the *_60 and *_61 lines for compatibility.
 38 # For CUDA >= 9.0, comment the *_20 and *_21 lines for compatibility.
 39 CUDA_ARCH := -gencode arch=compute_30,code=sm_30 \
 40         -gencode arch=compute_35,code=sm_35 \
 41         -gencode arch=compute_50,code=sm_50 \
 42         -gencode arch=compute_52,code=sm_52 \
 43         -gencode arch=compute_60,code=sm_60 \
 44         -gencode arch=compute_61,code=sm_61 \
 45         -gencode arch=compute_61,code=compute_61
 46
 47 # BLAS choice:
 48 # atlas for ATLAS (default)
 49 # mkl for MKL
 50 # open for OpenBlas
 51 BLAS := atlas
 52 # Custom (MKL/ATLAS/OpenBLAS) include and lib directories.
 53 # Leave commented to accept the defaults for your choice of BLAS
 54 # (which should work)!
 55 # BLAS_INCLUDE := /path/to/your/blas
 56 # BLAS_LIB := /path/to/your/blas
 57
 58 # Homebrew puts openblas in a directory that is not on the standard search path
 59 # BLAS_INCLUDE := $(shell brew --prefix openblas)/include
 60 # BLAS_LIB := $(shell brew --prefix openblas)/lib
 61
 62 # This is required only if you will compile the matlab interface.
 63 # MATLAB directory should contain the mex binary in /bin.
 64 # MATLAB_DIR := /usr/local
 65 # MATLAB_DIR := /Applications/MATLAB_R2012b.app
 66
 67 # NOTE: this is required only if you will compile the python interface.
 68 # We need to be able to find Python.h and numpy/arrayobject.h.
 69 # PYTHON_INCLUDE := /usr/include/python2.7 \
 70         /usr/lib/python2.7/dist-packages/numpy/core/include
 71 # Anaconda Python distribution is quite popular. Include path:
 72 # Verify anaconda location, sometimes it's in root.
 73   ANACONDA_HOME := $(HOME)/anaconda3/envs/caffe
 74   PYTHON_INCLUDE := $(ANACONDA_HOME)/include \
 75           $(ANACONDA_HOME)/include/python3.5m \
 76           $(ANACONDA_HOME)/lib/python3.5/site-packages/numpy/core/include
 77
 78 # Uncomment to use Python 3 (default is Python 2)
 79 # PYTHON_LIBRARIES := boost_python3 python3.5m
 80 # PYTHON_INCLUDE := /usr/include/python3.5m \
 81 #                 /usr/lib/python3.5/dist-packages/numpy/core/include
 82
 83 # We need to be able to find libpythonX.X.so or .dylib.
 84 # PYTHON_LIB := /usr/lib
 85   PYTHON_LIB := $(ANACONDA_HOME)/lib
 86
 87 # Homebrew installs numpy in a non standard path (keg only)
 88 # PYTHON_INCLUDE += $(dir $(shell python -c 'import numpy.core; print(numpy.core.__file__)'))/include
 89 # PYTHON_LIB += $(shell brew --prefix numpy)/lib
 90
 91 # Uncomment to support layers written in Python (will link against Python libs)
 92   WITH_PYTHON_LAYER := 1
 93
 94 # Whatever else you find you need goes here.
 95 INCLUDE_DIRS := $(PYTHON_INCLUDE) /usr/local/include /usr/include/hdf5/serial/ /usr/local/cuda-9.0/include/
 96 LIBRARY_DIRS := $(PYTHON_LIB) /usr/local/lib /usr/lib /usr/local/cuda-9.0/lib64/
 97
 98 # If Homebrew is installed at a non standard location (for example your home directory) and you use it for general dependencies
 99 # INCLUDE_DIRS += $(shell brew --prefix)/include
100 # LIBRARY_DIRS += $(shell brew --prefix)/lib
101
102 # NCCL acceleration switch (uncomment to build with NCCL)
103 # https://github.com/NVIDIA/nccl (last tested version: v1.2.3-1+cuda8.0)
104 # USE_NCCL := 1
105
106 # Uncomment to use `pkg-config` to specify OpenCV library paths.
107 # (Usually not necessary -- OpenCV libraries are normally installed in one of the above $LIBRARY_DIRS.)
108   USE_PKG_CONFIG := 1
109
110 # N.B. both build and distribute dirs are cleared on `make clean`
111 BUILD_DIR := build
112 DISTRIBUTE_DIR := distribute
113
114 # Uncomment for debugging. Does not work on OSX due to https://github.com/BVLC/caffe/issues/171
115 # DEBUG := 1
116
117 # The ID of the GPU that 'make runtest' will use to run unit tests.
118 TEST_GPUID := 0
119
120 # enable pretty build (comment to see full commands)
121 Q ?= @
编译caffe,要在你git下载的caffe目录下编译
make -j8 # make clean是清除之前编译产生的内容
这里你可能会遇到一些问题,仔细检擦自己的Makefile.config先(要搞明白这个文件),再去百度搜索问题。
第二步 安装opencv3.4.2
同时参考https://blog.csdn.net/dl_chenbo/article/details/78687461/和https://www.jianshu.com/p/c42fc8702f2b,下面只说与他们的不同之处:
1. 本博客所述整个过程只要是安装东西,我都是在激活虚拟环境下安装的,因为本身用虚拟环境就是为了不影响别的用户。
2. 我下载的是3.4.2版本,解压之后如下
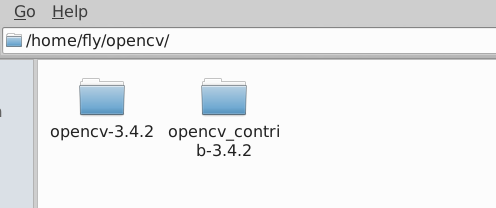
3. CMake 配置如下:(根据自己的目录修改几个小地方)
cmake -D CMAKE_BUILD_TYPE=Release -D INSTALL_PYTHON_EXAMPLES=ON -D INSTALL_C_EXAMPLES=OFF -D BUILD_EXAMPLES=ON -D OPENCV_EXTRA_MODULES_PATH=/home/fly/opencv/opencv_contrib-3.4.2/modules -D CMAKE_LIBRARY_PATH=/usr/local/cuda-9.0/lib64/stubs -D WITH_CUDA=ON -DBUILD_TIFF=ON -DBUILD_opencv_java=OFF -DWITH_OPENGL=ON -DWITH_OPENCL=ON -DWITH_IPP=ON -DWITH_TBB=ON -DWITH_EIGEN=ON -DWITH_V4L=ON -DWITH_VTK=OFF -DBUILD_TESTS=OFF -DBUILD_opencv_dnn=ON -D CUDA_NVCC_FLAGS="-D_FORCE_INLINES --expt-relaxed-constexpr" -DCMAKE_C_COMPILER=/usr/bin/cc -DCMAKE_CXX_COMPILER=/usr/bin/c++ -DBUILD_LIBPROTOBUF_FROM_SOURCES=ON -DBUILD_PERF_TESTS=OFF -DCMAKE_INSTALL_PREFIX=$(python -c "import sys; print(sys.prefix)") -DPYTHON3_EXECUTABLE=$(which python) -DPYTHON_INCLUDE_DIR=$(python -c "from distutils.sysconfig import get_python_inc; print(get_python_inc())") -DPYTHON_PACKAGES_PATH=$(python -c "from distutils.sysconfig import get_python_lib; print(get_python_lib())") -DPYTHON3_NUMPY_INCLUDE_DIRS=$(python -c "import numpy; import os; print(os.path.join(numpy.__path__[0], 'core', 'include'))") -DPYTHON_LIBRARY=/home/fly/anaconda3/envs/caffe/lib/libpython3.5m.so ..
4. 编译遇到许多文件下载不下来
参考https://blog.csdn.net/CSDN330/article/details/86747867

打开这个文件,ctrl+f 查找failed,自然会发现它在哪些个网址下载哪些包(安装不同的版本的opencv对应不同版本的包)的时候失败,以及这些包应该下载的位置,我利用一个插件(类似于vpn)下载了这些包,并且根据参考链接里的方法将下载地址修改为本地,才成功。
还要(重要!)
进入目录:/etc/ld.so.conf.d
创建:opencv.conf # sudo gedit opencv.conf
添加内容:/home/fly/opencv/opencv-3.4.2/build/lib
执行:ldconfig
最后make install别忘了。
补充说明:提供的链接目的是为了更好理解自己的安装。遇到问题,先看链接里面有木有,检查自己的,再百度。
第三步 再次编译caffe(此时你已经安装了opencv)
make clean
make -j8
make test -j8
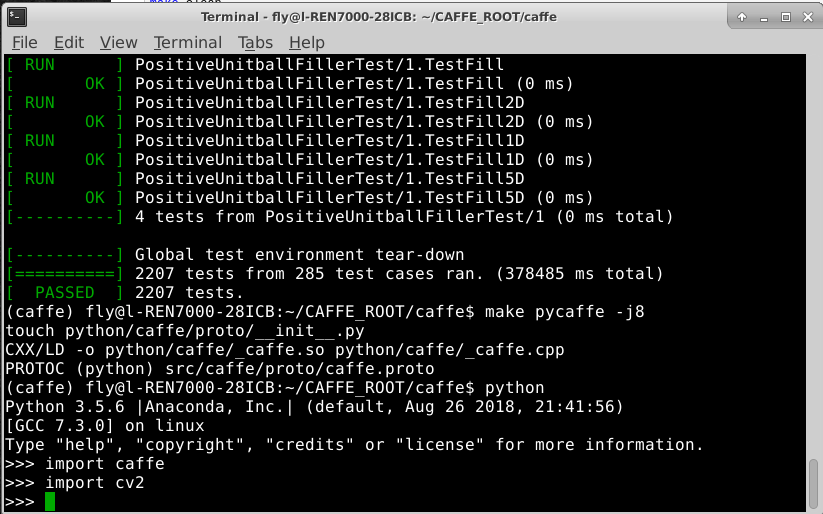
make runtest -j8
make pycaffe -j8
我遇到问题之后就做了下面的事情
进入home/fly/ , sudo gedit ~/.bashrc,再最后加上
export PYTHONPATH=/home/fly/CAFFE_ROOT/caffe/python:$PYTHONPATH #将caffe的python路径加入到环境变量中,为了使得import caffe成功
export PKG_CONFIG_PATH=/home/fly/anaconda3/envs/caffe/lib/pkgconfig:$PKG_CONFIG_PATH # 将opencv库路径加入环境变量
pkg-config opencv --modversion
#这里你可以使用pkg-config opencv --libs看你的opencv安装在哪里,也与makefile.config里面的第108行相呼应。
再次参考https://www.cnblogs.com/whb-20160329/p/10256766.html和https://www.jianshu.com/p/8d309dcc8b99和https://www.jianshu.com/p/c42fc8702f2b后面的部分(根据自己的目录修改),其中这个pip install scikit-image protobuf ,caffe依赖的库一定要装,不然会import不成功。
最终
说明:第一次配置caffe,历时五天,踩了许多坑,参考了很多博客和网站,也收获了不少,希望正在路上安装的不要放弃,搞清楚每一步做了什么,先后顺序。这个博客也是记录一下,有许多不足之处,只能靠各位同仁的努力,会成功的。
