Windows Phone的本地存储——IsolatedStorageSettings
最近找到一个新的学习目标,开始Windows Phone的开发 ^_^,学习途径主要是官方的文档以及网络上搜寻到的一些电子书籍,开通此博客,一来记录一些心得,再者希望将来能和各位热爱Windows Phone开发的同行们多多交流。本篇开始会对WP中的本地存储做一些简单介绍及实践。
在SDK 7.1中,本地存储大致上共有如下三种方式:
- Settings:通过类IsolatedStorageSettings使用键值对的方式存储信息。
- Files: 通过类IsolatedStorageFile可以实现文件,文件夹的管理。
- Local Database: 使用LINQ to SQL来实现对local database的存储及访问。
今天我们来了解如何通过IsolatedStorageSettings来实现信息的本地存储。
在WP中,使用IsolatedStorageSettings来存储本地信息,主要是通过IsolatedStorageSettings中的ApplicationSettings,比如通过下面的代码添加一个新的键值对
 View Code

1 IsolatedStorageSettings settings = IsolatedStorageSettings.ApplicationSettings;
2 settings.Add(key, value);
或者根据Key获取所对应的Value
View Code
1 IsolatedStorageSettings settings = IsolatedStorageSettings.ApplicationSettings;
2 if (settings.Contains(key))
3             {
4                 string value = settings[key].ToString();
5             }
通过上述的方法对setting的值进行操作,我们会发现需要去检查key是否存在,并且对应的Value值是已Object的方式存储的,需要转换成相应的数据类型,如果我们的app中有很多的setting需要处理,这些重复的过程就比较繁琐,所以我们可以封装一个类用来处理对这些setting键值对的处理。
View Code
 1 using System.IO.IsolatedStorage;
 2
 3 namespace FlorCava.WPBasic.StorageSetting
 4 {
 5     public class Setting<T>
 6     {
 7         string name;
 8         T value;
 9         T defaultValue;
10         bool hasValue;
11
12         public Setting(string name, T defaultValue)
13         {
14             this.name = name;
15             this.defaultValue = defaultValue;
16         }
17
18         public T Value
19         {
20             get
21             {
22                 if (!this.hasValue)
23                 {
24                     if (!IsolatedStorageSettings.ApplicationSettings.TryGetValue(this.name, out this.value))
25                     {
26                         this.value = this.defaultValue;
27                         IsolatedStorageSettings.ApplicationSettings[this.name] = this.value;
28                     }
29                     this.hasValue = true;
30                 }
31
32                 return this.value;
33             }
34             set
35             {
36                 IsolatedStorageSettings.ApplicationSettings[this.name] = value;
37                 this.value = value;
38                 this.hasValue = true;
39             }
40         }
41
42         public T DefaultValue
43         {
44             get { return this.defaultValue; }
45         }
46     }
47 }
接下来我们可以创建一个简单的Project来体会对于Setting的处理,创建一个类并利用我们上面封装的Setting类提供两个属性。
View Code
 1 namespace FlorCava.WPBasic.StorageSetting
 2 {
 3     public class AppSettings
 4     {
 5         private Setting<bool> boolSetting = new Setting<bool>("BoolSetting", false);
 6         /// <summary>
 7         /// test setting for bool
 8         /// </summary>
 9         public bool BoolSetting
10         {
11             get
12             {
13                 return boolSetting.Value;
14             }
15             set
16             {
17                 boolSetting.Value = value;
18             }
19         }
20
21         private Setting<string> stringSetting = new Setting<string>("StringSetting", string.Empty);
22         /// <summary>
23         /// test setting for string
24         /// </summary>
25         public string StringSetting
26         {
27             get
28             {
29                 return stringSetting.Value;
30             }
31             set
32             {
33                 stringSetting.Value = value;
34             }
35         }
36
37     }
38 }
然后在main页面中,添加两个控件CheckBox和TextBox,绑定到相关属性并通过TwoWay的方式来更新对Setting的修改。首先在页面上添加对local的声明:
xmlns:local="clr-namespace:FlorCava.WPBasic.StorageSetting"
并在Source中添加对AppSettings的引用:
<phone:PhoneApplicationPage.Resources>
        <local:AppSettings x:Key="appSettings"></local:AppSettings>
    </phone:PhoneApplicationPage.Resources>
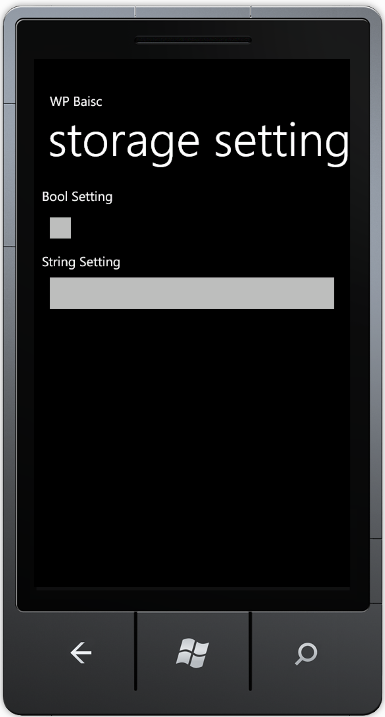
最后我们添加两个控件完成对上述AppSetting的绑定,设定绑定模式为TwoWay,这样当我们修改控件的属性或者内容时,就会同步修改在AppSetting中存储的Setting值。
View Code
1 <StackPanel x:Name="ContentPanel" Grid.Row="1" Margin="12,0,12,0">
2             <TextBlock Text="Bool Setting"/>
3             <CheckBox IsChecked="{Binding Source={StaticResource appSettings},Path=BoolSetting, Mode=TwoWay}" />
4             <TextBlock Text="String Setting"/>
5             <TextBox Text="{Binding Source={StaticResource appSettings}, Path=StringSetting, Mode=TwoWay}"/>
6 </StackPanel>
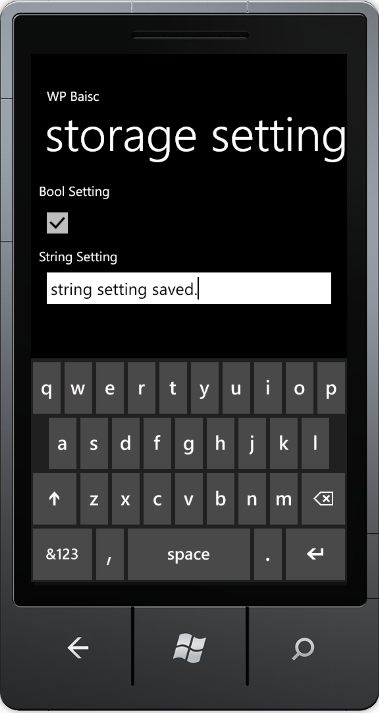
至此已经完成本次对于IsolatedStorageSettings存储测试的编码工作,编译并运行,输入一些内容后,点击Start退出应用,此时会把我们输入的内容通过键值对的方式保存在ApplicationSettings中。