[译] 第十八天:BoilerPipe - Java开发者的文章提取
前言
今天的30天挑战,我决定学习用Java处理从web链接提取文字和图片的问题,这在网站挖掘内容中非常常见,类似Prismatic. 本文,我们来学习用boilerpipe的Java库来完成这个任务。
前提准备
- 掌握Java基础知识。安装最新的Java Development Kit(JDK), 可以安装OpenJDK 7或者Oracle JDK 7, OpenShift支持OpenJDK 6 和7.
- 在OpenShift上注册。OpenShift完全免费,红帽给每个用户免费提供了3个Gears来运行程序。目前,这个资源分配合计有每人1.5GB内存,3GB磁盘空间。
- 在本机安装rhc 客户端工具,rhc是ruby gem包,所以你需要安装1.8.7或以上版本的ruby。安装rhc,输入 sudo gem install rhc. 如果已经安装了,确保是最新的,要更新rhc,输入sudo gem update rhc. 想了解rhc command-line 工具,更多帮助参考https://www.openshift.com/developers/rhc-client-tools-install.
- 用rhc setup 命令安装OpenShift. 执行命令可以帮你创建空间,上传ssh 密钥到OpenShift服务器。
第一步:创建Jboss EAP程序
开始创建demo, 命名newsapp.
$ rhc create-app newsapp jbosseap
如果你能访问普通gears可以用以下命令:
$ rhc create-app newsapp jbosseap -g medium
这会创建一个叫gear的程序容器,安装所需的SELinux策略和cgroup配置,OpenShift也会为你安装一个私有git仓库,克隆到本地,然后它会把DNS传播到网络。可访问http://newsapp-{domain-name}查看程序。替换你自己唯一的OpenShift域名(有时也叫命名空间)。
第二步:添加Maven依赖
在pom.xml中添加依赖。

<dependency>
    <groupId>de.l3s.boilerpipe</groupId>
    <artifactId>boilerpipe</artifactId>
    <version>1.2.0</version>
</dependency>
<dependency>
    <groupId>xerces</groupId>
    <artifactId>xercesImpl</artifactId>
    <version>2.9.1</version>
</dependency>

<dependency>
    <groupId>net.sourceforge.nekohtml</groupId>
    <artifactId>nekohtml</artifactId>
    <version>1.9.13</version>
</dependency>
你也需要新加个仓库。

<repository>
    <id>boilerpipe-m2-repo</id>
    <url>http://boilerpipe.googlecode.com/svn/repo/</url>
    <releases>
        <enabled>true</enabled>
    </releases>
    <snapshots>
        <enabled>false</enabled>
    </snapshots>
</repository>
更新pom.xml里几个属性把maven项目更新到Java 7.

<maven.compiler.source>1.7</maven.compiler.source>
<maven.compiler.target>1.7</maven.compiler.target>
现在更新Maven项目, 右击>Maven>Update Project.
第四步:创建BoilerpipeContentExtractionService
创建BoilerpipeContentExtractionService服务,用来获得url,找文章标题和内容。

import java.net.URL;
import java.util.Collections;
import java.util.List;

import com.newsapp.boilerpipe.image.Image;
import com.newsapp.boilerpipe.image.ImageExtractor;

import de.l3s.boilerpipe.BoilerpipeExtractor;
import de.l3s.boilerpipe.document.TextDocument;
import de.l3s.boilerpipe.extractors.ArticleExtractor;
import de.l3s.boilerpipe.extractors.CommonExtractors;
import de.l3s.boilerpipe.sax.BoilerpipeSAXInput;
import de.l3s.boilerpipe.sax.HTMLDocument;
import de.l3s.boilerpipe.sax.HTMLFetcher;

public class BoilerpipeContentExtractionService {

    public Content content(String url) {
        try {
            final HTMLDocument htmlDoc = HTMLFetcher.fetch(new URL(url));
            final TextDocument doc = new BoilerpipeSAXInput(htmlDoc.toInputSource()).getTextDocument();
            String title = doc.getTitle();

            String content = ArticleExtractor.INSTANCE.getText(doc);

            final BoilerpipeExtractor extractor = CommonExtractors.KEEP_EVERYTHING_EXTRACTOR;
            final ImageExtractor ie = ImageExtractor.INSTANCE;

            List<Image> images = ie.process(new URL(url), extractor);

            Collections.sort(images);
            String image = null;
            if (!images.isEmpty()) {
                image = images.get(0).getSrc();
            }

            return new Content(title, content.substring(0, 200), image);
        } catch (Exception e) {
            return null;
        }

    }
}
以上代码:
- 从给定的url获取文件。
- 分析HTML, 返回TextDocument。
- 从文章内容获取标题。
- 最后,从文章提取内容,返回程序值对象的新实例。
第五步:激活JAX-RS
要激活JAX-RS, 创建一个类继承 javax.ws.rs.core.Application, 指定路径用 javax.ws.rs.ApplicationPath

import javax.ws.rs.ApplicationPath;
import javax.ws.rs.core.Application;

@ApplicationPath("/api/v1")
public class JaxrsInitializer extends Application{


}
第六步:创建ContentExtractionResource
现在创建ContentExtractionResource类,让内容最为JSON返回,新建类ContentExtractionResource, 用以下代码替代。

import javax.inject.Inject;
import javax.ws.rs.GET;
import javax.ws.rs.Path;
import javax.ws.rs.Produces;
import javax.ws.rs.QueryParam;
import javax.ws.rs.core.MediaType;

import com.newsapp.service.BoilerpipeContentExtractionService;
import com.newsapp.service.Content;

@Path("/content")
public class ContentExtractionResource {

    @Inject
    private BoilerpipeContentExtractionService boilerpipeContentExtractionService;

    @GET
    @Produces(value = MediaType.APPLICATION_JSON)
    public Content extractContent(@QueryParam("url") String url) {
        return boilerpipeContentExtractionService.content(url);
    }
}
部署到OpenShift
最后,部署更新到OpenShift.

$ git add .
$ git commit -am "NewApp"
$ git push
代码和war成功推送部署后,可以在http://newsapp-{domain-name}.rhcloud.com查看程序,我的示例http://newsapp-t20.rhcloud.com.
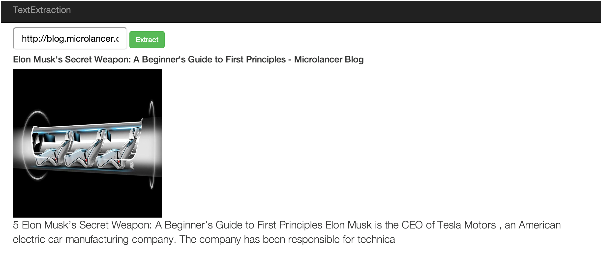
现在可以在程序界面提交一个链接测试。

这就是今天的内容,继续给反馈吧。
原文:https://www.openshift.com/blogs/day-18-boilerpipe-article-extraction-for-java-developers


