
Tomcat会话保持配置方案
基于Tomcat自身集群会话服务配置会话保持功能
1. 本次实验基于同一台机器运行2个tomcat实例进行测试
tomcat01: 172.16.68.73:8080
tomcat02: 172.16.68.73:8081
tomcat版本: 8.0.51
2.tomcat01配置
(1).修改/usr/local/tomcat01/conf/server.xml找到已注册cluster节点,在其后添加如下代码:
<Cluster className="org.apache.catalina.ha.tcp.SimpleTcpCluster"
                 channelSendOptions="8">

          <Manager className="org.apache.catalina.ha.session.DeltaManager"
                   expireSessionsOnShutdown="false"
                   notifyListenersOnReplication="true"/>

          <Channel className="org.apache.catalina.tribes.group.GroupChannel">
            <Membership className="org.apache.catalina.tribes.membership.McastService"
                        address="228.0.0.4"
                        port="45564"
                        frequency="500"
                        dropTime="3000"/>

            <Receiver className="org.apache.catalina.tribes.transport.nio.NioReceiver"
                      address="172.16.68.73"      --IP地址
                      port="4000"          --端口
                      autoBind="100"
                      selectorTimeout="5000"
                      maxThreads="6"/>

            <Sender className="org.apache.catalina.tribes.transport.ReplicationTransmitter">
              <Transport className="org.apache.catalina.tribes.transport.nio.PooledParallelSender"/>
            </Sender>
            <Interceptor className="org.apache.catalina.tribes.group.interceptors.TcpFailureDetector"/>
            <Interceptor className="org.apache.catalina.tribes.group.interceptors.MessageDispatch15Interceptor"/>
          </Channel>

          <Valve className="org.apache.catalina.ha.tcp.ReplicationValve"
                 filter=""/>
          <Valve className="org.apache.catalina.ha.session.JvmRouteBinderValve"/>

          <Deployer className="org.apache.catalina.ha.deploy.FarmWarDeployer"
                    tempDir="/tmp/war-temp/"
                    deployDir="/tmp/war-deploy/"
                    watchDir="/tmp/war-listen/"
                    watchEnabled="false"/>

          <ClusterListener className="org.apache.catalina.ha.session.ClusterSessionListener"/>
        </Cluster>
(2).修改/usr/local/tomcat01/conf/web.xml,在文件最后</webapps>之前添加如下代码
   <distributable/>    --添加该代码
</web-app>
(3).创建测试项目test,将/usr/local/tomcat01/conf/web.xml放到该项目中,
#mkdir -p /usr/local/tomcat01/webapps/test/WEB-INF
#cp /usr/local/tomcat01/conf/web.xml /usr/local/tomcat01/webapps/test/WEB-INF
注:在实际生产环境中直接修改对应项目下的web.xml,然后添加如下的代码即可.例如
#vi /usr/local/tomcat/webapps/b2c/web.xml
   <distributable/>    --添加该代码
</web-app>
3.tomcat02配置
(1).修改/usr/local/tomcat02/conf/server.xml找到已注册cluster节点,在其后添加如下代码:
<Cluster className="org.apache.catalina.ha.tcp.SimpleTcpCluster"
                 channelSendOptions="8">

          <Manager className="org.apache.catalina.ha.session.DeltaManager"
                   expireSessionsOnShutdown="false"
                   notifyListenersOnReplication="true"/>

          <Channel className="org.apache.catalina.tribes.group.GroupChannel">
            <Membership className="org.apache.catalina.tribes.membership.McastService"
                        address="228.0.0.4"
                        port="45564"
                        frequency="500"
                        dropTime="3000"/>
            <Receiver className="org.apache.catalina.tribes.transport.nio.NioReceiver"
                      address="172.16.68.73"    --IP地址
                      port="4001"           --由于在同一台机器上,故修改端口为4001
                      autoBind="100"
                      selectorTimeout="5000"
                      maxThreads="6"/>

            <Sender className="org.apache.catalina.tribes.transport.ReplicationTransmitter">
              <Transport className="org.apache.catalina.tribes.transport.nio.PooledParallelSender"/>
            </Sender>
            <Interceptor className="org.apache.catalina.tribes.group.interceptors.TcpFailureDetector"/>
            <Interceptor className="org.apache.catalina.tribes.group.interceptors.MessageDispatch15Interceptor"/>
          </Channel>

          <Valve className="org.apache.catalina.ha.tcp.ReplicationValve"
                 filter=""/>
          <Valve className="org.apache.catalina.ha.session.JvmRouteBinderValve"/>

          <Deployer className="org.apache.catalina.ha.deploy.FarmWarDeployer"
                    tempDir="/tmp/war-temp/"
                    deployDir="/tmp/war-deploy/"
                    watchDir="/tmp/war-listen/"
                    watchEnabled="false"/>

          <ClusterListener className="org.apache.catalina.ha.session.ClusterSessionListener"/>
        </Cluster>
(2).修改/usr/local/tomcat02/conf/web.xml,在文件最后</webapps>之前添加如下代码
   <distributable/>    --添加该代码
</web-app>
(3).创建测试项目test,将/usr/local/tomcat02/conf/web.xml放到该项目中
#mkdir -p /usr/local/tomcat02/webapps/test/WEB-INF
#cp /usr/local/tomcat02/conf/web.xml /usr/local/tomcat02/webapps/test/WEB-INF
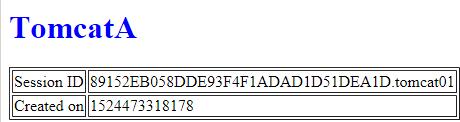
4.创建测试页面进行测试
/usr/local/tomcat01/webapps/test/index.jsp
/usr/local/tomcat02/webapps/test/index.jsp
代码如下:
<%@ page language="java" %>
    <html>
        <head><title>TomcatB</title></head>          --不同的机器显示不同,TomcatA和TomcatB
        <body>
            <h1><font color="blue">TomcatB</h1>
            <table align="centre" border="1">
                <tr>
                    <td>Session ID</td>
                    <% session.setAttribute("abc","abc"); %>
                    <td><%= session.getId() %></td>
                </tr>
                <tr>
                    <td>Created on</td>
                    <td><%= session.getCreationTime() %></td>
                </tr>
            </table>
        </body>
    </html>
5.分别启动Tomcat
#/usr/local/tomcat01/bin/startup.sh
#/usr/local/tomcat02/bin/startup.sh
6.访问页面进行测试

7. Nginx的配置主要是添加upstream指令以及proxy_pass转发即可
upstream tomcat {
        server 172.16.68.73:8080 weight=1;
        server 172.16.68.73:8081 weight=1;
    }
