
项目: 企业级LNMP环境应用实战(完结版)
源码包及其相关rpm包,下载路径:
链接:https://pan.baidu.com/s/1C6qYFuknWBHAL3bsBxv80g
提取码:9bu1
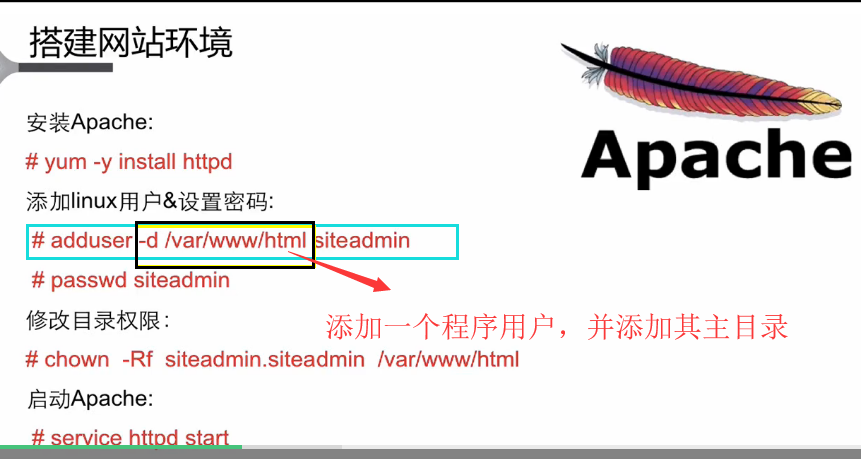
一 部署ngnix:
[root@6 ~]# tar xf nginx-1.10.2.tar.gz -C/usr/src
[root@6 ~]# cd /usr/src/nginx-1.10.2/
[root@6 nginx-1.10.2]# yum -y install pcre-devel openssl-devel #安装支持包
[root@6 nginx-1.10.2]# useradd -s /sbin/nologin -M www
#mysql与ngnix中程序用户最好设置一样
[root@6 nginx-1.10.2]# ./configure --user=www --group=www --prefix=/usr/local/nginx --with-http_stub_status_module --with-http_ssl_module
[root@6 nginx-1.10.2]# make && make install
[root@6 nginx-1.10.2]# ln -s /usr/local/nginx/sbin/* /usr/local/sbin/
#给命令做软连接,以便PATH能找到
[root@6 nginx-1.10.2]# cd /usr/local/nginx/conf/
[root@6 nginx-1.10.2]# egrep -v "#|^$" nginx.conf.default > nginx.conf
[root@6 conf]# cat nginx.conf
worker_processes 1; #worker进程的数量
events {
worker_connections 1024; #每个worker进程支持的最大连接数
}
http {
include mime.types;
default_type application/octet-stream;
sendfile on;
keepalive_timeout 65;
server { 第一个server第一个虚拟主机站
listen 80; #提供服务的端口,默认80
server_name localhost; #提供服务的域名主机名
location / {
root html; 站点的根目录(相对于nginx安装路径)
index index.html index.htm;
}
}
}
[root@6 conf]# ping 10.0.0.8 #排除物理线路问题影响
PING 10.0.0.8 (10.0.0.8) 56(84) bytes of data.
From 192.168.1.104 icmp_seq=3 Destination Host Unreachable
From 192.168.1.104 icmp_seq=6 Destination Host Unreachable
From 192.168.1.104 icmp_seq=9 Destination Host Unreachable
[root@6 conf]# /usr/local/nginx/sbin/nginx #启动
扩展:[root@6 conf]# /usr/local/nginx/sbin/nginx -t #查看配置文件有误否
[root@6 conf]# /usr/local/nginx/sbin/nginx -s reload #平滑重启
[root@6 conf]# /usr/local/nginx/sbin/nginx -s stop #关闭
[root@6 conf]# ss -antup | grep nginx #查看端口是否开启
二 安装mysql数据库(二进制方式):
2.1 创建mysql用户账号:
[root@6 ~]# useradd -s /sbin/nologin -M mysql
[root@6 ~]# tar xf mysql-5.5.32-linux2.6-x86_64.tar.gz -C /usr/local/
[root@6 ~]# cd /usr/local/mysql-5.5.32-linux2.6-x86_64
[root@6 mysql-5.5.32-linux2.6-x86_64]# /bin/cp support-files/my-small.cnf /etc/my.cnf
[root@6 local]# echo "`hostname -I` LNMP" >> /etc/hosts #主机映射
[root@6 local]# ln -s /usr/local/mysql-5.5.32-linux2.6-x86_64 /usr/local/mysql
[root@6 local]#cd /usr/local/mysql
[root@6 mysql]# chown -R mysql.mysql /usr/local/mysql
[root@6 mysql]# yum -y install libaio #安装支持包
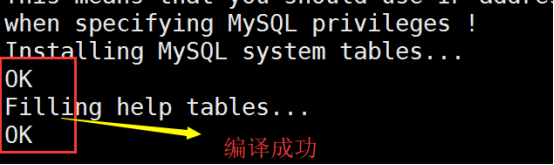
[root@6 mysql-5.5.32-linux2.6-x86_64]# /usr/local/mysql/scripts/mysql_install_db --basedir=/usr/local/mysql --datadir=/usr/local/mysql/data --user=mysql
[root@6 local]# cd /usr/local/mysql
[root@6 mysql]# cp support-files/mysql.server /etc/init.d/mysqld
[root@6 mysql]# chmod +x /etc/init.d/mysqld
[root@6 mysql]# /etc/init.d/mysqld start

[root@6 mysql]# ss -antup | grep 3306 # 检查MySQL数据库是否启动
[root@6 mysql]# ss -antup | egrep "80|3306"
[root@6 mysql]# chkconfig --add mysqld #设置MySQL开机自启动
[root@6 mysql]# chkconfig mysqld on
[root@6 mysql]# chkconfig --list mysqld
mysqld 0:off 1:off 2:on 3:on 4:on 5:on 6:off
(提示:也可以将启动命令/etc/init.d/mysqld start 放到/etc/rc.local里面)
[root@6 mysql]# ln -s /usr/local/mysql/bin/* /usr/local/bin/ #创建mysql命令
[root@6 mysql]# mysql
Welcome to the MySQL monitor. Commands end with ; or \g.
Your MySQL connection id is 1
Copyright (c) 2000, 2013, Oracle and/or its affiliates. All rights reserved.
Oracle is a registered trademark of Oracle Corporation and/or its
affiliates. Other names may be trademarks of their respective
owners.
Type 'help;' or '\h' for help. Type '\c' to clear the current input statement.
mysql> Ctrl-C -- exit!
Server version: 5.5.32 MySQL Community Server (GPL)
[root@6 mysql]# mysqladmin -u root password '123123' #给mysql设密码
三 安装PHP所需的lib库:
3.1安装如下:
[root@6 mysql]# yum -y install zlib-devel libxml2-devel libjpeg-devel libjpeg-turbo-devel libiconv-devel
[root@6 mysql]# yum -y install freetype-devel libpng-devel gd libcurl-devel libxslt-devel
libiconv-devel 这个包安装失败 ------------安装如下:
[root@6 mysql]# cd ~

[root@6 ~]# tar xf libiconv-1.14.tar.gz -C/usr/src
[root@6 ~]# cd /usr/src/libiconv-1.14/
[root@6 libiconv-1.14]# ./configure --prefix=/usr/local/libiconv && make && make install
3.2安装依赖库:
安装libmcrypt库,mhash加密扩展库,mcrvpt加密扩展库,mcrypt:
[root@6 ~]# mkdir rpm #所有依赖库所需rpm包放到这个文件内

安装如下:
[root@6 rpm]# rpm -ivh libmcrypt-2.5.8-9.el6.x86_64.rpm

[root@6 rpm]# rpm -ivh libmcrypt-devel-2.5.8-9.el6.x86_64.rpm
[root@6 rpm]# rpm -ivh mhash-0.9.9.9-3.el6.x86_64.rpm
[root@6 rpm]# rpm -ivh mcrypt-2.6.8-10.el6.x86_64.rpm
(注意:哪个安装报错,就先安装别的,报错的最后安装)
四 开始安装PHP(FastCGI方式)服务:
4.1 解压配置PHP:
[root@6 ~]# tar xf php-5.3.28.tar.gz -C /usr/src/
[root@6 ~]# cd /usr/src/php-5.3.28/
[root@6 php-5.3.28]# ./configure --prefix=/usr/local/php5.3.28 --with-mysql=/usr/local/mysql --with-iconv-dir=/usr/local/libiconv --with-freetype-dir --with-jpeg-dir --with-png-dir --with-zlib --with-libxml-dir=/usr --enable-xml --disable-rpath --enable-safe-mode --enable-bcmath --enable-shmop --enable-sysvsem --enable-inline-optimization --with-curl --with-curlwrappers --enable-mbregex --enable-fpm --enable-mbstring --with-mcrypt --with-gd --enable-gd-native-ttf --with-openssl --with-mhash --enable-pcntl --enable-sockets --with-xmlrpc --enable-zip --enable-soap --enable-short-tags --enable-zend-multibyte --enable-static --with-xsl --with-fpm-user=www --with-fpm-group=www --enable-ftp
(表示需要指定MySQL的安装路径,安装PHP需要的MySQL相关内容。当然,如果没有MySQL软件包,也可以不单独安装,这样的情况可使用--with-mysql=mysqlnd替代--with-mysql=/usr/local/mysql,因为PHP软件里已经自带了连接MySQL的客户端工具)
[root@6 ~]# ln -s /usr/local/mysql/lib/libmysqlclient.so.18 /usr/lib64/
[root@6 ~]# cd /usr/src/php-5.3.28/
[root@6 php-5.3.28]# touch ext/phar/phar.phar
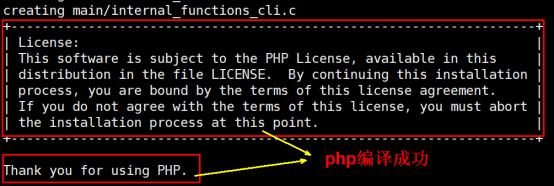
[root@6 php-5.3.28]# make
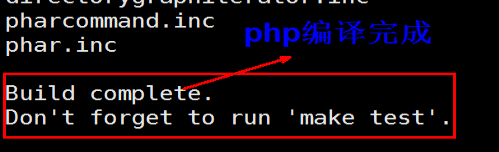
[root@6 php-5.3.28]# make install
[root@6 php-5.3.28]# ln -s /usr/local/php5.3.28/ /usr/local/php
[root@6 php-5.3.28]# cd /usr/local/php
[root@6 local]# cd /usr/src/php-5.3.28/
[root@6 php-5.3.28]# ls php.ini*
php.ini-development php.ini-production
[root@6 php-5.3.28]# cp php.ini-production /usr/local/php/lib/php.ini
[root@6 php-5.3.28]# cd /usr/local/php/etc/
[root@6 etc]# ls
pear.conf php-fpm.conf.default
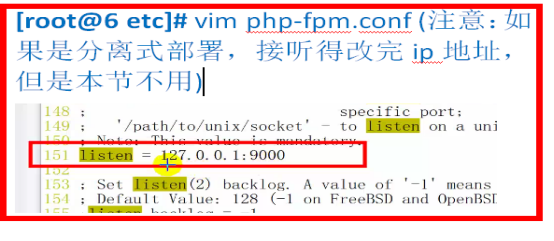
[root@6 etc]# cp php-fpm.conf.default php-fpm.conf
[root@6 etc]# /usr/local/php/sbin/php-fpm #启动PHP服务php-fpm
[root@6 etc]# netstat -antup | grep 9000
tcp 0 0 127.0.0.1:9000 0.0.0.0:* LISTEN 128915/php-fpm
这里9000表示,只能本地访问
扩展:
五 配置Nginx支持PHP程序请求访问,修改Nginx配置文件:
5.1
[root@6 etc]# cd /usr/local/nginx/conf/
[root@6 conf]# vim nginx.conf
worker_processes 1;
error_log logs/error.log;
events {
worker_connections 1024;
}
http {
include mime.types;
worker_processes 1;
error_log logs/error.log;
events {
worker_connections 1024;
}
http {
include mime.types;
default_type application/octet-stream;
sendfile on;
keepalive_timeout 65;
server {
listen 80;
server_name blog.yunjisuan.com;
location / {
root html/blog;
index index.html index.htm;
}
location ~ .*\.(php|php5)?$ {
root html/blog;
index index.html index.htm;
fastcgi_pass 127.0.0.1:9000; #推
fastcgi_index index.php; #动态网站的首页
include fastcgi.conf; #优化配置文件
}
}
}
[root@6 conf]# /usr/local/nginx/sbin/nginx -t #检查配置文件是否正确
[root@6 conf]# /usr/local/nginx/sbin/nginx #启动
[root@6 conf]# cd /usr/local/nginx/html
[root@6 html]# mkdir blog

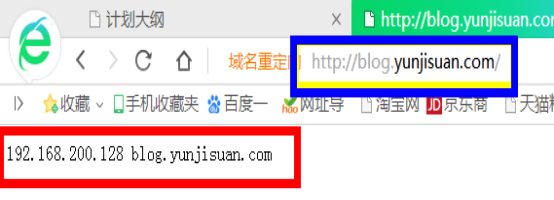
[root@6 html]# echo "`hostname -I` blog.yunjisuan.com" > blog/index.html
[root@6 html]# cat blog/index.html
192.168.200.128 blog.yunjisuan.com
[root@6 html]# echo "`hostname -I` blog.yunjisuan.com" > /etc/hosts #主机映射
[root@6 html]# curl blog.yunjisuan.com #测试
192.168.200.128 blog.yunjisuan.com

360浏览器测试结果:
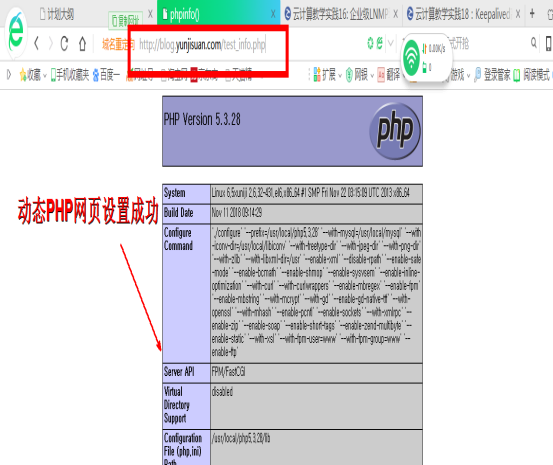
root@6 html]# echo "<?php phpinfo(); ?>" > blog/test_info.php
[root@6 html]# cat blog/test_info.php
<?php phpinfo(); ?>
360浏览器测试PHP动态网页设置是否成功:
http://blog.yunjisuan.com/test_info.php
5.2 mysql数据库与PHP连接测试:
[root@6 blog]# touch test_mysql.php
[root@6 blog]# vim test_mysql.php
输入------------------
<?php
//$link_id=mysql_connect('主机名','用户','密码');
$link_id=mysql_connect('localhost','root','123123');
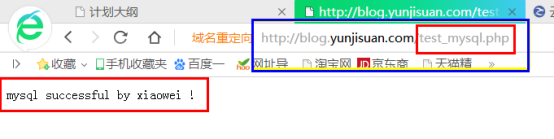
if($link_id){
echo "mysql successful by xiaowei !";
}else{
echo mysql_error();
}
?>

[root@6 blog]# ln -s /usr/local/php/bin/* /usr/local/bin/ #按PHP命令
[root@6 blog]# which php
/usr/local/bin/php
[root@6 blog]# php test_mysql.php #激活与PHP有关的网页
mysql successful by xiaowei ![root@6 blog]# 成功提示语,说明PHP也联通mysql数据库,实现数据交换
360浏览器测试:
六 WordPress 博客程序的搭建准备
6.1 创建一个专用的数据库WordPress,用于存放blog数据,
操作如下:
[root@6 ~]# mysql -uroot -p123123
mysql> create database wordpress; #创建一个数据库,名字为wordpress
Query OK, 1 row affected (0.00 sec)
mysql> show databases like 'wordpress';
+----------------------+
| Database (wordpress) |
+----------------------+
| wordpress |
+----------------------+
1 row in set (0.01 sec)
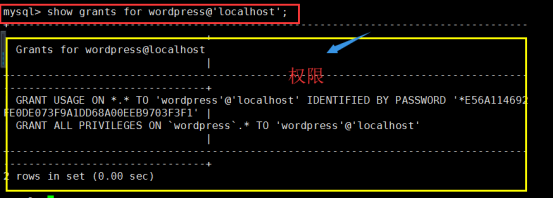
mysql> grant all on wordpress.* to wordpress@'localhost' identified by '123123'; #localhost为客户端地址
mysql> flush privileges; #立即生效
mysql> show grants for wordpress@'localhost'; #查看wordpress有哪些权限
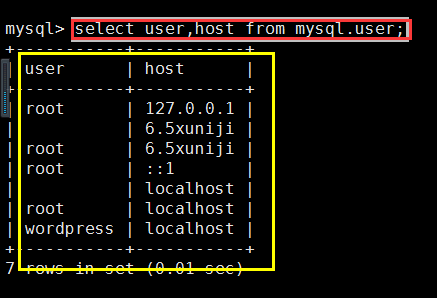
mysql> select user,host from mysql.user; #查看数据库里创建的wordpress用户
6.2 Nginx及PHP环境配置准备
[root@6 ~]# cd /usr/local/nginx/conf/
[root@6 conf]# vim nginx.conf
worker_processes 1;
error_log logs/error.log;
events {
worker_connections 1024;
}
http {
include mime.types;
default_type application/octet-stream;
sendfile on;
keepalive_timeout 65;
server {
listen 80;
server_name blog.yunjisuan.com;
location / {
root html/blog;
Index index.php index.html index.htm; #补充一个首页文件index.php
}
location ~ .*\.(php|php5)?$ {
root html/blog;
index index.html index.htm;
fastcgi_pass 127.0.0.1:9000; #推
fastcgi_index index.php; #动态网站的首页
include fastcgi.conf; #优化配置文件
}
}
}
[root@6 conf]# /usr/local/nginx/sbin/nginx -s reload #重启
[root@6 ~]# ls
[root@6 conf]# cd ~
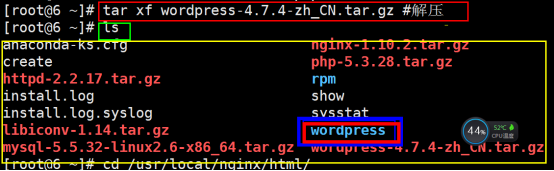
[root@6 ~]# tar xf wordpress-4.7.4-zh_CN.tar.gz #解压
[root@6 ~]#cd /usr/local/nginx/html/blog/
[root@6 blog]# rm -f *
[root@6 blog]# mv /root/wordpress/*

[root@6 blog]# chown -R www.www /usr/local/nginx/html/blog/
# mysql ngnix php 程序用户都设置成一样的
6.3 开始安装blog博客程序
浏览器输入blog.yunjisuan.com,直接跳转到 index.php:
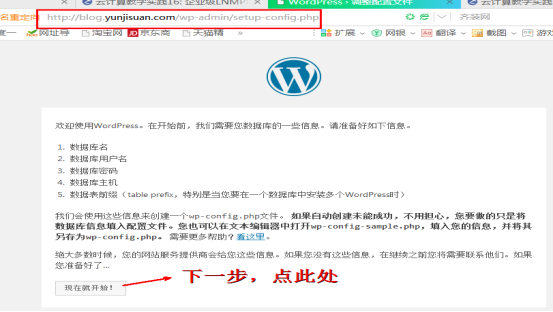
仔细阅读页面的文字信息后,单击“现在就开始”按钮继续,然后在现的页面表单上填写相应的内容,如下图所示:
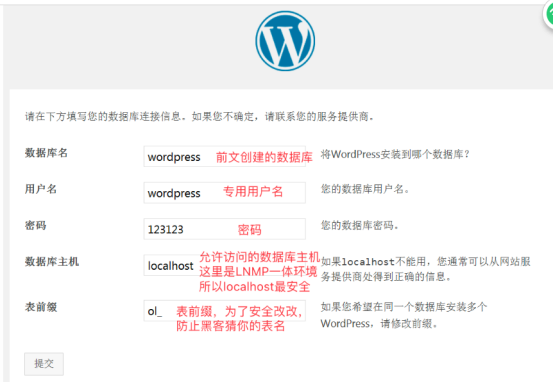
3)在页面表单里填好内容后,单击结尾的“提交”按钮继续,得到下图
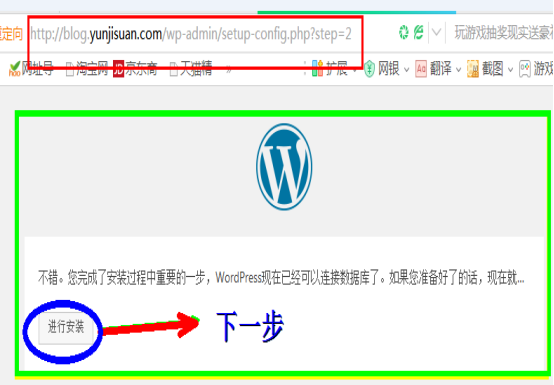
4)出现上图就表示可以安装了,单击“进行安装”按钮继续,进入下图:
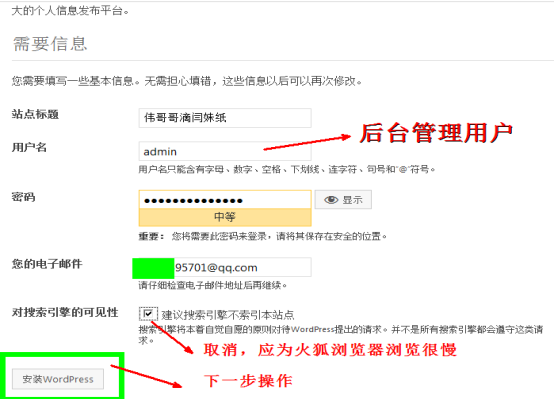
5)根据界面提示设置blog站点的信息后,单击“安装WordPress”按钮继续。
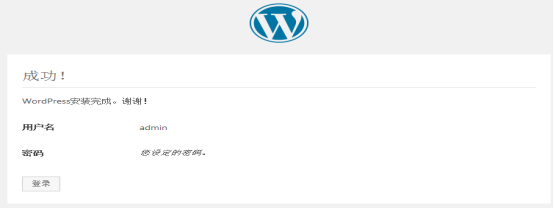
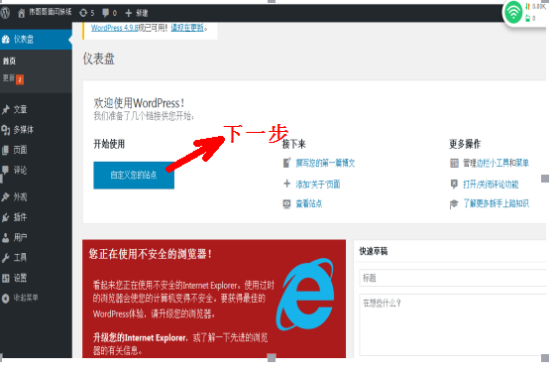
> 出现下图所示的信息就表明已经成功安装了WordPress博客。
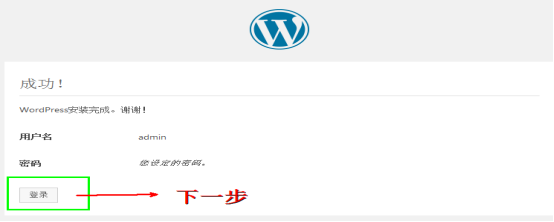
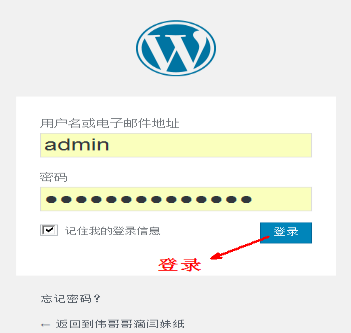
6.4 博客的简单使用
(1)后台登录,如下图:

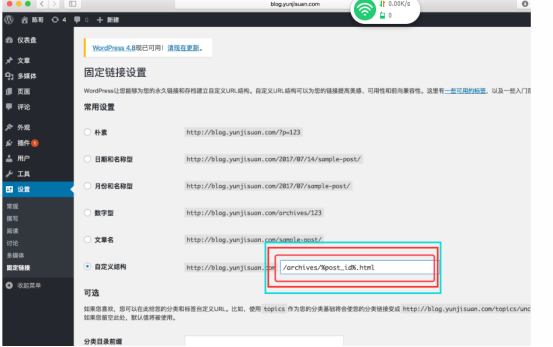
(2) 实现WordPress博客程序URL静态化
实现此功能时,首先要在WordPress后台依次单击设置--->固定链接--->自定义结构,然后输入下面的代码,并保存更改。
- /archives/%post_id%.html
- #说明:%post_id%是数据库对应博文内容的唯一ID,例如423
接着,在Nginx配置文件的server容器中添加下面的代码:
- location / {
- index index.php index.html index.htm;
- if (-f $request_filename/index.html){
- rewrite (.*) $1/index.html break;
- }
- if (-f $request_filename/index.php){
- rewrite (.*) $1/index.php;
- }
- if (!-f $request_filename){
- rewrite (.*) /index.php;
- }
- }
最后检查语法并重新加载Nginx服务,操作如下:
后检查语法并重新加载Nginx服务,操作如下:
- [root@localhost extra]# /usr/local/nginx/sbin/nginx -t
- nginx: the configuration file /usr/local/nginx-1.10.2//conf/nginx.conf syntax is ok
- nginx: configuration file /usr/local/nginx-1.10.2//conf/nginx.conf test is successful
- [root@localhost extra]# /usr/local/nginx/sbin/nginx -s reload
现在可以通过浏览器访问了,如下图所示:

扩展:

.
