使用Grunt自动化任务
使用Grunt自动化任务,本文简单介绍各个插件用途及用法。
more in grunt plugins 有更详细的介绍、示例及配置
Grunt安装
配置文件
- 创建npm配置文件package.json
$ npm init -y
- 手动创建grunt配置文件Gruntfile.js
Gruntfile.js
**注册任务 **
- registerTask(name,function)
**多个任务 **
- registerTask(name,[function,function...])
name:任务名;function:任务执行的函数
// 来自nodejs的模块系统
module.exports = function(grunt) {

  grunt.registerTask('default', function(){
        console.log("Hello Grunt!");
  };

};
- 运行任务
根目录
// grunt默认执行的任务就是`default`,所以也可以直接用`grunt`
$ grunt default

- 给任务传参
module.exports = function(grunt) {

  grunt.registerTask('test', function(name){
        console.log("Hello Grunt!");
		grunt.log.writeln("Hello "+name+"!");
  });

};
$ grunt test:chenjy

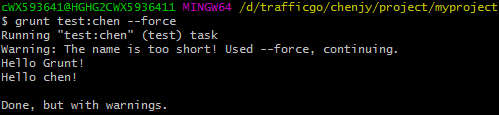
- 错误提示
module.exports = function(grunt) {

  grunt.registerTask('test', function(name){
        if(name.length < 5){
		   grunt.warn("The name is too short!");
		}
        console.log("Hello Grunt!");
		grunt.log.writeln("Hello "+name+"!");
  });

};
$ grunt test:chen

错误会中止后续操作可以使用
grunt test:chen --force继续执行
- 初始化grunt任务参数
可以使用grunt.initConfig()来初始化
module.exports = function(grunt) {

  grunt.initConfig({

	name:"chenjy"

  });

  grunt.registerTask('test', function(){
		grunt.log.writeln("Hello "+grunt.config.get('name')+"!");
  });

};

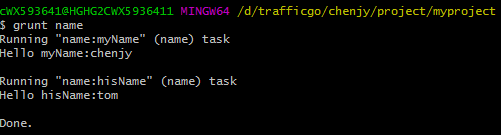
- 多任务
我们也可以使用registerMultiTask注册一个多任务,任务可以根据一组属性执行多次
module.exports = function(grunt) {

  grunt.initConfig({

	name:{
		myName:"chenjy",
		hisName:"tom"
	}

  });

  grunt.registerMultiTask('name', function(){
		grunt.log.writeln("Hello "+this.target+":"+this.data);
  });

};
grunt的API还包括file、log等..
grunt-contrib-copy:文件复制
-
安装
$ npm install grunt-contrib-copy --save-dev -
复制单文件
使用loadNpmTasks加载插件
module.exports = function(grunt) {

 grunt.initConfig({

	// copy属性对应着copy插件
    copy: {
		//自定义一个html属性;属性名可以是任意的合法名称
		html:{
 			/**
			 * 文件写法1;
			 * src属性:要操作的文件或路径;dest属性:目标文件或路径;
			 * {
			 *  src:""
			 *  dest:""
			 * }
			 */

			/**
			 * 文件写法2;
			 * files属性:{目标文件或路径:要操作的文件或路径}
			 * {
			 * 	'':''
			 * }
			 */

			src:'index.html',
			dest:'src/'

			/**
			 * or
			 *
			 * files:{'src/':'index.html'}
			 */

			  }
		  }
  });

  grunt.loadNpmTasks('grunt-contrib-copy');

};

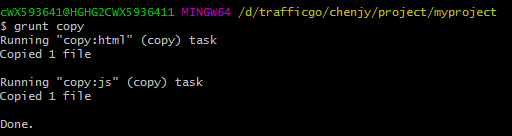
- 复制多文件
module.exports = function(grunt) {

 grunt.initConfig({

    copy: {
		html:{
			src:'index.html',
			dest:'src/'
		},
		js:{
		    src:'app.js',
			dest:'src/'
		}

    }

  });

  grunt.loadNpmTasks('grunt-contrib-copy');

};
grunt-contrib-watch:监视文件变化
- 安装
$ npm install grunt-contrib-watch --save-dev
module.exports = function(grunt) {

 grunt.initConfig({
    copy: {
		html:{
			src:'index.html',
			dest:'src/'
		}

    },
	watch:{
			html:{
				// 要监视的文件
				files:['index.html'],
				// 要执行的任务
				tasks:['copy:html']
			}
		}

  });

  grunt.loadNpmTasks('grunt-contrib-copy');
  grunt.loadNpmTasks('grunt-contrib-watch');

};
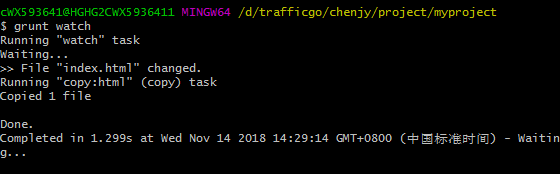
// 任务启动后,一直会监听 当index.html发生变化以后会把index.html`copy`到`src/`文件夹
$ grunt watch
grunt-contrib-connect:创建服务器
- 安装
$ npm install grunt-contrib-connect --save-dev
module.exports = function(grunt) {

 grunt.initConfig({
	 connect:{
		 server:{
			 // 服务器相关配置
			 options:{
				 port:8080,
				 // 服务器根目录
				 base:''
			 }
		 }
	 }

  });

  grunt.loadNpmTasks('grunt-contrib-watch');

};

访问http://localhost:8080/ 会默认打开根目录的index.html
grunt-contrib-sass:编译sass
- 安装
$ npm install grunt-contrib-sass --save-dev
在项目根目录创建一个style.css
**style.css: **
$nav-color: #F90;
nav {
  $width: 100px;
  width: $width;
  color: $nav-color;
}
module.exports = function(grunt) {

  grunt.initConfig({
    sass: {
      dist:{
                files:{
                    // 编译后的生成的css文件:要编译的sass文件
                    'src/style.css':'style.css'
                }
            }
	}
    });


  grunt.loadNpmTasks('grunt-contrib-sass');

};
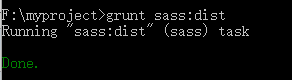
生成的style.css:
nav {
  width: 100px;
  color: #F90; }

/*# sourceMappingURL=style.css.map */
grunt-contrib-less:编译less
- 安装
$ npm install grunt-contrib-less --save-dev
在项目根目录创建一个style.css(官方示例)
**style.css: **
@base: #f938ab;

.box-shadow(@style, @c) when (iscolor(@c)) {
  -webkit-box-shadow: @style @c;
  box-shadow:         @style @c;
}
.box-shadow(@style, @alpha: 50%) when (isnumber(@alpha)) {
  .box-shadow(@style, rgba(0, 0, 0, @alpha));
}
.box {
  color: saturate(@base, 5%);
  border-color: lighten(@base, 30%);
  div { .box-shadow(0 0 5px, 30%) }
}
module.exports = function(grunt) {

 grunt.initConfig({
	less:{
			dist:{
				files:{
					// 编译后的生成的css文件:要编译的less文件
					'src/style.css':'style.css'
				}
			}
		}

  });

  grunt.loadNpmTasks('grunt-contrib-less');

};

生成的style.css:
.box {
  color: #fe33ac;
  border-color: #fdcdea;
}
.box div {
  -webkit-box-shadow: 0 0 5px rgba(0, 0, 0, 0.3);
  box-shadow: 0 0 5px rgba(0, 0, 0, 0.3);
}
grunt-contrib-concat:合并文件
- 安装
$ npm install grunt-contrib-concat --save-dev
在根目录创建两个js文件:
**app1.js **
let name = chenjy;
**app2.js **
console.log(name);
module.exports = function(grunt) {

 grunt.initConfig({
	concat:{
		js:{
			src:['app1.js','app2.js'],
			dest:'src/app.js'
			}
		}

  });

  grunt.loadNpmTasks('grunt-contrib-concat');

};

**app.js: **
let name = chenjy;
console.log(name);
grunt-contrib-uglify:最小化js
- 安装
$ npm install grunt-contrib-uglify --save-dev
我们可以通过bower安装一下angularJS用来测试,可以参见用nodesjs+grunt+bower+angularjs搭建项目

module.exports = function(grunt) {

 grunt.initConfig({
	uglify:{
		dist:{
			// 需要处理的文件
			src:'libs/angular/angular.js',
			dest:'libs/angular/angular2.min.js'
			}
		}

  });

  grunt.loadNpmTasks('grunt-contrib-uglify');

};


grunt-contrib-cssmin:最小化css
- 安装
$ npm install grunt-contrib-cssmin --save-dev
这里再用已经安装好的bootstrap 进行测试
module.exports = function(grunt) {

 grunt.initConfig({
	cssmin:{
		dist:{
			src:'libs/bootstrap/dist/css/bootstrap.css',
			dest:'libs/bootstrap/dist/css/bootstrap2.min.css'
			}
		}

  });

  grunt.loadNpmTasks('grunt-contrib-cssmin');

};


grunt-contrib-htmlmin:最小化html
- 安装
$ npm install grunt-contrib-htmlmin --save-dev
module.exports = function(grunt) {

 grunt.initConfig({
	htmlmin:{
		dist:{
			src:'index.html',
			dest:'src/index.html'
			}
		}

  });

  grunt.loadNpmTasks('grunt-contrib-htmlmin');

};

grunt-contrib-clean:清除文件或文件夹
- 安装
$ npm install grunt-contrib-clean--save-dev
module.exports = function(grunt) {

 grunt.initConfig({
	clean:{
		dist:{
			src:['index.html','src/']
			}
		}

  });

  grunt.loadNpmTasks('grunt-contrib-clean');

};

grunt-contrib-jshint:js语法校验
- 安装
$ npm install grunt-contrib-jshint --save-dev
module.exports = function(grunt) {

 grunt.initConfig({
	jshint:{
		dist:{
			src:['app.js']
			}
		}

  });

  grunt.loadNpmTasks('grunt-contrib-jshint');

};
**app.js: **
let name = chenjy;
console.log(name);
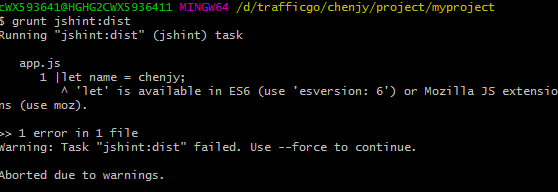
因为使用了es6语法而没有配置所以报错了 如提示所示要在options中配置esversion:6
module.exports = function(grunt) {

 grunt.initConfig({
	jshint:{
		options: {
         esversion: 6
      },
		dist:{
			src:['app.js']
			}
		}

  });

  grunt.loadNpmTasks('grunt-contrib-jshint');

};

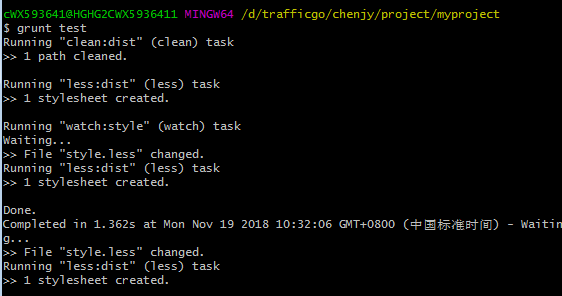
live load less
我们可以通过多个插件的组合使用,完成一系列更高级的自动化任务。如live load less,当我们修改了less文件以后,自动编译生成css文件。
我们可以用grunt-contrib-watch监视本地less文件的变化。当文件发生变化,使用grunt-contrib-clean清除旧的css文件,然后使用 grunt-contrib-less重新编译less。
**Gruntfile.js: **
module.exports = function(grunt) {

	grunt.initConfig({
		clean: {
			dist: 'src'
		},
		less: {
			dist: {
				files: [{
					expand: true,
					src: ['*.less'],
					dest: 'style/',
					ext: '.css'
				}]
			}
		},
		watch: {
			style: {
				files: ['*.less'],
				tasks: ['less']
			}
		}

	});

	grunt.loadNpmTasks('grunt-contrib-clean');
	grunt.loadNpmTasks('grunt-contrib-less');
	grunt.loadNpmTasks('grunt-contrib-watch');

	grunt.registerTask('test', ['clean:dist', 'less:dist', 'watch:style']);

};
grunt test
-
我们在根目录创建一个空的
style.less文件,style会自动生成一个style.css,即编译后的css文件。 -
我们修改
style.less添加测试代码
@width: 10px;
@height: @width + 10px;

#header {
  width: @width;
  height: @height;
}
- 自动编译生成
**style.css: **
#header {
  width: 10px;
  height: 20px;
}