CSS float浅析
写在开篇:
浮动属性的设计初衷,只是为了实现文本环绕效果!
时刻牢记这一点,才能正确使用浮动。
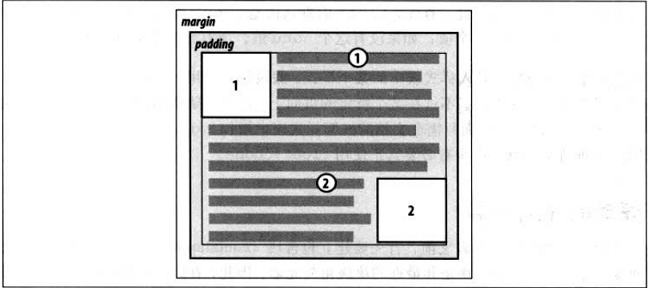
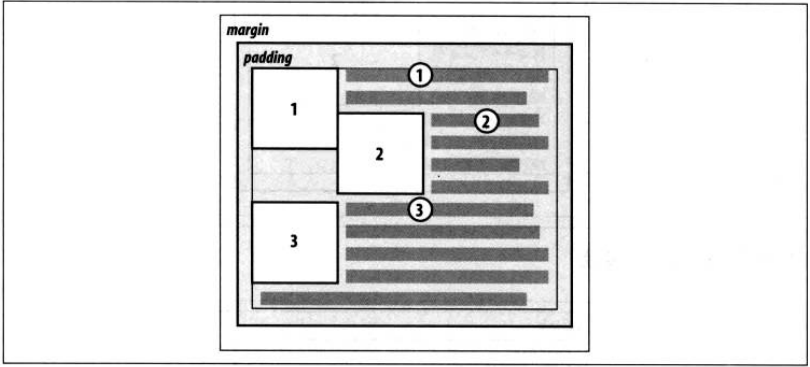
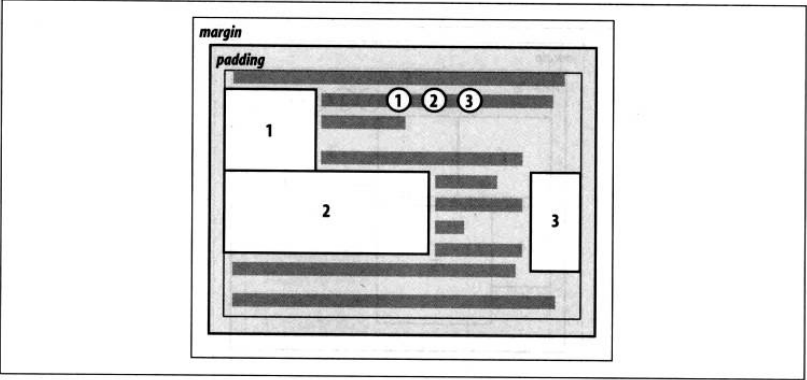
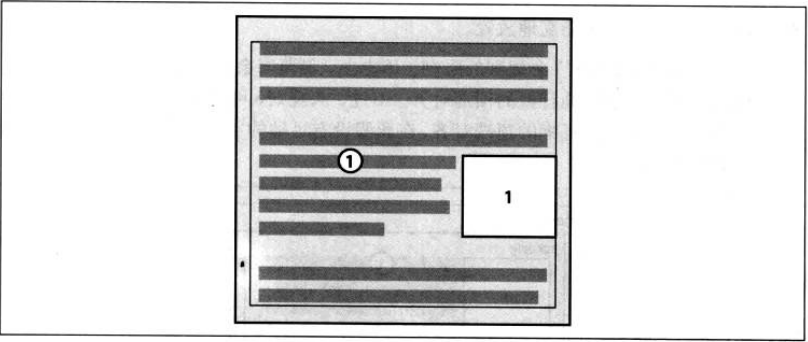
由于浮动元素脱离文档流,它后面的块级元素会忽略它的存在,占据它原本的位置,但是这个块级元素中的内联元素,在流入页面时会考虑浮动元素的边界,它们会围绕着浮动元素。
浮动元素的特征:
1.浮动元素脱离文档流。
2.浮动元素周围的外边距不会合并。
3.浮动元素具有包裹性。
4.浮动元素具有破坏性。
下面这段代码,能够验证上述的四个特征:

  1 <!DOCTYPE html>
  2 <html>
  3     <head>
  4         <meta charset="utf-8">
  5         <title>浮动</title>
  6         <style>
  7             * {
  8                 margin: 0;
  9             }
 10
 11             .main {
 12                 width:750px;
 13                 margin:30px auto;
 14                 position: relative;
 15             }
 16
 17             .wraper {
 18                 width:410px;
 19                 background-color: #ccc;
 20                 margin-bottom: 30px;
 21             }
 22
 23             .container {
 24                 background-color: green;
 25                 width: 350px;
 26                 margin-left: 30px;
 27             }
 28
 29             .contain {
 30                 background-color: green;
 31                 margin-left: 30px;
 32             }/*有宽度的容器不会自动收缩,不能体现包裹性,这里去掉容器的宽度*/
 33
 34             .float {
 35                 float:left;
 36             }
 37
 38             .clearfix:after {
 39                  content: "";
 40                  display: table;
 41                  clear: both;
 42              }
 43
 44             .clearfix {
 45                  *zoom: 1;
 46              }
 47
 48             .box1 {
 49                 height: 50px;
 50                 width: 100px;
 51                 background-color: red;
 52                 margin: 20px;
 53             }
 54
 55             .box2 {
 56                 height: 100px;
 57                 width: 200px;
 58                 background-color: blue;
 59                 margin: 20px;
 60             }
 61
 62             .list {
 63                 background-color: orange;
 64                 line-height: 1.5;
 65                 width: 300px;
 66                 position: absolute;
 67                 top: 0;
 68                 right: 0;
 69             }
 70
 71             li {
 72                 margin-bottom: 80px;
 73             }
 74
 75         </style>
 76     </head>
 77
 78     <body>
 79         <div class="main">
 80             <div class="wraper">
 81                 <div class="container">
 82                     <div class="box1">box1</div>
 83                     <div class="box2">box2</div>
 84                 </div><!--结束container-->
 85             </div><!--结束wraper-->
 86             <div class="wraper clearfix">
 87                 <div class="contain float">
 88                     <div class="box1">box1</div>
 89                     <div class="box2">box2</div>
 90                 </div><!--结束container-->
 91             </div><!--结束wraper-->
 92             <div class="wraper">
 93                 <div class="container">
 94                     <div class="box1 float">box1</div>
 95                     <div class="box2">box2</div>
 96                 </div><!--结束container-->
 97             </div><!--结束wraper-->
 98             <div class="wraper clearfix">
 99                 <div class="container">
100                     <div class="box1">box1</div>
101                     <div class="box2 float">box2</div>
102                 </div><!--结束container-->
103             </div><!--结束wraper-->
104             <div class="list">
105                 <ol>
106                     <li>第一幅图中,box1与box2在一个绿色的容器中垂直摆放,box1的margin-bottom与box2的margin-top合并,所以它们的margin为20px。</li>
107                     <li>第二幅图中,将绿色容器浮动,浮动之后容器紧紧包裹着里面的元素,是为包裹性。(要体现包裹性,一定不要设置浮动元素的宽度,否则不会自动收缩)
108                     </li>
109                     <li>第三幅图中,将box1浮动,box1脱离文档流,box2向上占据box1的位置,它们的上外边距没有合并。<br />
110                         字符“box2”如此显示是box1的margin-top和margin-right的原因。
111                     </li>
112                     <li>第四幅图中,将box2浮动,容器的高度塌陷;box2的上外边距与box1的下外边距没有合并。
113                     </li>
114                 </ol>
115             </div><!--结束list-->
116         </div><!--结束main-->
117     </body>
118 </html>
深入理解float的破坏性:

 1 <!DOCTYPE html>
 2 <html>
 3     <head>
 4         <meta charset="utf-8">
 5         <title>深入理解float的破坏性</title>
 6         <style>
 7             body {
 8                 font-size: 16px;
 9                 line-height: 1.5;
10             }
11
12             .container {
13                 width:50%;
14                 margin-left: auto;
15                 margin-right: auto;
16             }
17
18             .box1,.box2 {
19                 background-color: cyan;
20                 margin-bottom: 50px;
21             }
22
23             .box1 img,.box2 img {
24                 margin:5px;
25                 padding:5px;
26                 border:1px solid red;
27             }
28
29             .box2 img,.box4 img {
30                 float:left;
31
32             }
33
34             .box3 {
35                 margin-top: 100px;
36                 margin-bottom: 50px;
37             }
38
39             .box3,.box4 {
40                 border:2px solid cyan;
41             }
42
43         </style>
44     </head>
45
46     <body>
47         <div class="container">
48             <div class="box1">
49                 <p>这个盒子中的图像没有浮动。我们先来研究一下,图像在没有浮动的情况下,为什么会这样显示?</p>
50                 <p>首先,每一个行内元素都会形成一个行内框,没有被任何标签包含的文本被称为“匿名行内元素”,(文本)行内框的高度为line-height的高度;
51                     <img src="http://a.hiphotos.baidu.com/zhidao/pic/item/72f082025aafa40fa38bfc55a964034f79f019ec.jpg" alt="A picture" style="width:140px;height:80px" />
52                     图像的行内框的高度就是它自身盒子的高度(height+padding+border+margin)。
53                 </p>
54                 <p>然后,每一行都会形成一个行框,行框必须包含这一行中最高行内框的顶端和最低行内框的底端;于是,这个盒子中的文本和图像就是这样显示了。</p>
55                 <p>当所有的行框组合在一起,就形成了整个段落的包含框(containing box,包含盒子)。
56             </div><!--关闭box1-->
57             <div class="box2">
58                 <p>这是第二个盒子,图像浮动了。</p>
59                 <p>如果浮动只是改变了图像的位置,那么图像应该依旧与自己所在的那一行文字在同一行上,然而它并没有。
60                    与它在同一行的文本重新形成了行框,这个行框的形成完全忽略了图像的行内框。也就是说,因为浮动的破坏性,图像的行内框没有了。
61                 </p>
62                 <p>所有的行框组成这个段落的包含框,可以明显看到,这个段落的包含框没有把浮动图像包含在内。</p>
63                 <p>总结:浮动的破坏性实际上破坏了浮动元素的高度,浮动元素的高度为0。
64                 <p><img src="http://a.hiphotos.baidu.com/zhidao/pic/item/72f082025aafa40fa38bfc55a964034f79f019ec.jpg" alt="A picture" style="width:140px;height:80px" /></p>
65                 但是浮动元素是有宽度的,正是因为它有宽度,所以才会有文本环绕效果。</p>
66             </div><!--关闭box2-->
67             <div class="box3">
68                 <img src="http://a.hiphotos.baidu.com/zhidao/pic/item/72f082025aafa40fa38bfc55a964034f79f019ec.jpg" alt="A picture" style="width:140px;height:80px" /> 图像没有浮动
69             </div><!--关闭box3-->
70             <div class="box4">
71                 <img src="http://a.hiphotos.baidu.com/zhidao/pic/item/72f082025aafa40fa38bfc55a964034f79f019ec.jpg" alt="A picture" style="width:140px;height:80px" /> 图像浮动,父元素高度塌陷
72             </div><!--关闭box4-->
73         </div><!--关闭container-->
74     </body>
75 </html>
小tips:
父元素overflow: auto; 可解决浮动元素高度塌陷问题。
将元素浮动前,要设置body元素的margin和padding,以避免各浏览器的页面差异。
5.浮动元素块状化。不管元素本身是什么(inline/inline-block/block),只要浮动,自带display:inline-block声明。
浮动的规则:
首先,必须了解浮动元素包含块的概念。
浮动元素的包含块,是其最近的块级祖先元素。
规则1:左浮动的元素,左外边界不能超出其包含块的左内边界。(浮动元素不能超出其包含块的内容区)

规则2:左浮动的元素,左外边界必须是源文档中之前出现的左浮动元素的右外边界;除非后出现的浮动元素的顶端在先出现的浮动元素的底端下面,那么这个后出现的左浮动元素会一直浮动到其包含块的左内边界。

规则3:左浮动元素的右外边界不会与右浮动元素的左外边界交叉。
(如果两个浮动元素加起来的宽度大于包含块的宽度,那么后一个浮动元素将会向下浮动,直到其顶端在前一个浮动元素的底端之下。)

规则4:一个浮动元素的顶端不能超出其包含块的上内边界。(浮动元素不能超出其包含块的内容区)

规则5:浮动元素的顶端不能比它之前所有浮动元素或者块级元素的顶端更高。

规则6:如果一个段落中有一个浮动图像,这个图像的顶端最高只能到该图像所在行框的顶端。

规则7:如果有多个元素连续浮动,浮动元素不能超出包含块的内容区,除非某一浮动元素本身宽度就比包含块的内容区大。
规则8:在满足以上规则的条件下,浮动元素要浮动得尽可能高、尽可能远。
关于浮动元素负外边距:

 1 <!DOCTYPE html>
 2 <html>
 3     <head>
 4         <meta charset="utf-8">
 5         <title>浮动元素的margin值</title>
 6         <style>
 7             * {
 8                 margin: 0;
 9             }
10
11             body {
12                 font-size: 16px;
13                 line-height: 1.5;
14             }
15
16             .box1,.box2 {
17                 width: 500px;
18                 margin: 20px auto 50px auto;
19                 background-color: cyan;
20                 border: 1px solid black;
21             }
22
23             img {
24                 border: 1px solid red;
25                 float: left;
26             }
27
28             .box1 img {
29                 margin: -70px 20px 20px -50px;
30             }
31
32             .box2 img {
33                 margin-right: -30px;
34             }
35
36             p {
37                 margin: 10px;
38             }
39
40             span {
41                 background-color: red;
42                 border: 1px solid black;
43             }
44
45             .blockElement {
46                 border: 1px solid yellow;
47                 background-color: green;
48                 margin: 10px;
49             }
50
51         </style>
52     </head>
53
54     <body>
55         <div class="box1">
56             <img src="http://imgsrc.baidu.com/forum/w%3D580/sign=0c101fe665380cd7e61ea2e59145ad14/f9a3492762d0f7032de1758a08fa513d2797c542.jpg" alt="a picture" style="width:140px;height:210px" />
57             <p>浮动元素可以设置负外边距。</p>
58             <p>如果左浮动图像将左外边和上外边距距设为负值,则图像向左和向上移动相应的距离。</p>
59             <p>此浮动图像的margin-left为-50px,margin-top为-70px;图像向左移动了50px的距离,向上移动了70px的距离</p>
60             <p>如果浮动图像margin负值过大,相应地一部分图像将会移动到视窗之外(不可见)。</p>
61             <p>浮动图像可以设置margin值,来控制与周围文本的距离。</p>
62             <p>此浮动图像的margin-right为20px,margin-bottom为20px。</p>
63         </div>
64         <div class="box2">
65             <img src="http://imgsrc.baidu.com/forum/w%3D580/sign=0c101fe665380cd7e61ea2e59145ad14/f9a3492762d0f7032de1758a08fa513d2797c542.jpg" alt="a picture" style="width:140px;height:210px" />
66             <p>如果左浮动图像将右外边距设为负值,那么浮动图像位置不动,其右边的文本向左移动相应的距离。</p>
67             <span>如果右边的文本是行内元素,则其边框、背景和文字都将在图像之上显示;</span>
68             <div class="blockElement">如果右边的文本是块级元素,则只有文本会在图像之上显示,边框和背景在图像之下显示。</div>
69         </div>
70     </body>
71 </html>
对于定宽的左浮动元素,margin-left为负,元素向左移动;margin-right为负,浮动元素原地不动,其后的行内元素向左移动;两个都为负,两种效果结合。
对于不定宽的左浮动元素,margin-left为负,元素的宽度向左扩展;margin-right为负,元素的宽度向右扩展;两个都为负,向两边扩展。
初步结论:只要显式地设置了width属性,都是定宽;只有没有显式地设置width属性,才有可能是不定宽。
通过浮动元素负外边距实现不改变DOM结构的流体布局:

 1 <!DOCTYPE html>
 2 <html>
 3     <head>
 4         <meta charset="utf-8">
 5         <title>不改变DOM结构的流体布局</title>
 6         <style>
 7             .container {
 8                 width:700px;
 9                 margin: 50px auto;
10                 background-color: orange;
11                 font-size: 16px;
12                 line-height: 1.5;
13             }
14
15             .box1 {
16                 width:100%;
17                 float:left;
18             }
19
20             img {
21                 float: left;
22                 margin-left: -200px;
23             }
24
25             .box2 {
26                 margin-right: 230px;
27             }
28
29             .clearfix:after {
30                 content: "";
31                 display: table;
32                 clear: both;
33             }
34
35             .clearfix {
36                 *zoom: 1;
37             }
38
39             h3,p {
40                 padding-left: 10px;
41             }
42
43         </style>
44     </head>
45     <body>
46         <div class="container clearfix">
47             <div class="box1">
48                 <div class="box2">
49                 <h3>不改变DOM位置的流体布局</h3>
50                 <p>假如有一段文本和一幅图像,在DOM节点中,文本在前,图像在后,怎么能把图像定位到右边呢?</p>
51                 <p>通常的做法是,调换DOM节点中图像与文本的位置,让图像在前,文本在后,然后将图像浮动到右边即可。</p>
52                 <p>但这样改变DOM节点顺序始终不妥,还有什么更好的方法呢?</p>
53                 <p>下面就介绍一种新的思路来完成布局。</p>
54                 <ul>
55                     <li>将文本用div包起来,定义为box1;现在的结构是一个box1和一个img。</li>
56                     <li>将box1宽度设为100%,左浮动;将img设置一个宽度,也左浮动,然后margin-left设为负的宽度值;此时图像就定位到文本的右边啦。
57                     (或者,将box1的宽度设为100%,左浮动,并且margin-right为负的图像宽度;图像也会定位到文本右边。)</li>
58                     <li>但是有一个问题,图像盖住了文本内容,这可怎么办?</li>
59                     <li>重点来了,在box1中增加一个box2,box2把文本全部包起来,然后margin-right设为图像的宽度(+额外的间距),这样就解决问题啦!</li>
60                 </ul>
61                 </div><!--关闭box2-->
62             </div><!--关闭box1-->
63             <img src="http://imgsrc.baidu.com/forum/w%3D580/sign=0c101fe665380cd7e61ea2e59145ad14/f9a3492762d0f7032de1758a08fa513d2797c542.jpg" alt="a picture" style="width:200px;height:300px" />
64         </div><!--关闭container-->
65     </body>
66 </html>
想一下我们是如何将图像从文本的下面定位到文本的右边的?
第一种方法,文本宽度100%,左浮动,图像自身宽度,也左浮动;可以这样想,如果视窗的宽度足够,两个相邻的浮动元素本应该是紧挨着的,后浮动的图像开启了margin负值位移技能,向左边移动,当它向左移动的距离等于或者大于自身宽度,它整个图像都将会覆盖在文本之上。
第二种方法,文本宽度100%,左浮动,margin-right为负值;可以这样理解,普通流中,文本占据一整行的宽度,但是可以通过margin调整它在普通流中所占的空间,当margin为正,所占的空间向外边扩展,当margin为负,所占的空间向里面收缩;当margin-right为负的图像宽度时,文本右侧收缩出来的宽度刚好够图形容身。


