

图像处理---《在图片上打印文字 windows+GDI+TrueType字体》
图像处理---《在图片上打印文字 windows+GDI+TrueType字体》
刚开始使用的是putText()函数做,缺陷是只能显示非中文; 接着,看大多数推荐Freetype库来做,尝试了,可以的,适合图像输入的是IPLImage格式,其他格式需要转换一下;现在,看到可以不使用Freetype库做的,也尝试了,好用:
上接前几篇,(3)“采用windows的GDI显示系统的TrueType字体,没有封装,就两个函数,分成了h和cpp文件,可以自己编辑文件名和函数名,亦可以直接将cpp的代码复制到你需要的程序中。”
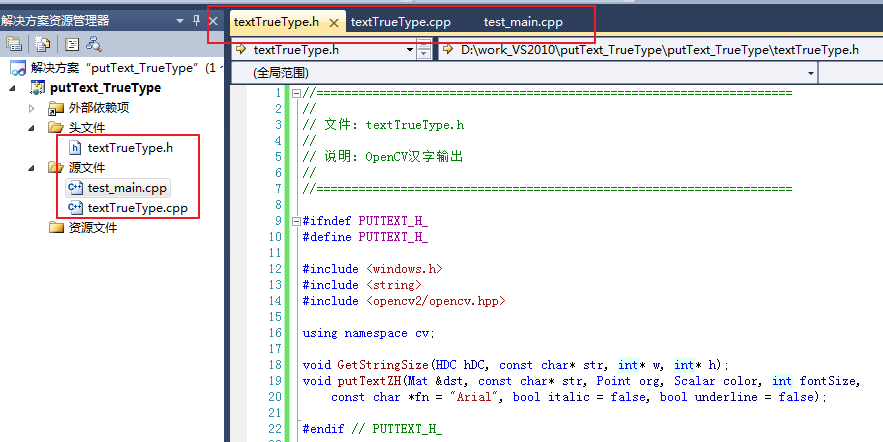
//====================================================================
//
// 文件: textTrueType.h
//
// 说明: OpenCV汉字输出
//
//====================================================================

#ifndef PUTTEXT_H_
#define PUTTEXT_H_

#include <windows.h>
#include <string>
#include <opencv2/opencv.hpp>

using namespace cv;

void GetStringSize(HDC hDC, const char* str, int* w, int* h);
void putTextZH(Mat &dst, const char* str, Point org, Scalar color, int fontSize,
    const char *fn = "Arial", bool italic = false, bool underline = false);

#endif // PUTTEXT_H_
//====================================================================
//
// 文件: textTrueType.cpp
//
// 说明: OpenCV汉字输出
//
//====================================================================

//#include "putText.h"
#include "textTrueType.h"

void GetStringSize(HDC hDC, const char* str, int* w, int* h)
{
    SIZE size;
    GetTextExtentPoint32A(hDC, str, strlen(str), &size);
    if (w != 0) *w = size.cx;
    if (h != 0) *h = size.cy;
}

void putTextZH(Mat &dst, const char* str, Point org, Scalar color, int fontSize, const char* fn, bool italic, bool underline)
{
    CV_Assert(dst.data != 0 && (dst.channels() == 1 || dst.channels() == 3));

    int x, y, r, b;
    if (org.x > dst.cols || org.y > dst.rows) return;
    x = org.x < 0 ? -org.x : 0;
    y = org.y < 0 ? -org.y : 0;

    LOGFONTA lf;
    lf.lfHeight = -fontSize;
    lf.lfWidth = 0;
    lf.lfEscapement = 0;
    lf.lfOrientation = 0;
    lf.lfWeight = 5;
    lf.lfItalic = italic;   //斜体
    lf.lfUnderline = underline; //下划线
    lf.lfStrikeOut = 0;
    lf.lfCharSet = DEFAULT_CHARSET;
    lf.lfOutPrecision = 0;
    lf.lfClipPrecision = 0;
    lf.lfQuality = PROOF_QUALITY;
    lf.lfPitchAndFamily = 0;
    strcpy_s(lf.lfFaceName, fn);

    HFONT hf = CreateFontIndirectA(&lf);
    HDC hDC = CreateCompatibleDC(0);
    HFONT hOldFont = (HFONT)SelectObject(hDC, hf);

    int strBaseW = 0, strBaseH = 0;
    int singleRow = 0;
    char buf[1 << 12];
    strcpy_s(buf, str);
    char *bufT[1 << 12];  // 这个用于分隔字符串后剩余的字符,可能会超出。
    //处理多行
    {
        int nnh = 0;
        int cw, ch;

        const char* ln = strtok_s(buf, "\n",bufT);
        while (ln != 0)
        {
            GetStringSize(hDC, ln, &cw, &ch);
            strBaseW = max(strBaseW, cw);
            strBaseH = max(strBaseH, ch);

            ln = strtok_s(0, "\n",bufT);
            nnh++;
        }
        singleRow = strBaseH;
        strBaseH *= nnh;
    }

    if (org.x + strBaseW < 0 || org.y + strBaseH < 0)
    {
        SelectObject(hDC, hOldFont);
        DeleteObject(hf);
        DeleteObject(hDC);
        return;
    }

    r = org.x + strBaseW > dst.cols ? dst.cols - org.x - 1 : strBaseW - 1;
    b = org.y + strBaseH > dst.rows ? dst.rows - org.y - 1 : strBaseH - 1;
    org.x = org.x < 0 ? 0 : org.x;
    org.y = org.y < 0 ? 0 : org.y;

    BITMAPINFO bmp = { 0 };
    BITMAPINFOHEADER& bih = bmp.bmiHeader;
    int strDrawLineStep = strBaseW * 3 % 4 == 0 ? strBaseW * 3 : (strBaseW * 3 + 4 - ((strBaseW * 3) % 4));

    bih.biSize = sizeof(BITMAPINFOHEADER);
    bih.biWidth = strBaseW;
    bih.biHeight = strBaseH;
    bih.biPlanes = 1;
    bih.biBitCount = 24;
    bih.biCompression = BI_RGB;
    bih.biSizeImage = strBaseH * strDrawLineStep;
    bih.biClrUsed = 0;
    bih.biClrImportant = 0;

    void* pDibData = 0;
    HBITMAP hBmp = CreateDIBSection(hDC, &bmp, DIB_RGB_COLORS, &pDibData, 0, 0);

    CV_Assert(pDibData != 0);
    HBITMAP hOldBmp = (HBITMAP)SelectObject(hDC, hBmp);

    //color.val[2], color.val[1], color.val[0]
    SetTextColor(hDC, RGB(255, 255, 255));
    SetBkColor(hDC, 0);
    //SetStretchBltMode(hDC, COLORONCOLOR);

    strcpy_s(buf, str);
    const char* ln = strtok_s(buf, "\n",bufT);
    int outTextY = 0;
    while (ln != 0)
    {
        TextOutA(hDC, 0, outTextY, ln, strlen(ln));
        outTextY += singleRow;
        ln = strtok_s(0, "\n",bufT);
    }
    uchar* dstData = (uchar*)dst.data;
    int dstStep = dst.step / sizeof(dstData[0]);
    unsigned char* pImg = (unsigned char*)dst.data + org.x * dst.channels() + org.y * dstStep;
    unsigned char* pStr = (unsigned char*)pDibData + x * 3;
    for (int tty = y; tty <= b; ++tty)
    {
        unsigned char* subImg = pImg + (tty - y) * dstStep;
        unsigned char* subStr = pStr + (strBaseH - tty - 1) * strDrawLineStep;
        for (int ttx = x; ttx <= r; ++ttx)
        {
            for (int n = 0; n < dst.channels(); ++n){
                double vtxt = subStr[n] / 255.0;
                int cvv = vtxt * color.val[n] + (1 - vtxt) * subImg[n];
                subImg[n] = cvv > 255 ? 255 : (cvv < 0 ? 0 : cvv);
            }

            subStr += 3;
            subImg += dst.channels();
        }
    }

    SelectObject(hDC, hOldBmp);
    SelectObject(hDC, hOldFont);
    DeleteObject(hf);
    DeleteObject(hBmp);
    DeleteDC(hDC);
}
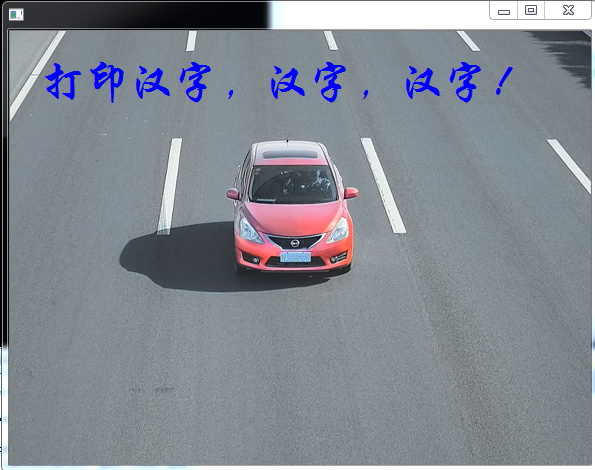
//====================================================================
//
// 文件: test_main.cpp
//
// 说明: OpenCV汉字输出,测试主函数
//
//====================================================================
#include "opencv2/opencv.hpp"

//#include "putText.h"
#include "textTrueType.h"

using namespace std;
using namespace cv;

/*int main()
{
    Mat img = imread("D:\\005_test_4\\testImg\\road_6.png");

    putTextZH(img, "Arial字体换...\n行显示!", Point(50, 50), Scalar(0, 0, 255), 30, "Arial");
    putTextZH(img, "Times New Roman字体换...\n行显示!", Point(50, 50), Scalar(0, 0, 255), 30, "Times New Roman");
    putTextZH(img, "微软雅黑字体换...\n行,斜体,下划线,显示!", Point(50, 100), Scalar(0, 255, 0), 30, "微软雅黑", true, true);
    putTextZH(img, "楷体字体换...\n行,斜体,下划线,显示!", Point(50, 200), Scalar(128, 255, 0), 30, "楷体", true, true);

    imshow("test", img);

    waitKey();

    return 0;
}*/


void main()
{
    //Mat img(150,600,CV_8UC3,Scalar(255,255,255));//初始化图像
    Mat img = imread("D:\\005_test_4\\testImg\\road_6.png");
    putTextZH(img, "打印汉字,汉字,汉字!", Point(30, 30), Scalar(255, 0, 0), 45, "华文行楷");
    imwrite("1.png", img);
    imshow("", img);
    waitKey(0);
}

致谢:https://blog.csdn.net/wanggao_1990/article/details/52955056;https://blog.csdn.net/weixinhum/article/details/84074594;
【. . . . . .本博客仅作个人生活、工作、学习等的日常记录。说明: (1) 内容有参考其他博主、网页等,有因“懒”直接粘贴来,会备注出处。若遇雷同,或忘备注,并无故意抄袭之意,请诸“原主”谅解,很感谢您的辛勤"笔记"可供本人参考学习。 (2) 如遇同行,有参考学习者,因个人学识有限,不保证所写内容完全正确。您对本博文有任何的意见或建议,欢迎留言,感谢指正。 (3) 若您认为本主的全博客还不错,可以点击关注,便于互相学习。 (4) 感谢您的阅读,希望对您有一定的帮助。欢迎转载或分享,但请注明出处,谢谢。. . . . . .】
【作者: Carole0904 ; 出处: https://www.cnblogs.com/carle-09/ 】
