

Spring AOP梳理
一、Srping AOP
AOP(Aspect Oriented Programming)解释为面向切面编程,何为切面,用刀把一块面包切成两半,刀切下去形成的面就叫切面,那么面向切面的就是形成切面的这把刀,刀切在哪(切入点),怎么切(通知),切成什么样(通知实现方法),切的过程就是切面织入的过程。这种编程方式主要为了分离关注点并且能够增强类的辅助功能。比如做日志管理,权限控制等工作,在特定的时候和位置做特定的事情,而无需在原来方法中做特殊处理。
AOP概念:
-
-
- 切面:多个对象或方法要实现的交叉功能的集合。
- 连接点:被关注的方法,执行了该方法会触发通知。
- 切入点:一系列连接点的集合。
- 通知:切面的实际实现,在连接点方法被执行的时候在适当的地方插入通知。
- before:前置通知,在方法被调用之前调用
- after:后置通知,在方法执行结束之后调用,无论方法是否执行成功
- around:环绕通知,在目标方法执行前和执行结束之后分别执行自定义方法
- after-return:在方法成功执行之后调用,
- after-throwing:在方法抛出异常后调用
- 目标对象:被通知的对象,可以是自己的编写的类也可以是,第三方类对象。(连接点就是目标对象中的某些方法)
- 代理:将通知应用到目标对象后创建的对象。
- 织入:将切面应用到目标对象从而创建一个新的代理对象的过程。
- 引入:为类添加新的方法和属性。(<aop:declare-parents ../>)
- 切面:多个对象或方法要实现的交叉功能的集合。
-
二、AOP配置范例:
1.spring中的aop的xml配置方式简单实例
2.spring中aop的注解实现方式简单实例
3.利用切面为特定的类添加新功能:
<aop:config>
        <!-- 两个切面-->
        <aop:aspect ref="company">
            <!-- 利用切面为特定的类添加新功能 -->
            <aop:declare-parents types-matching="com.springAop.InstanceMine+" <!-- 实现了InstanceMine接口的实现类可以强转成InstanceOtheer类型的对象并使用他的实现类的方法的方法 -->
        implement-interface="com.springAop.InstanceOther"
             default-impl="com.springAop.OtherImpl"/>  <!--InstanceOther的默认实现类,当InstanceMine对象强转成InstanceOther的对象时,默认实现类为OtherImpl-->
        </aop:aspect>
    </aop:config>
接口类:instanceMine和instanceOther
public interface InstanceMine {
    public void speak1(String meg);
}


public interface InstanceOther {
    public void speak2(String meg);
}
接口实现类: OtherImple和MineImpl
public class MineImpl implements instanceMine {

    public void speak1(String meg) {
        System.out.println("s1");
    }
}


public class OtherImpl implements instanceOther {
    public void speak2(String meg) {
        System.out.println(meg);
    }
}
测试类:Test
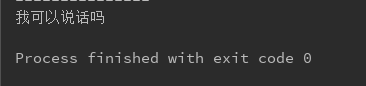
public class Test {
    @org.junit.jupiter.api.Test
    public void TestDemo(){
        ApplicationContext app = new FileSystemXmlApplicationContext("src/main/java/com/springAop/bean.xml");

        InstanceMine mine = app.getBean("mine",instanceMine.class);
        ((InstanceOther)mine).speak2("我可以说话吗");//强转成InstanceOther,并调用实现类OtherImpl的实现方法
    }
}
结果:
三.以代理对象的方式实现AOP:
首先理解一下三种代理模式:理解三种代理模式
1.前置通知:
 1 /**
 2  * 前置通知:实现MethodBeforeAdvice接口,在目标方法执行之前执行
 3  * 相当于aop配置<aop:before method="before" pointcut-ref="当前类的bean"/>
 4  */
 5 public class BeforeNotify implements MethodBeforeAdvice {
 6
 7     public void before(Method method, Object[] objects, Object o) throws Throwable {
 8         System.out.println("=========== 前置通知 =========");
 9     }
10 }
2.后置通知:
 1 /**
 2  * 后置(返回)通知:在方法结束返回时调用,一般包含在环绕通知结束前执行,
 3  * 方法成功执行有效,异常结束则该方法无效。
 4  * 相当于aop配置:<aop:after-returning method="afterReturning" pointcut-ref="当前类的bean"/>
 5  */
 6 public class AfterNotify implements AfterReturningAdvice {
 7     public void afterReturning(Object returnValue, Method method, Object[] args, Object target) throws Throwable {
 8         System.out.println("=========== 后置通知 =========");
 9     }
10 }
3.环绕通知:
 1 /**
 2  * 环绕通知:在方法执行前和执行后均可以执行自定义的方法,
 3  * 相当于aop配置:<aop:around method="invoke" pointcut-ref="当前类的Bean"/>
 4  */
 5 public class AroundNotify implements MethodInterceptor {
 6
 7     public Object invoke(MethodInvocation methodInvocation) throws Throwable {
 8         System.out.println("=========== 环绕通知 =========");
 9         Object obj = methodInvocation.proceed();//执行目标方法
10         System.out.println("=========== 环绕通知 =========");
11         return obj;
12     }
13 }
4.异常通知:
 1 /**
 2  * 异常通知:在目标方法执行异常时执行,
 3  * 注意:ThrowsAdvice是个空接口,里面未定义任何待实现类
 4  * 相当于aop配置:<aop:after-throwing method="afterThrowing" pointcut-ref="当前类的bean"/>
 5  */
 6 public class ExceptionNotify implements ThrowsAdvice {
 7     public void afterThrowing(Method method, Object[] args, Object target, Exception ex){
 8         System.out.println("方法:"+method.getName()+"出错了\n原因:"+ex.getMessage());
 9     }
10 }
此处的ThrowAdvice接口是没有实现方法的,但是又不允许随便定义,在源码中我们看到了规定的几个方法,因为此接口中,没有任何实现方法,当被利用反射机制调用的时候,必须实现一下方法中的一种,这是源码注释的说明:


5.bean配置
 1 <beans xmlns="http://www.springframework.org/schema/beans"
 2        xmlns:xsi="http://www.w3.org/2001/XMLSchema-instance"
 3        xsi:schemaLocation="http://www.springframework.org/schema/beans http://www.springframework.org/schema/beans/spring-beans.xsd">
 4
 5         <!--  被代理对象 -->
 6         <bean class="com.springAop.proxyAOP.UserDao" id="userDao"/>
 7
 8         <!-- 关联通知 -->
 9         <bean class="com.springAop.proxyAOP.BeforeNotify" id="before"/>
10         <bean class="com.springAop.proxyAOP.AroundNotify" id="aroundNotify"/>
11         <bean class="com.springAop.proxyAOP.ExceptionNotify" id="exceptionNotify"/>
12         <bean class="com.springAop.proxyAOP.AfterNotify" id="afterNotify"/>
13
14         <!-- 代理对象 -->
15         <bean id="proxyFactoryBean" class="org.springframework.aop.framework.ProxyFactoryBean">
16             <!-- 代理对象接口,接口方法就是连接点 -->
17             <property name="proxyInterfaces">
18                 <list>
19                     <!--  目标对象实现的接口类,实现了那些接口都可以补充进去,接口的方法就是一个个连接点 -->
20                     <value>com.springAop.proxyAOP.IUserDao</value>
21                     <value>com.springAop.proxyAOP.BookDao</value>
22                 </list>
23             </property>
24
25             <!-- 关联通知类型 -->
26             <property name="interceptorNames">
27                 <list>
28                     <value>before</value><!-- 前置通知织入 -->
29                     <value>aroundNotify</value><!-- 环绕通知织入 -->
30                     <value>exceptionNotify</value><!-- 异常通知织入 -->
31                     <value>afterNotify</value><!-- 后置通知织入 -->
32                 </list>
33             </property>
34
35             <!-- 关联被代理对象(aop的目标对象) -->
36             <property name="target" ref="userDao"/>
37         </bean>
38 </beans>
6.目标对象:(实现了两个接口)
 1 public class UserDao implements IUserDao,BookDao{
 2     public void save() {
 3         System.out.println("保存用户信息中。。。。");
 4         // int i=1/0;
 5     }
 6
 7     public void getBook() {
 8         System.out.println("拿到一本书");
 9     }
10 }
7.测试类:
 1 public class Test{
 2     @org.junit.jupiter.api.Test
 3     public void testDemo(){
 4         ApplicationContext app = new FileSystemXmlApplicationContext("file:G:\\DevelopSoftware\\IDEA\\workspace\\springDemo\\src\\main\\java\\com\\springAop\\proxyAOP\\bean.xml");
 5         /**
 6          * 获取的bean是目标对象的代理对象,可以将代理对象强转成任何目标对象实现的接口对象
 7          */
 8         IUserDao userDao = app.getBean("proxyFactoryBean",IUserDao.class);
 9         userDao.save();
10         System.out.println("=========================");
11         /**
12          * 将代理对象强转成BookDao接口对象,并调用该接口方法。
13          */
14         ((BookDao)userDao).getBook();
15     }
16 }
运行结果:


 浙公网安备 33010602011771号