
【转载】FreeBSD10.2安装教程
FreeBSD9.0之前,安装命令为 sysinstall l,
FreeBSD 从9.0开始引用 bsdinstall 代替 sysinstall 。不然输入会显示:command not found!
9.1前安装程序为pkg_add,而9.1之后已经改为pkg install。
========================================================================================
我安装的FreeBSD版本为最新的10.2,官方:http://www.freebsd.org/where.html
因为我的安装平台为32位系统,所以我选的是i386,如果是64位平台的,请选用AMD64版本。

我是用VMware家的10.0.7版本安装的,如果喜欢用VB的,请忽略!
本人系统支持:
VM设置过程不表,直接进入镜像ISO安装FreeBSD设置面:
1 小恶魔镜像界面:
2 左为直接安装,中间为进数据页,右为LiveCD模式
3 键盘,我随便选了第一个,为什么?懒!

4 主机名,我输入XMAN,大家自己随意

5我选的是最小化,如果是老用户,可能喜欢ports tree,那你就勾,不过安装有点慢哦
6 磁盘系统
7 分区格式:
8 默认分区表
9 最小化安装,好快的说

10设置密码,
11再次确认
12网卡识别
13 IPv4协议
14 网卡地址分配DHCP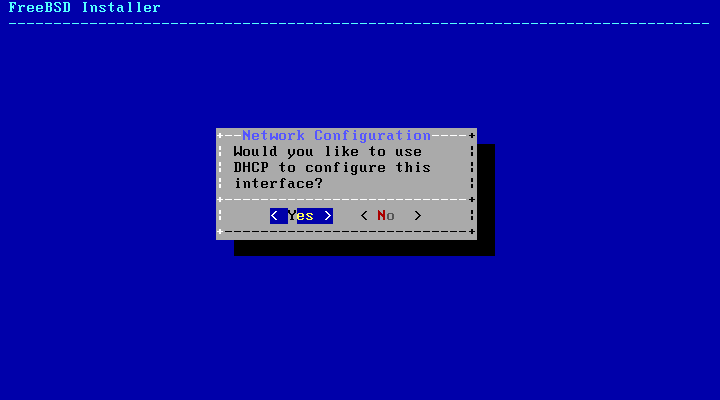
15 IPv6协议
16 IP地址详细表
16时区是否自动选择,我选No!
17中国人选亚洲
18 China
19 你选北京还是新疆?
20 系统服务选择,我选鼠标/时间同步/电源管理
21 是否添加其它用户? No!
22 同意配置
23 要不要看下系统新特性?No!
24 重启还是进新LiveCD继续玩?
25登陆页面
26帐号密码
27 进入后的终端界面:
28 bsdconfig调出来看看能不能安装我想要的桌面系统服务包
29 选Packages 服务包
30 来源,我选CD、DVD,如果你选网络或者FTP,其它也行,不过时间就。。。。。。。
31 加载的光盘镜像,cd0是我的VM虚拟光驱,9660是虚拟光驱型号,ISO镜像在这里,等下要用到哦
32 是否安装来自光盘的服务包,你以为点Y,就搞定了么?太年轻了,骚年!
33 从BSD10版本开始,服务包里面,已经没有INDEX索引功能,所以,无法bsdconfig安装服务包了,傻眼了吧?
如果喜欢用Ports Tree功能的老前辈,可以在安装xorg时,勾选ports功能,用
图形软件包在系统安装镜像ISO中,所以需要先添加iso镜像到系统光驱挂载到本地使用,
挂载安装镜像(选择本地iso文件)
挂载镜像到本地目录
通过以下命令将光驱挂载到系统可识别的 /dist 下使用。
若光驱不能挂载,则可拷贝iso镜像的内容到 /dist ,效果相同。
1 mkdir -p /dist
mount -t cd9660 /dev/cd0 /dist

安装图形包,执行以下命令即可(请按顺序执行)
(系统自动从 /dist 目录下获取软件进行安装)
env REPOS_DIR=/dist/packages/repos pkg install xorg 注意大小写哦
2 xorg有195个服务包

env REPOS_DIR=/dist/packages/repos pkg install gnome3 注意大小写哦
3 gnome3有2GB,453个服务包,如果网络,没有一天半天,你就别想了,用镜像安装,只需20多分钟

4 运行Xorg -configure

5 会自动创建xorg.conf.new文件

6 测试Xorg 指令

7指令正确的话,会显示灰白格和一个X形鼠标

8 不加-retro的后面,就是黑屏


9 用ee命令打开rc.conf

10 加入hald_enable和dbus_enable,侦测硬件和键盘

11按ESC键退出,弹出功能菜单,默认第一顶

12 肯定是选save change啦

13 编辑好的conf文件到指定位置:
cp xorg.conf.new /etc/X11/xorg.conf

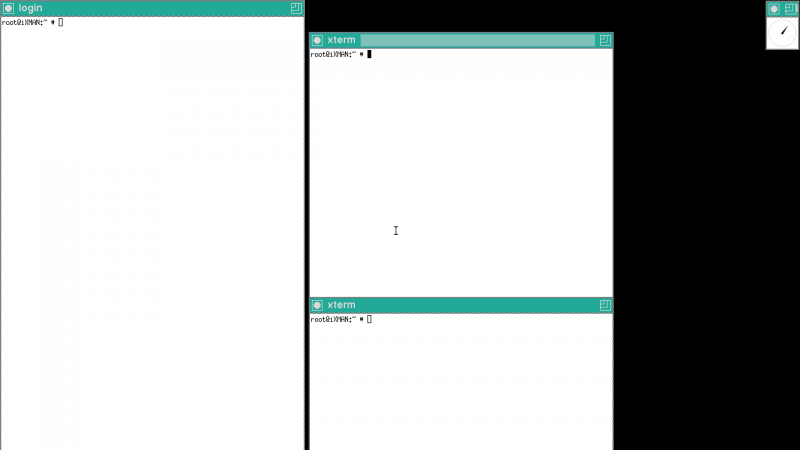
14 再次测试startx,会见到三个窗口:
15 如果上面已经测试成功,rc.conf该加入gdm_enable启动桌面环境了

16 ESC退出,记得保存!

17 conf加入了gdm,就要再复制一次配置文件到xorg了,不然启动还是没桌面

18 reboot重启系统

19 第一次进桌面环境,会比较慢,所以,你如果看到文字登录界面,别急,等等就进Gnome3了

20 输入root用户名,点Next下一步

21输入密码:

22别急着进系统,在密码左边,老用户可以选新界面或者经典界面

23快进桌面吧,看看俺系统属性

24工作环境:

25 设置功能

26开始菜单

27 多任务界面

28终端指令,适合指令高手

29不想用桌面,就删掉rc.conf的gdm选择就行

如果你不喜欢Gnome3,也可以试试KDE4,不过装完Xorg后,有一些地方 ,跟Gnome3不一样,以下详细说明:
同样用ee打开:
ee /etc/rc.conf

在文件最后依次添加:
dbus_enable="YES"
hald_enable="YES"
kdm4_enable="YES"

然后退出,保存,大功告成,输入reboot重启后,会自动进入KDE中,在那里可以进行进一步的个性化配置。
KDE4的登录界面,比Gnome3的强多了:
 <ignore_js_op>

到这里的时候,已经基本完成我们要进入桌面的设置
可是,正当我输入熟悉的Root 和密码时,却出来这么个东西:
Root Logins are not allowed.

尼玛Gnome3都能进的,丫的KDE4硬是不让我进了:


没办法,想玩,还得按KDE4的规则来,找了好多资料和论坛,那些回答此问题的,还是拿老版本来说事:
kde的改法
vi /etc/X11/xdm/kdmrc 这个配置文件, 然后搜索AllowRootLogin, 你会搜索到2个,把两个都修改成AllowRootLogin=true, 或只修改后面那行AllowRootLogin=true. 保存退出。然后重新启动
---------------------------------------------------------这个根本不能用10.2FreebSD和新的KDE4上,喜欢用KDE4的注意了
折腾了大半夜,终于找到针对10.0和KDE4新版本的方法:
1 10.2版本KDE登录问题
KDM默认不允许root登录,请修改/usr/local/share/config/kdm/kdmrc文件下:
AllowRootLogin=true
所以,直接在图形登录界面中,按Ctrl +Alt+F1,直接进入指令界面,
帐户密码登录后,ee命令打开:
ee /usr/local/share/config/kdm/kdmrc
修改 Line 256 行的这个代码:AllowRootLogin原来值为=False,修改为=true,如图:

保存退出后,重新用Reboot命令重启,KDE4就不会再不给 Root用户登录了:以下是KDE4桌面一些设计:


这个是新版KDE菜单:


不喜欢新版的,可以右键选经典菜单:


 浙公网安备 33010602011771号