


centos7安装ceph-luminous(1 mon+2 osd)
说明:由于环境有限,这里只是用一台机器
一、部署环境
- VMware Workstation 10
- centos7
二、主机配置
| 主机名 | ip | cpu | ram |
| master | 192.168.137.10 | 2 | 3G |
1、在 /etc/hosts 添加以下内容:

2、关闭防火墙、selinux、swap
systemctl stop firewalld
systemctl disable firewalld
修改:vim /etc/selinux/config

3、对主机进行免密设置
1)、CentOS7默认没有启动ssh无密登录,去掉/etc/ssh/sshd_config其中1行的注释
#PubkeyAuthentication yes
然后重启ssh服务
systemctl restart sshd
2)、在master机器的/root执行:ssh-keygen -t rsa命令,一直按回车。2台机器都要执行。
[root@master ~]# ssh-keygen -t rsa
Generating public/private rsa key pair.
Enter file in which to save the key (/root/.ssh/id_rsa):
Created directory '/root/.ssh'.
Enter passphrase (empty for no passphrase):
Enter same passphrase again:
Your identification has been saved in /root/.ssh/id_rsa.
Your public key has been saved in /root/.ssh/id_rsa.pub.
The key fingerprint is:
SHA256:aMUO8b/EkylqTMb9+71ePnQv0CWQohsaMeAbMH+t87M root@master
The key's randomart image is:
+---[RSA 2048]----+
|  o ...      .   |
|   =  o=  . o    |
|    + oo=. . .   |
|     =.Boo o  . .|
|    . OoSoB  . o |
|     =.+.+ o. ...|
|      + o o  .. +|
|     .   o . ..+.|
|        E ....+oo|
+----[SHA256]-----+
3)、在master上合并公钥到authorized_keys文件
[root@master ~]# cd /root/.ssh/
[root@master .ssh]# cat id_rsa.pub>> authorized_keys
测试,master上可以用ip免密直接登录,但是用名字还需要输入一次yes,输入一次之后以后就可以了
[root@master]# ssh master
The authenticity of host 'master (192.168.137.10)' can't be established.
ECDSA key fingerprint is 5c:c6:69:04:26:65:40:7c:d0:c6:24:8d:ff:bd:5f:ef.
Are you sure you want to continue connecting (yes/no)? yes
Warning: Permanently added 'master,192.168.137.10' (ECDSA) to the list of known hosts.
Last login: Mon Dec 10 15:34:51 2018 from 192.168.137.1
4、配置国内 yum源地址、ceph源地址
cp -r /etc/yum.repos.d/ /etc/yum-repos-d-bak
yum install -y wget
rm -rf  /etc/yum.repos.d/*
wget -O /etc/yum.repos.d/CentOS-Base.repo http://mirrors.aliyun.com/repo/Centos-7.repo
wget -O /etc/yum.repos.d/epel-7.repo http://mirrors.aliyun.com/repo/epel-7.repo
yum clean all
yum makecache
cat <<EOF > /etc/yum.repos.d/ceph.repo
[ceph]
name=Ceph packages
baseurl=http://mirrors.aliyun.com/ceph/rpm-luminous/el7/x86_64/
enabled=1
gpgcheck=1
priority=1
type=rpm-md
gpgkey=https://mirrors.aliyun.com/ceph/keys/release.asc

[ceph-noarch]
name=Ceph noarch packages
baseurl=http://mirrors.aliyun.com/ceph/rpm-luminous/el7/noarch
enabled=1
gpgcheck=1
priority=1
type=rpm-md
gpgkey=https://mirrors.aliyun.com/ceph/keys/release.asc

[ceph-source]
name=Ceph source packages
baseurl=http://mirrors.aliyun.com/ceph/rpm-luminous/el7/SRPMS
enabled=0
gpgcheck=1
type=rpm-md
gpgkey=https://mirrors.aliyun.com/ceph/keys/release.asc
priority=1
EOF
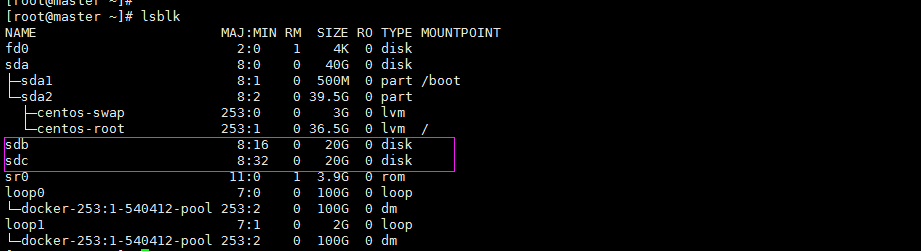
5、准备2块盘给2个osd用
三、安装ceph
1、安装ceph-deploy工具
yum install -y ceph-deploy
2、配置监控节点
ceph-deploy new master
当前工具目录会多出以下文件

3、修改ceph.conf,添加public network
[global]
fsid = d81b3ce4-bcbc-4b43-870e-430950652315
mon_initial_members = cluster9
public network = 192.168.137.0/24
mon_host = 192.168.137.10
mon allow pool delete = true
auth_cluster_required = cephx
auth_service_required = cephx
auth_client_required = cephx
4、安装ceph,监视节点和osd节点都要安装,只不过,现在只有一个节点,都在master上
ceph-deploy install master
[root@master ceph]# ceph -v
ceph version 12.2.11 (26dc3775efc7bb286a1d6d66faee0ba30ea23eee) luminous (stable)
5、配置初始 monitor(s)、并收集所有密钥
ceph-deploy mon create-initial
6、将配置文件和管理密钥复制到管理节点和你的Ceph的节点
ceph-deploy admin master
7、部署管理器守护程序
ceph-deploy mgr create master
8、添加osd
第一步,格式化磁盘
mkfs.xfs /dev/sda1 -f
如果出现:mkfs.xfs: cannot open /dev/sda1: Device or resource busy
通过以下命令找到被占用(不是必选 ,只有出现Device or resource busy)
sda                                       8:0    0   3.7T  0 disk
└─sda1                                    8:1    0   3.7T  0 part
  └─ceph--90f7ab20--7120--4ad7--a1a2--0cc510aa78cc-osd--block--9841f92e--9877--43af--8a93--6c798079d8c0
                                        253:4    0   3.7T  0 lvm
sdc                                       8:32   0   3.7T  0 disk
└─sdc1                                    8:33   0   3.7T  0 part
  └─ceph--becd0c65--b2f7--4b47--b833--a2b141c44c51-osd--block--dd47485c--871b--41bc--862f--b2c9ebfe8684
                                        253:5    0   3.7T  0 lvm
sdd                                       8:48   0   3.7T  0 disk
└─sdd1                                    8:49   0   3.7T  0 part
  └─ceph--98ae6926--4336--43ae--84d2--9bb7b99d5456-osd--block--4160272c--7e60--4cab--ba77--cabedcce2f54
删除掉文件系统不是必选 ,只有出现Device or resource busy)
dmsetup remove ceph--90f7ab20--7120--4ad7--a1a2--0cc510aa78cc-osd--block--9841f92e--9877--43af--8a93--6c798079d8c0
第二步:创建osd
ceph-deploy --overwrite-conf osd create --fs-type xfs --data /dev/sda1 master
ceph-deploy --overwrite-conf osd create --fs-type xfs --data /dev/sdb1 master
9、检查集群状态
[root@master ceph]# ceph -s
  cluster:
    id:     aca21f57-bcd2-4eb5-bf47-3ad1e5bb1e7a
    health: HEALTH_OK

  services:
    mon: 1 daemons, quorum master
    mgr: master(active)
    osd: 2 osds: 2 up, 2 in

  data:
    pools:   0 pools, 0 pgs
    objects: 0 objects, 0B
    usage:   2.00GiB used, 5.00GiB / 7GiB avail
    pgs:
[root@master ceph]# ceph osd tree
ID CLASS WEIGHT  TYPE NAME       STATUS REWEIGHT PRI-AFF
-1       0.00679 root default
-3       0.00679     host master
 0   hdd 0.00389         osd.0       up  1.00000 1.00000
 1   hdd 0.00290         osd.1       up  1.00000 1.00000
四、ceph常用命令
1、查看版本
[root@cluster9 ~]# ceph --version
ceph version 12.2.13 (584a20eb0237c657dc0567da126be145106aa47e) luminous (stable)
2、启动、停止、重启、查看MON进程
sudo systemctl [start/stop/restart/status] ceph-mon@mon‘sid.service
[root@cluster9 ~]# systemctl status ceph-mon@cluster9.service
● ceph-mon@cluster9.service - Ceph cluster monitor daemon
   Loaded: loaded (/usr/lib/systemd/system/ceph-mon@.service; enabled; vendor preset: disabled)
   Active: active (running) since Mon 2020-07-06 00:48:14 EDT; 1 weeks 1 days ago
 Main PID: 3545 (ceph-mon)
   CGroup: /system.slice/system-ceph\x2dmon.slice/ceph-mon@cluster9.service
           └─3545 /usr/bin/ceph-mon -f --cluster ceph --id cluster9 --setuser ceph --setgroup ceph

Jul 14 19:53:20 cluster9.com ceph-mon[3545]: 2020-07-14 19:53:20.925077 7fa1fc598700 -1 log_channel(cluster) log [ERR] : Health check update: 48 stuck requests are blocked > 4096 sec. Implicat...REQUEST_STUCK)
Jul 14 20:08:15 cluster9.com ceph-mon[3545]: 2020-07-14 20:08:15.638488 7fa1fc598700 -1 log_channel(cluster) log [ERR] : Health check update: 49 stuck requests are blocked > 4096 sec. Implicat...REQUEST_STUCK)
Jul 14 20:23:17 cluster9.com ceph-mon[3545]: 2020-07-14 20:23:17.278952 7fa1fc598700 -1 log_channel(cluster) log [ERR] : Health check update: 50 stuck requests are blocked > 4096 sec. Implicat...REQUEST_STUCK)
Jul 14 20:38:15 cluster9.com ceph-mon[3545]: 2020-07-14 20:38:15.082665 7fa1fc598700 -1 log_channel(cluster) log [ERR] : Health check update: 51 stuck requests are blocked > 4096 sec. Implicat...REQUEST_STUCK)
Jul 14 20:53:15 cluster9.com ceph-mon[3545]: 2020-07-14 20:53:15.826228 7fa1fc598700 -1 log_channel(cluster) log [ERR] : Health check update: 52 stuck requests are blocked > 4096 sec. Implicat...REQUEST_STUCK)
Jul 14 21:08:17 cluster9.com ceph-mon[3545]: 2020-07-14 21:08:17.342280 7fa1fc598700 -1 log_channel(cluster) log [ERR] : Health check update: 53 stuck requests are blocked > 4096 sec. Implicat...REQUEST_STUCK)
Jul 14 21:23:21 cluster9.com ceph-mon[3545]: 2020-07-14 21:23:21.269260 7fa1fc598700 -1 log_channel(cluster) log [ERR] : Health check update: 54 stuck requests are blocked > 4096 sec. Implicat...REQUEST_STUCK)
Jul 14 21:38:15 cluster9.com ceph-mon[3545]: 2020-07-14 21:38:15.985947 7fa1fc598700 -1 log_channel(cluster) log [ERR] : Health check update: 55 stuck requests are blocked > 4096 sec. Implicat...REQUEST_STUCK)
Jul 14 21:53:20 cluster9.com ceph-mon[3545]: 2020-07-14 21:53:20.710455 7fa1fc598700 -1 log_channel(cluster) log [ERR] : Health check update: 56 stuck requests are blocked > 4096 sec. Implicat...REQUEST_STUCK)
Jul 14 22:08:17 cluster9.com ceph-mon[3545]: 2020-07-14 22:08:17.439460 7fa1fc598700 -1 log_channel(cluster) log [ERR] : Health check update: 57 stuck requests are blocked > 4096 sec. Implicat...REQUEST_STUCK)
Hint: Some lines were ellipsized, use -l to show in full.
3、查看mon节点上启动的ceph服务
[root@cluster9 ~]# systemctl list-units --type=service|grep ceph
ceph-mgr@cluster9.service                             loaded active running Ceph cluster manager daemon
ceph-mon@cluster9.service                             loaded active running Ceph cluster monitor daemon
ceph-osd@0.service                                    loaded active running Ceph object storage daemon osd.0
ceph-osd@1.service                                    loaded active running Ceph object storage daemon osd.1
ceph-osd@2.service                                    loaded active running Ceph object storage daemon osd.2
4、查看节点上自动启的ceph服务
[root@cluster9 ~]# systemctl list-unit-files|grep enabled|grep ceph
ceph-mgr@.service                             enabled
ceph-mon@.service                             enabled
ceph-osd@.service                             enabled-runtime
ceph-volume@.service                          enabled
ceph-mds.target                               enabled
ceph-mgr.target                               enabled
ceph-mon.target                               enabled
ceph-osd.target                               enabled
ceph-radosgw.target                           enabled
ceph.target                                   enabled
5、启动、停止、重启、查看OSD所有和单个进程
systemctl [start/stop/restart/status] ceph-osd@* or eph-osd@osd_id.service
systemctl status ceph-osd@*.service
systemctl status ceph-osd@0.service
6、查看OSD node上 所有OSD data目录和 挂载磁盘
[root@cluster9 ~]# ls /var/lib/ceph/osd/
ceph-0  ceph-1  ceph-2
[root@cluster9 ~]#  mount |grep osd
tmpfs on /var/lib/ceph/osd/ceph-0 type tmpfs (rw,relatime,seclabel)
tmpfs on /var/lib/ceph/osd/ceph-1 type tmpfs (rw,relatime,seclabel)
tmpfs on /var/lib/ceph/osd/ceph-2 type tmpfs (rw,relatime,seclabel)
7、查看集群详情状态
[root@cluster9 ~]# ceph health detail
HEALTH_WARN Reduced data availability: 84 pgs inactive; Degraded data redundancy: 128 pgs undersized; 1 slow requests are blocked > 32 sec. Implicated osds 2
PG_AVAILABILITY Reduced data availability: 84 pgs inactive
    pg 1.0 is stuck inactive for 771037.239650, current state undersized+peered, last acting [1]
    pg 1.1 is stuck inactive for 771037.239650, current state undersized+peered, last acting [2]
    pg 1.2 is stuck inactive for 771037.239650, current state undersized+peered, last acting [0]
    pg 1.3 is stuck inactive for 771037.239650, current state undersized+peered, last acting [1]
    pg 1.4 is stuck inactive for 771037.239650, current state undersized+peered, last acting [1]
    pg 1.5 is stuck inactive for 771037.239650, current state undersized+peered, last acting [2]
    pg 1.6 is stuck inactive for 771037.239650, current state undersized+peered, last acting [1]
    pg 1.7 is stuck inactive for 771037.239650, current state undersized+peered, last acting [1]
    pg 1.8 is stuck inactive for 771037.239650, current state undersized+peered, last acting [1]
    pg 1.9 is stuck inactive for 771037.239650, current state undersized+peered, last acting [1]
    pg 1.a is stuck inactive for 771037.239650, current state undersized+peered, last acting [1]
    pg 1.b is stuck inactive for 771037.239650, current state undersized+peered, last acting [1]
    pg 1.c is stuck inactive for 771037.239650, current state undersized+peered, last acting [1]
    pg 1.d is stuck inactive for 771037.239650, current state undersized+peered, last acting [2]
    pg 1.e is stuck inactive for 771037.239650, current state undersized+peered, last acting [1]
    pg 1.16 is stuck inactive for 771037.239650, current state undersized+peered, last acting [1]
    pg 1.17 is stuck inactive for 771037.239650, current state undersized+peered, last acting [0]
    pg 1.18 is stuck inactive for 771037.239650, current state undersized+peered, last acting [2]
    pg 1.19 is stuck inactive for 771037.239650, current state undersized+peered, last acting [1]
    pg 1.1a is stuck inactive for 771037.239650, current state undersized+peered, last acting [1]
    pg 1.1b is stuck inactive for 771037.239650, current state undersized+peered, last acting [0]
    pg 1.1c is stuck inactive for 771037.239650, current state undersized+peered, last acting [0]
    pg 1.1d is stuck inactive for 771037.239650, current state undersized+peered, last acting [1]
    pg 1.1e is stuck inactive for 771037.239650, current state undersized+peered, last acting [1]
    pg 1.1f is stuck inactive for 771037.239650, current state undersized+peered, last acting [0]
    pg 1.20 is stuck inactive for 771037.239650, current state undersized+peered, last acting [2]
    pg 1.21 is stuck inactive for 771037.239650, current state undersized+peered, last acting [1]
    pg 1.22 is stuck inactive for 771037.239650, current state undersized+peered, last acting [2]
8、创建一个pool
ceph osd pool create k8s-volumes 128 128
ceph osd pool application enable k8s-volumes k8s-volumes
9、查看pool的详情
[root@cluster9 ~]# ceph osd pool ls detail
pool 1 'k8s-volumes' replicated size 3 min_size 2 crush_rule 0 object_hash rjenkins pg_num 128 pgp_num 128 last_change 21 lfor 0/17 flags hashpspool stripe_width 0
10、删除pool
[root@cluster9 ~]# ceph osd pool delete k8s-volumes k8s-volumes --yes-i-really-really-mean-it
pool 'k8s-volumes' removed
五、ceph pg状态详解
正常的 PG 状态是 100% 的 active + clean, 这表示所有的 PG 是可访问的,所有副本都对全部 PG 都可用。
如果 Ceph 也报告 PG 的其他的警告或者错误状态。PG 状态表:
| 状态 | 描述 |
|---|---|
| Activating | Peering 已经完成,PG 正在等待所有 PG 实例同步并固化 Peering 的结果 (Info、Log 等) |
| Active | 活跃态。PG 可以正常处理来自客户端的读写请求 |
| Backfilling | 正在后台填充态。 backfill 是 recovery 的一种特殊场景,指 peering 完成后,如果基于当前权威日志无法对 Up Set 当中的某些 PG 实例实施增量同步 (例如承载这些 PG 实例的 OSD 离线太久,或者是新的 OSD 加入集群导致的 PG 实例整体迁移) 则通过完全拷贝当前 Primary 所有对象的方式进行全量同步 |
| Backfill-toofull | 某个需要被 Backfill 的 PG 实例,其所在的 OSD 可用空间不足,Backfill 流程当前被挂起 |
| Backfill-wait | 等待 Backfill 资源预留 |
| Clean | 干净态。PG 当前不存在待修复的对象, Acting Set 和 Up Set 内容一致,并且大小等于存储池的副本数 |
| Creating | PG 正在被创建 |
| Deep | PG 正在或者即将进行对象一致性扫描清洗 |
| Degraded | 降级状态。Peering 完成后,PG 检测到任意一个 PG 实例存在不一致 (需要被同步 / 修复) 的对象,或者当前 ActingSet 小于存储池副本数 |
| Down | Peering 过程中,PG 检测到某个不能被跳过的 Interval 中 (例如该 Interval 期间,PG 完成了 Peering,并且成功切换至 Active 状态,从而有可能正常处理了来自客户端的读写请求), 当前剩余在线的 OSD 不足以完成数据修复 |
| Incomplete | Peering 过程中, 由于 a. 无非选出权威日志 b. 通过 choose_acting 选出的 Acting Set 后续不足以完成数据修复,导致 Peering 无非正常完成 |
| Inconsistent | 不一致态。集群清理和深度清理后检测到 PG 中的对象在副本存在不一致,例如对象的文件大小不一致或 Recovery 结束后一个对象的副本丢失 |
| Peered | Peering 已经完成,但是 PG 当前 ActingSet 规模小于存储池规定的最小副本数 (min_size) |
| Peering | 正在同步态。PG 正在执行同步处理 |
| Recovering | 正在恢复态。集群正在执行迁移或同步对象和他们的副本 |
| Recovering-wait | 等待 Recovery 资源预留 |
| Remapped | 重新映射态。PG 活动集任何的一个改变,数据发生从老活动集到新活动集的迁移。在迁移期间还是用老的活动集中的主 OSD 处理客户端请求,一旦迁移完成新活动集中的主 OSD 开始处理 |
| Repair | PG 在执行 Scrub 过程中,如果发现存在不一致的对象,并且能够修复,则自动进行修复状态 |
| Scrubbing | PG 正在或者即将进行对象一致性扫描 |
| Unactive | 非活跃态。PG 不能处理读写请求 |
| Unclean | 非干净态。PG 不能从上一个失败中恢复 |
| Stale | 未刷新态。PG 状态没有被任何 OSD 更新,这说明所有存储这个 PG 的 OSD 可能挂掉, 或者 Mon 没有检测到 Primary 统计信息 (网络抖动) |
| Undersized | PG 当前 Acting Set 小于存储池副本数 |
