

CentOS初级扫盲
发行版介绍
Linux是一套免费使用和自由传播的类Unix操作系统,是一个基于POSIX(可移植操作系统接口Portable Operating System Interface ,缩写为 POSIX )和UNIX(1969)的多用户、多任务、支持多线程和多CPU的操作系统。它能运行主要的UNIX工具软件、应用程序和网络协议。它支持32位和64位硬件。Linux继承了Unix以网络为核心的设计思想,是一个性能稳定的多用户网络操作系统。
GNU和GPL(GNU General Public License,GPL)是由Richard Stallman在1983年9月27日公开发起的,即"反版权"(或称Copyleft)概念。是指软件可以自由地"使用、复制、修改和发布",所有GNU软件都有一份在禁止其他人添加任何限制的情况下授权所有权利给任何人的协议条款,GNU通用公共许可证。 单位或个人开发的商业版本软件,只要使用了有GPL的软件,可以收取费用,但是必须开放源代码。
Linus Benedict Torvalds,Linux内核的发明人及该计划的合作者,与1991年发布了Linux内核。
Linux加入GNU计划之前,有不少组织把Linux包装发行。比如比较Debian(1993)和Slackware(1993)。加入GPU之后有其它发行版,例如Slackware一个比较出名的分支是SUSE(1994)。Debian一个分支是Ubuntu(2004),Kali Linux是Debian的一款衍生版,用于渗透测试。RedHat诞生于1994,其中出名的RHEL主要针对企业,2个分支,新技术先在Fedora上跑,如果稳定再移植到RHEL中。CentOS也是基于RedHat(2003)是分支。国产有ReadFlag(1999)。
目录介绍
可以参考这个
http://www.linuxidc.com/Linux/2013-01/77368.htm
启动流程介绍
第1阶段:
bios加电自检,检测硬件。
确认启动介质,找到启动介质MBR。
第2阶段:
找到MBR后确认GRUB,在grub配置文件中确认内核以及内核映像位置。
第3阶段:
由内核控制,内核只包含最基本的硬件driver,常见的硬件驱动在initrd中。
initrd先释放内存中临时构成一个只读文件系统,在这个只读的文件系统中,内核回字形临时文件系统中的init进程,目的至加载各种驱动。驱动加载完成,内核再次挂载真正的根文件系统,内核把控制器给了/sbin/init进程。
第4阶段:
/sbin/init是父进程,接管控制权后,读取inittab文件来执行相应脚本系统初始化。
- 执行系统初始化脚本/etc/rc.d/rc.sysinit
- 执行/etc/rc.d/rc脚本
- 执行用户自定义/etc/rc.d/rc.local
- 完成任务后,启动终端/sbin/(tty)或者x-windows等待用户登录。
fg用法
用Jobs查看暂停的任务,可以用fg调至前台继续运行。

bg用法
暂停的任务用bg调至后台运行,不在前台显示。

快捷键用法
crtl+c终止当前命令
crtl+D,退出当前终端,也可以输入exit
ctrl+z,暂停当前进程,可以用fg恢复,暂停的进程也可以用jobs查看
ctrl+L,清屏
ctrl+u,删除前面敲的字符
ctrl+A,移动光标至行首
crtl+E移动光标到行尾。
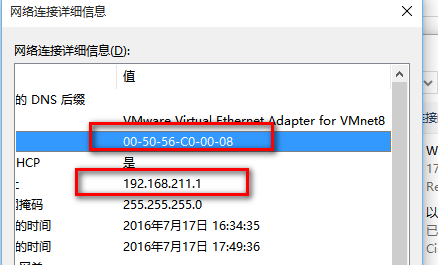
arp用法
直接输入arp就行了,可以查同一局域网中与之有通信的设备的mac。

route用法
常用route -n或者-C

netstat查看端口
一般用这2个
netstat –lnp查看当前系统启动哪些端口
netstat –an查看网络连接状况
抓包工具tcpdump
选项:
-nn显示成ip+端口号形式
-i跟设备名称
-c指定包数量
-w写入指定文件中,可用wireshark查看


lsblk用法
一般用lsblk或者lsblk -f就可以了。

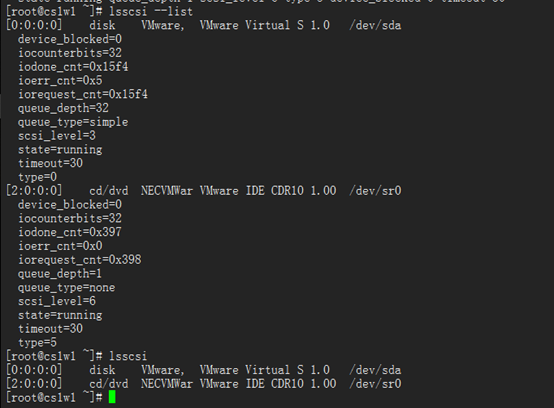
lsscsi用法
一般用lsscsi --list或者lsscsi就可以了。
lsblk可以查看到硬盘分区状态或者已经挂载的文件系统mount point。
lsscsi可以查看到详细的某块硬盘的状态,如timeout或者queue_depth。
less用法
g快速返回文件首部
G快速到文本最末端
/当前行向下搜索
?当前行向上搜索
n显示下一个
q退出
cp用法
r拷贝一个目录必须加这个
rm用法
r删除目录
f强制删除
mkdir用法
p不存在的目录会报错,需要加这个。
cat用法
-A显示所有东东,包括特殊字符。
head 用法
n显示前面多少行
tail 用法
n显示后面多少行,f动态跟踪显示
ls -l用法
第1列:
d标示目录-标示普通文件l标示链接文件b标示块设备c表示串行端口设备s标示套接字文件
r读w写x执行,前3位所有者user权限,中间3位所属组权限最后3位其他非本群组权限。
第2列:
Inode,这个数值与目录下有多少一级子目录有关系。
第3列:所有者
第4列:所述组
第5列:文件大小
第6、7、8列:修改日期
第9列:文件名文件名
chmod用法
-R表示级联更改
可用数字表示r=4,w=2,x=1
可用缩写表示u=rwx,g=rwx,o=rwx ;u-x,a-x
root用户,默认一个目录权限为755,一个文件默认权限为644,普通用户登录一个目录权限是775,一个文件权限是664
umask用法
例如目录最大权限777文件最大权限666,Umask设置后需要减掉的权限。
例如一般使用者为umask 002,默认为0022(前面那1位是特殊权限位),因为写权限11分重要。
创建后目录权限为775,文件权限为664
chown用法
-R级联更改
EXAMPLES
chown root /u
Change the owner of /u to "root".
chown root:staff /u
Likewise, but also change its group to "staff".
chgrep用法
EXAMPLES
chgrp staff /u
Change the group of /u to "staff".
chgrp -hR staff /u
Change the group of /u and subfiles to "staff".
chattr用法
+-=分别为增加、减少、设定
A:增加该属性后,文件或目录的atime将不可被修改
S:增加该属性后,会将数据同步写入磁盘中
a:增加该属性后,只能追加不能删除,非root用户不能设定该属性
c:自动压缩改文件,读取时会自动解压
i:增加后,使文件不能被删除、重命名、设定软连接、写入、新增数据。
常用的有a和i两个选项。
root@cs1w1 root]# chattr +i 111111111111111111111111111111111111
[root@cs1w1 root]# lsattr
-------------e- ./env.log
-------------e- ./install.log.syslog
-------------e- ./aaaaaaaaaaaaaaaaaaaaaaaaaaaaaaaaaaaaaa
-------------e- ./install.log
-------------e- ./456
-------------e- ./lvm
-------------e- ./cs1w1.pub
----i--------e- ./111111111111111111111111111111111111
lsattr: Operation not supported While reading flags on ./11link
-------------e- ./111
-------------e- ./sshd_config
-------------e- ./lvmdump-cs1w1-20160714133655.tgz
-------------e- ./anaconda-ks.cfg
[root@cs1w1 root]# rm -rf 111111111111111111111111111111111111
rm: cannot remove `111111111111111111111111111111111111': Operation not permitted
[root@cs1w1 root]#
[root@cs1w1 root]# chattr -i 111111111111111111111111111111111111
[root@cs1w1 root]# rm -rf 111111111111111111111111111111111111
[root@cs1w1 root]# chattr +a aaaaaaaaaaaaaaaaaaaaaaaaaaaaaaaaaaaaaa/
[root@cs1w1 root]# lsattr
-------------e- ./env.log
-------------e- ./install.log.syslog
-----a-------e- ./aaaaaaaaaaaaaaaaaaaaaaaaaaaaaaaaaaaaaa
-------------e- ./install.log
-------------e- ./456
-------------e- ./lvm
-------------e- ./cs1w1.pub
-------------e- ./111
-------------e- ./sshd_config
-------------e- ./lvmdump-cs1w1-20160714133655.tgz
-------------e- ./anaconda-ks.cfg
[root@cs1w1 aaaaaaaaaaaaaaaaaaaaaaaaaaaaaaaaaaaaaa]# rm -rf view
rm: cannot remove `view': Operation not permitted
[root@cs1w1 aaaaaaaaaaaaaaaaaaaaaaaaaaaaaaaaaaaaaa]# touch aa
[root@cs1w1 aaaaaaaaaaaaaaaaaaaaaaaaaaaaaaaaaaaaaa]# echo "test " >> aa
[root@cs1w1 aaaaaaaaaaaaaaaaaaaaaaaaaaaaaaaaaaaaaa]# cat aa
test
[root@cs1w1 root]# chattr -a aaaaaaaaaaaaaaaaaaaaaaaaaaaaaaaaaaaaaa/
[root@cs1w1 root]# cd aaaaaaaaaaaaaaaaaaaaaaaaaaaaaaaaaaaaaa/
[root@cs1w1 aaaaaaaaaaaaaaaaaaaaaaaaaaaaaaaaaaaaaa]# ls
aa view
[root@cs1w1 aaaaaaaaaaaaaaaaaaaaaaaaaaaaaaaaaaaaaa]# rm -rf *
[root@cs1w1 aaaaaaaaaaaaaaaaaaaaaaaaaaaaaaaaaaaaaa]# ls
[root@cs1w1 aaaaaaaaaaaaaaaaaaaaaaaaaaaaaaaaaaaaaa]#
[root@cs1w1 root]# chattr +Asaci aaaaaaaaaaaaaaaaaaaaaaaaaaaaaaaaaaaaaa/
[root@cs1w1 root]# lsattr
-------------e- ./env.log
-------------e- ./install.log.syslog
s---ia-Ac----e- ./aaaaaaaaaaaaaaaaaaaaaaaaaaaaaaaaaaaaaa
-------------e- ./install.log
-------------e- ./456
-------------e- ./lvm
-------------e- ./cs1w1.pub
-------------e- ./111
-------------e- ./sshd_config
-------------e- ./lvmdump-cs1w1-20160714133655.tgz
-------------e- ./anaconda-ks.cfg
[root@cs1w1 aaaaaaaaaaaaaaaaaaaaaaaaaaaaaaaaaaaaaa]# mkdir aa
mkdir: cannot create directory `aa': Permission denied
[root@cs1w1 aaaaaaaaaaaaaaaaaaaaaaaaaaaaaaaaaaaaaa]# touch aa
touch: cannot touch `aa': Permission denied
[root@cs1w1 root]# chattr -Asaci aaaaaaaaaaaaaaaaaaaaaaaaaaaaaaaaaaaaaa/
[root@cs1w1 root]# cd aaaaaaaaaaaaaaaaaaaaaaaaaaaaaaaaaaaaaa/
[root@cs1w1 aaaaaaaaaaaaaaaaaaaaaaaaaaaaaaaaaaaaaa]# ls
[root@cs1w1 aaaaaaaaaaaaaaaaaaaaaaaaaaaaaaaaaaaaaa]# mkdir aa
[root@cs1w1 aaaaaaaaaaaaaaaaaaaaaaaaaaaaaaaaaaaaaa]# touch bb
[root@cs1w1 aaaaaaaaaaaaaaaaaaaaaaaaaaaaaaaaaaaaaa]# rm -rf aa bb
[root@cs1w1 aaaaaaaaaaaaaaaaaaaaaaaaaaaaaaaaaaaaaa]# ls
[root@cs1w1 aaaaaaaaaaaaaaaaaaaaaaaaaaaaaaaaaaaaaa]#
lsattr用法
-a类似与ls -a连同隐藏文件一同列出
-R连同子目录数据一同列出
特殊权限之suid
针对二进制可执行文件,在执行阶段具有文件所有者的权限。创建u+s,取消u-s
[root@cs1w1 root]# su - apugyt
[apugyt@cs1w1 ~]$ ls -l /root/
ls: cannot open directory /root/: Permission denied
[apugyt@cs1w1 ~]$ exit
logout
[root@cs1w1 root]# chmod u+s /bin/ls
[root@cs1w1 root]# ls -l /bin/ls
-rwsr-xr-x. 1 root root 117024 Nov 22 2013 /bin/ls
[root@cs1w1 root]# su - apugyt
[apugyt@cs1w1 ~]$ ls -l /root/
total 0
[apugyt@cs1w1 ~]$
特殊权限之sgid
设置set gid后,执行该文件的用户会临时以改文件所属组的身份执行。创建g+s,取消g-s
[root@cs1w1 root]# mkdir /tmp/test
[root@cs1w1 root]# chmod 777 /tmp/test/
[root@cs1w1 root]# ls -ld /tmp/test/
drwxrwxrwx 2 root root 4096 Jul 15 09:34 /tmp/test/
[root@cs1w1 root]# chmod g+s /tmp/test/
[root@cs1w1 root]# ls -ld /tmp/test/
drwxrwsrwx 2 root root 4096 Jul 15 09:34 /tmp/test/
[root@cs1w1 root]# su - apugyt
[apugyt@cs1w1 ~]$ cd /tmp/
[apugyt@cs1w1 tmp]$ cd test/
[apugyt@cs1w1 test]$ ls
[apugyt@cs1w1 test]$ touch 1.txt
[apugyt@cs1w1 test]$ ls
1.txt
[apugyt@cs1w1 test]$ ll
total 0
-rw-rw-r-- 1 apugyt root 0 Jul 15 09:35 1.txt
[apugyt@cs1w1 test]$ exit
logout
[root@cs1w1 root]# chmod g-s /tmp/test/
[root@cs1w1 root]# su - apugyt
[apugyt@cs1w1 ~]$ cd /tmp/
[apugyt@cs1w1 tmp]$ ls
test yum.log
[apugyt@cs1w1 tmp]$ ll
total 4
drwxrwxrwx 2 root root 4096 Jul 15 09:35 test
-rw-------. 1 root root 0 Jul 12 10:16 yum.log
[apugyt@cs1w1 tmp]$ cd test/
[apugyt@cs1w1 test]$ ls
1.txt
[apugyt@cs1w1 test]$ touch 2.txt
[apugyt@cs1w1 test]$ ll
total 0
-rw-rw-r-- 1 apugyt root 0 Jul 15 09:35 1.txt
-rw-rw-r-- 1 apugyt apugyt 0 Jul 15 09:35 2.txt
[apugyt@cs1w1 test]$
特殊权限之sticky_bit
防删除位,即使对目录拥有写权限,也不能删除其他用户的文件,创建+t,取消-t
[root@cs1w1 root]# ls -ld /tmp/
drwxrwxrwt. 4 root root 4096 Jul 15 09:34 /tmp/
[root@cs1w1 root]# useradd user2
[root@cs1w1 root]# passwd user2
Changing password for user user2.
New password:
BAD PASSWORD: it is based on your username
Retype new password:
passwd: all authentication tokens updated successfully.
[root@cs1w1 root]# su - apugyt
[apugyt@cs1w1 ~]$ touch /tmp/apugyt.txt
[apugyt@cs1w1 ~]$ exit
logout
[root@cs1w1 root]# su - user2
[user2@cs1w1 ~]$ rm -rf /tmp/apugyt.txt
rm: cannot remove `/tmp/apugyt.txt': Operation not permitted
[user2@cs1w1 ~]$ exit
logout
[root@cs1w1 root]# chmod o-t /tmp/
[root@cs1w1 root]# ll /
total 106
-rwSr--r-- 1 root root 0 Jul 15 09:30 aa
dr-xr-xr-x. 2 root root 4096 Jul 13 07:37 bin
dr-xr-xr-x. 5 root root 1024 Jul 12 10:24 boot
drwxr-xr-x. 2 root root 4096 Nov 22 2013 cgroup
drwxr-xr-x 19 root root 3740 Jul 15 05:46 dev
drwxr-xr-x. 100 root root 12288 Jul 15 09:38 etc
drwxr-xr-x. 4 root root 4096 Jul 15 09:38 home
dr-xr-xr-x. 11 root root 4096 Jul 12 10:22 lib
dr-xr-xr-x. 9 root root 12288 Jul 13 07:37 lib64
drwx------. 2 root root 16384 Jul 12 10:16 lost+found
drwxr-xr-x. 2 root root 4096 Sep 23 2011 media
drwxr-xr-x 2 root root 0 Jul 15 05:46 misc
drwxr-xr-x. 2 root root 4096 Sep 23 2011 mnt
drwxr-xr-x 2 root root 0 Jul 15 05:46 net
drwxr-xr-x. 3 root root 4096 Jul 12 10:23 opt
dr-xr-xr-x 110 root root 0 Jul 15 05:45 proc
dr-xr-x---. 3 root root 4096 Jul 15 09:31 root
dr-xr-xr-x. 2 root root 12288 Jul 13 07:37 sbin
drwxr-xr-x. 2 root root 4096 Jul 12 10:17 selinux
drwxr-xr-x. 2 root root 4096 Sep 23 2011 srv
drwxr-xr-x 13 root root 0 Jul 15 05:45 sys
drwxrwxrwx. 4 root root 4096 Jul 15 09:39 tmp
drwxr-xr-x. 13 root root 4096 Jul 12 10:17 usr
drwxr-xr-x. 20 root root 4096 Jul 12 10:22 var
[root@cs1w1 root]# su - user2
[user2@cs1w1 ~]$ cd /tmp/
[user2@cs1w1 tmp]$ ls
apugyt.txt test yum.log
[user2@cs1w1 tmp]$ rm -rf apugyt.txt
[user2@cs1w1 tmp]$
软链接和硬链接
软链接:
1.软链接,以路径的形式存在。类似于Windows操作系统中的快捷方式
2.软链接可以 跨文件系统 ,硬链接不可以
3.软链接可以对一个不存在的文件名进行链接
4.软链接可以对目录进行链接
5.软链接占用Inode
1.硬链接,以文件副本的形式存在。但不占用实际空间。
2.不允许给目录创建硬链接
3.硬链接只有在同一个文件系统中才能创建
4.不占用inode和空间
常用项
f 如果目标文件存在会强制移除
s软连接
d硬链接
#软链接可以链接跨文件系统
#链接目录、文件
ln -s /mnt/aaa /opt/aa
ln -s /opt/ /mnt
#硬链接只允许在自己的文件系统
ln -d /opt/aaa /opt/bb
用户名文件
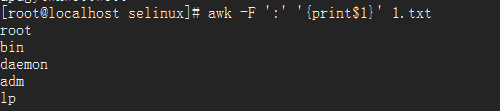
[root@cs1w1 ~]# cat /etc/passwd | head -n 3
root : x : 0 : 0 : root : /root : /bin/bash
bin:x:1:1:bin:/bin:/sbin/nologin
daemon:x:2:2:daemon:/sbin:/sbin/nologin
第1字段,用户名,可以使大小写字母、数字、减号(不能出现在首位)、点以及下划线,其它不合法。
第2字段,早期unix存放在这里,基于安全因素,放在/etc/shadow中了。
第3字段,uid用户身份,0是root,1-499系统保留作为管理账号,普通用户标示从500开始。
第4字段,组标示,对应group中一条记录
第5字段,注释说明
第6字段,用户家目录
第7字段,指定默认的shell程序,启动后会启动一个进程,用来将指令传递给操作系统内核。
密码文件
[root@cs1w1 ~]# cat /etc/shadow | head -n 3
root : $6$dPgogaO9$xKdBg64FWHJJcutWDtyxuF465Ri.TsNHTMhYpUUPTCcTZPhAhypNmLdBsbCwdWY621bocFWJn3y1eFNR.x.xz1:16995 : 0 : 99999 : 7 : : :
bin:*:15980:0:99999:7:::
daemon:*:15980:0:99999:7:::
9个字段含义:
第1字段,跟/etc/passwd用户名对应
第2字段,真正的加密过的密码
第3字段,从1970年1月1日到上次更改密码的日期。
第4字段,过多少天才可以更改密码,默认0不限制
第5字段,多天后密码到期,默认99999不限制
第6字段,密码到期警告期限
第7字段,密码已经到期,到期前没修改,再过几天就锁定
第8字段,生命周期,在这个日期前可以使用,到期后作废。
第9字段,作为保留用的,没有什么意义
增加删除用户组
Groupadd用法
G指定gid
groupdel后面指定用户组
增加删除用户
Useradd用法
u自定义uid
U创建一个和用户一样的组
N创建用户没有同样的组
g加入已经存在的某个组
d自定义用户家目录
m创建家目录
M不建立家目录
S自定义shell
L指定创建的用户不加入log数据库
Userdel用法
R删除账户时候带账户家目录一起删除
Usermod修改用户属性
Usermod用法
u更改用户uid
G更改用户属组,也可以跟组id
d更改用户家目录
S更改用户shell
Passwd修改用户密码
Passwd用法
-stdin从标准输入设置密码,适用于脚本
-d删除密码
-e设置密码过期
-x设置密码最大生命周期
-w设置密码过期提示周期
mkpasswd用法
生成密码,安装一个expect包才可以使用
-s指定特殊字符个数
-d指定数字个数
-l指定密码个数
su切换用户
Su用法
-需要加这个
C指定执行命令
su – apugyt –c "touch /home/apugyt/apugytsuswitchtest"
sudo详解
普通用户登录无法执行一些命令操作,如果告知给普通用户root密码,有风险。可以修改解决sudoers配置文件解决这个问题,允许普通用户执行系统中的一些命令。
[apugyt@localhost ~]$ yum install
Loaded plugins: fastestmirror
You need to be root to perform this command.
[apugyt@localhost ~]$ sudo yum install
apugyt is not in the sudoers file. This incident will be reported.
visudo编辑配置文件,添加普通用户就可以了。可以明确用户名,允许切换的组,Ip,允许的命令
## Allow root to run any commands anywhere
root ALL=(ALL) ALL
apugyt ALL=(ALL) ALL
设置完成后sudo 加命令,输入自己的密码就可以运行了
[apugyt@localhost root]$ sudo ls
[sudo] password for apugyt:
[apugyt@localhost root]$ sudo ls
? anaconda-ks.cfg apugytswitchtest yum.conf
[apugyt@localhost root]$
如果有多个普通用户一次一次添加麻烦,可以直接开启wheel组。普通用户加入这个wheel组就可以了。
## Allows people in group wheel to run all commands
%wheel ALL=(ALL) ALL
查看这个测试账户的组
[apugyt@localhost ~]$ id apugyt
uid=1000(apugyt) gid=1000(apugyt) groups=1000(apugyt),10(wheel)
[apugyt@localhost ~]$
重新测试ok
[apugyt@localhost home]$ yum install lsof
Loaded plugins: fastestmirror
You need to be root to perform this command.
[apugyt@localhost home]$ sudo yum install lsof
Loaded plugins: fastestmirror
Loading mirror speeds from cached hostfile
* base: ftp.sjtu.edu.cn
* extras: mirrors.163.com
* updates: mirrors.163.com
Package lsof-4.87-4.el7.x86_64 already installed and latest version
Nothing to do
[apugyt@localhost home]$
fdisk用法
fdisk用法
l指定某个盘
w写入
p主分区
e扩展分区
一个磁盘只能有4个主分区,或者3个主分区,一个扩展分区,然后是逻辑分区。
parted用法
EXAMPLES:
加标签
parted /dev/sdb mklabel gpt
分区
parted /dev/sdb mkpart PartedTest 0% 100%
格式化文件系统
mkfs.ext4 /dev/sdb1
partx用法
常用
加
partx –a /dev/sdb
删除
partx –d /dev/sdb
列出
partx –l /dev/sdb
NAME
partx - telling the kernel about presence and numbering of on-disk partitions.
mke2fs用法
mke2fs用法
-b设定每个区块占用空间大小,目前支持1024、2048以及4096Bytes每个块。
-N指定inode数量
-c创建文件系统之前检查坏块
-L指定分区标签
-D使用direct IO
-t文件系统类型
[root@localhost ~]# mke2fs -t ext4 -N 1000 -c -L ext4mke2fstest -D -b 2048 /dev/sdb1
mke2fs 1.42.9 (28-Dec-2013)
Filesystem label=ext4mke2fstest
OS type: Linux
Block size=2048 (log=1)
Fragment size=2048 (log=1)
Stride=0 blocks, Stripe width=0 blocks
5120 inodes, 10485248 blocks
524262 blocks (5.00%) reserved for the super user
First data block=0
Maximum filesystem blocks=278921216
640 block groups
16384 blocks per group, 16384 fragments per group
8 inodes per group
Superblock backups stored on blocks:
16384, 49152, 81920, 114688, 147456, 409600, 442368, 802816, 1327104,
2048000, 3981312, 5619712, 10240000
Checking for bad blocks (read-only test): done
Allocating group tables: done
Writing inode tables: done
Creating journal (32768 blocks): done
Writing superblocks and filesystem accounting information: done
[root@localhost ~]# mount -t ext4 /dev/sdb1 /mnt/
[root@localhost ~]# stat /mnt/
File: '/mnt/'
Size: 2048 Blocks: 4 IO Block: 2048 directory
Device: 811h/2065d Inode: 2 Links: 3
Access: (0755/drwxr-xr-x) Uid: ( 0/ root) Gid: ( 0/ root)
Context: system_u:object_r:unlabeled_t:s0
Access: 2016-07-14 05:44:16.000000000 -0400
Modify: 2016-07-14 05:44:16.000000000 -0400
Change: 2016-07-14 05:44:16.000000000 -0400
Birth: -
e2label用法
查看分区标签
[root@localhost ~]# e2label /dev/sdb1
ext4mke2fstest
[root@localhost ~]#
mount用法
如果需要开机启动建议mount分区的label或者uuid哟。
UUID指定挂载文件系统的uuid
LABEL指定挂载文件系统的的标签
a挂载所有fstab中指定的文件系统
o指定其他选项,如-o loop
t指定文件系统类型
av还可以检查fstab配置文件中指定挂载的文件系统
[root@localhost ~]# blkid
/dev/sdb1: LABEL="ext4mke2fstest" UUID="90ceec7f-bf30-44b3-af46-a24c091156ab" TYPE="ext4"
/dev/sr0: UUID="2015-12-09-23-03-16-00" LABEL="CentOS 7 x86_64" TYPE="iso9660" PTTYPE="dos"
/dev/sda1: UUID="23ef456b-700c-421a-94b4-4aa7636c5ec9" TYPE="xfs"
/dev/sda2: UUID="wpNLhW-vVjP-s4wi-kXMr-VaD4-A74G-xbhsZN" TYPE="LVM2_member"
/dev/mapper/centos-root: UUID="6f348a94-c270-42e9-96bd-b6166d689ba2" TYPE="xfs"
/dev/mapper/centos-swap: UUID="992c1fae-1daa-4297-adf8-546548fa0769" TYPE="swap"
/dev/mapper/centos-home: UUID="48398901-c2a7-4278-894b-5b66c707d4ec" TYPE="xfs"
[root@localhost ~]# mount UUID="90ceec7f-bf30-44b3-af46-a24c091156ab" /mnt/
[root@localhost ~]# mount LABEL=ext4mke2fstest /mnt/
umount用法
l强制卸载
分区表fstab
[root@localhost ~]# cat /etc/fstab
#
# /etc/fstab
# Created by anaconda on Tue Jul 12 03:20:27 2016
#
# Accessible filesystems, by reference, are maintained under '/dev/disk'
# See man pages fstab(5), findfs(8), mount(8) and/or blkid(8) for more info
#
/dev/mapper/centos-root / xfs defaults 0 0
UUID=23ef456b-700c-421a-94b4-4aa7636c5ec9 /boot xfs defaults 0 0
/dev/mapper/centos-home /home xfs defaults 0 0
/dev/mapper/centos-swap swap swap defaults 0 0
[root@localhost ~]#
第1列:分区标示,label/uuid/分区名字都ok
第2列:挂载点
第3列:分区类型
第4列:挂载参数,一般写defaults
第5列:是否被dump备份,1是,0不是
第6列:0不自检磁盘,1和2都检测,1先检测
第4列参数详解:
async磁盘和内存不同步,每隔一段时间吧内存数据写入磁盘
sync时时同步内存和磁盘中数据
auto/noauto:开机自动挂载/不自动挂载
ro:只读权限
rw:可读可写权限
exec/noexec:允许/不允许可执行文件执行
user/nouser:是否允许root用户外的其他用户挂载分区,一般Nouser
suid/nosuid:允许/不允许分区有suid属性,一般nosuid
usrquota:启用磁盘配额
grquota:启动群组磁盘配额模式
w用法
第一行显示当前时间,系统运行时间,登陆用户数量,系统负载1分钟、5分钟、15分钟,值超过cpu数量证明系统压力大。
tty为显示器
pts为远程终端。
[root@cs1w1 root]# w
12:13:05 up 6:27, 3 users, load average: 0.00, 0.00, 0.00
USER TTY FROM LOGIN@ IDLE JCPU PCPU WHAT
root tty1 - 12:09 3:54 0.00s 0.00s -bash
root pts/0 192.168.211.1 05:47 36.00s 0.55s 0.55s -bash
root pts/1 192.168.211.1 07:13 0.00s 0.02s 0.00s w
[root@cs1w1 root]#
有可能远程服务器本地显示器tty没有退出,可以通过kill进程关闭本地tty。
[root@cs1w1 root]# ps -ef | egrep -i tty
UID PID PPID C STIME TTY TIME CMD
root 1338 1 0 05:46 tty2 00:00:00 /sbin/mingetty /dev/tty2
root 1340 1 0 05:46 tty3 00:00:00 /sbin/mingetty /dev/tty3
root 1342 1 0 05:46 tty4 00:00:00 /sbin/mingetty /dev/tty4
root 1344 1 0 05:46 tty5 00:00:00 /sbin/mingetty /dev/tty5
root 1349 1 0 05:46 tty6 00:00:00 /sbin/mingetty /dev/tty6
root 4293 4245 0 12:09 tty1 00:00:00 -bash
root 4390 2363 0 12:17 pts/1 00:00:00 egrep -i tty
[root@cs1w1 root]# kill -9 4293
-bash: kill: (4293) - No such process
[root@cs1w1 root]# ps -ef | egrep -i tty
UID PID PPID C STIME TTY TIME CMD
root 1338 1 0 05:46 tty2 00:00:00 /sbin/mingetty /dev/tty2
root 1340 1 0 05:46 tty3 00:00:00 /sbin/mingetty /dev/tty3
root 1342 1 0 05:46 tty4 00:00:00 /sbin/mingetty /dev/tty4
root 1344 1 0 05:46 tty5 00:00:00 /sbin/mingetty /dev/tty5
root 1349 1 0 05:46 tty6 00:00:00 /sbin/mingetty /dev/tty6
root 4393 1 0 12:17 tty1 00:00:00 /sbin/mingetty /dev/tty1
root 4395 2363 0 12:17 pts/1 00:00:00 egrep -i tty
[root@cs1w1 root]#
[root@cs1w1 root]# w
12:20:13 up 6:34, 2 users, load average: 0.00, 0.00, 0.00
USER TTY FROM LOGIN@ IDLE JCPU PCPU WHAT
root pts/0 192.168.211.1 05:47 3:01 0.55s 0.55s -bash
root pts/1 192.168.211.1 07:13 0.00s 0.03s 0.00s w
[root@cs1w1 root]#
vmstat详解
vmstat用法
6部分。
procs显示进程相关信息
r:表示运行和等待cpu时间片的进程数。如果长期大于cpu个数,说明cpu不够用了。
b:等待资源进程数。例如等待I/O、内存等。如果长时间大于1,需要关注下。
memory内存相关信息
swpd切换到交换分区中的内存数量
free当前空闲的内存数量
buff缓冲大小,即将写入磁盘的。
cache缓存大小,从磁盘中读取的。
swap内存交换情况
si:交换区写入到内存的数据量
so:由内存写入到交换区的数据量
io磁盘使用情况
bi:从块设备读取数据的量
bo:从块设备吸入数据的量
system显示采集间隔内发生的中断次数
in:表示在某一时间间隔中观测到的每秒设备中断数
cs:每秒上下文切换次数
CPU显示cpu的使用状态
us:显示用户下所花费cpu时间的百分比
sy:显示系统花费cpu时间百分比
id:cpu处于空闲状态的时间百分比
wa:表示I/O等待所占用cpu时间百分比
st:被偷走的cpu所占百分比
[root@cs1w1 root]# vmstat
procs -----------memory---------- ---swap-- -----io---- --system-- -----cpu-----
r b swpd free buff cache si so bi bo in cs us sy id wa st
0 0 0 767452 43688 86112 0 0 5 1 12 14 0 0 100 0 0
[root@cs1w1 root]#
关注r\b\wa列就可以了。
top动态查看负载
top用法
c可以查看进程命令
k提示kill掉哪个进程的Pid
其中RES可以查看进程占用内存大小。
top –bn1非动态打印系统资源使用情况,可以用在shell脚本中。
[root@dntodu001 ~]# top
top - 16:39:36 up 6 days, 22:04, 10 users, load average: 27.39, 28.05, 27.28
Tasks: 3406 total, 39 running, 3367 sleeping, 0 stopped, 0 zombie
Cpu(s): 20.1%us, 4.3%sy, 0.0%ni, 69.3%id, 4.8%wa, 0.1%hi, 1.5%si, 0.0%st
Mem: 264279036k total, 44741164k used, 219537872k free, 365716k buffers
Swap: 33554424k total, 0k used, 33554424k free, 29961196k cached
PID USER PR NI VIRT RES SHR S %CPU %MEM TIME+ COMMAND
38413 root 20 0 21.6g 933m 13m S 148.0 0.4 514:12.13 java
98366 oracle -2 0 28.1g 22g 22g S 72.4 8.9 159:21.52 oracle
98300 oracle -2 0 28.1g 22g 22g R 51.7 8.9 162:38.06 oracle
98374 oracle -2 0 28.1g 22g 22g S 45.2 8.9 162:46.30 oracle
98287 oracle -2 0 28.1g 22g 22g S 42.0 8.9 162:15.72 oracle
98370 oracle -2 0 28.1g 22g 22g R 41.7 8.9 159:16.79 oracle
98415 oracle 20 0 28.1g 178m 168m R 28.8 0.1 108:06.83 oracle
17592 oracle 20 0 28.1g 23g 23g S 25.9 9.4 82:11.82 oracle
17711 oracle 20 0 28.1g 23g 23g S 25.9 9.4 81:53.08 oracle
17696 oracle 20 0 28.1g 23g 23g S 25.5 9.4 81:56.69 oracle
sar命令
sar用法
sar –n DEV显示网卡流量,rx表示进,tx表示出
sar –n EDEV Network interfaces (errors)
sar –b I/O and transfer rate statistics
sar –r Memory utilization statistics
sar -u [ ALL ] CPU utilization statistics
安装sysstat这个包就有sar命令。
sar数据文件放在/var/log/sa下,加日期的需要用sar -f查看,不加日期的可以直接cat。
free查看内存
一般查看剩余看第2行。因此系统分配物理内存给缓存用来给程序使用。如果程序不用就是空闲的。所以查看那个比较靠谱。
[root@dntodu001 ~]# free -g
total used free shared buffers cached
Mem: 252 73 178 0 0 58
-/+ buffers/cache: 14 237
Swap: 31 0 31
[root@dntodu001 ~]#
ps查看进程
STAT进程状态:
D不能中断,通常为IO
R正在运行的进程
S已经中断,系统大部分进程都在这个状态
T,已经停止或暂停的进程
Z僵尸进程,占系统一点资源,少了没问题,多了就有问题了。
<高优先级进程
N低优先级进程
L在内存中被锁了内存分页
s主进程
l多线程进程
+在前台运行的进程

df用法
i显示inode
k显示1k block
m显示1M block
h显示任性化
T显示文件系统
一般用df -hT
du用法
b显示bytes
k显示kB
m显示mB
h人性化显示
s显示聚合
S不包括子目录
一般用du –sh
stat用法

Atime:读取或执行文件时更改的。
Mtime:吸入文件时随文件内容更改而更改。
Ctime::写入文件、更改所有者、权限或链接设置时随inode的内容更改而更改的。
这3个time属性都在inode中。如果指定了文件系统noatime参数,Atime不一定在访问后修改。Mtime改了inode一定改,既然inode改了,ctime也得跟着改。
lsof用法
EXAMPLES:
查找本地主机使用端口范围1-1024的进程。

NAME
lsof - list open files
tree用法
EXAMPLES:
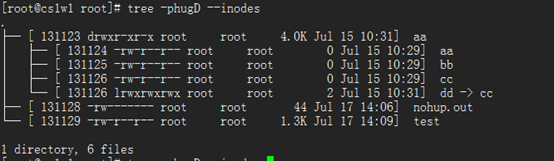
NAME
tree - list contents of directories in a tree-like format.
pstree用法
使用示例:

pstree - display a tree of processes
selinux用法
获取状态
getenforce
设置临时关闭
setenforce 0
配置文件位置
/etc/selinuc/config
# This file controls the state of SELinux on the system.
# SELINUX= can take one of these three values:
# enforcing - SELinux security policy is enforced.
# permissive - SELinux prints warnings instead of enforcing.
# disabled - No SELinux policy is loaded.
SELINUX=disabled
# SELINUXTYPE= can take one of these two values:
# targeted - Targeted processes are protected,
# mls - Multi Level Security protection.
SELINUXTYPE=targeted
cron计划任务
crontab用法
-u指定某个用户,不加-u为当前用户
-e制定计划任务,实际上编辑/var/spool/cron/username文件
-l列出计划任务
-r删除计划任务
列出计划任务
crontab –l
删除计划任务
crontab –r
服务查看、启停
service crond status\stop\start
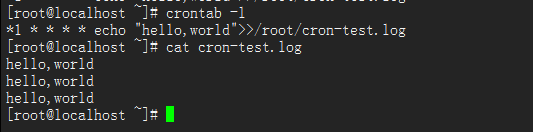
从左到右,分、时、日、月、周
示例:没隔一分钟输出hello,world到/root/目录下的cron-test.log文件中。
iptables详解
3张表
filter用于过滤包,是系统预设的表,应用最多。里面3个链,input用于进入本机的包,output用于本机出去的包,forward用于跟本机无关的包。
nat用于网络地址转换,里面3个链,prerouting用于在包到达防火墙时改变它的目的地址。output改变本地产生包的目的地址,postrouting用于在包离开防火墙时改变源地址。
mangle用于给数据包打标记。几乎不怎么用。除非想成为一个高级网络工程师。
查看规则以及清除规则:
#iptables –t filter –nvL
选项:
#-t后面跟表明,-n不针对ip反解析主机名,-L标示列出,-v标示列出详细信息
#-A往后增加
#-D删除
#-I,往前插入
#-p指定协议,可以使tcp,udp或者icmp
#-dport跟p一起使用,目标端口
#-s指定源ip
#-d指定目的ip
#-j跟动作,accept允许,drop丢掉,reject拒绝包,MASQUERADE伪装
#-i指定网卡
#-o跟设备名
#--line-numbers显示规则号码
#-P表示预设策略
#–F清除全部规则,
# -Z包以及流量计数器置零
注意事项:
iptables –P input drop一旦设定,必须用iptables –P input accept才能恢复原始状态,-不能使用-F。
防火墙服务停掉后,一旦重新设定规则,会自动开启。
使用示例:
需求:只针对filter表,预设策略input链drop,其它2个链accept,然后针对某个管理ip开通22端口,对所有网段开通80端口和21端口。

#备份&恢复
iptables-save >myipt.sh
iptables-restore <myipt.sh
设置nat表上网
需求:1台linux主机2块网卡,1个能上网,1个不行,局域网中还有其它主机与不能上网的主机相连。如何保证也能上网。
#设置内核参数,打开路由转发

#对nas标做了一个IP转发的操作

系统服务
ntsysv图形化配置服务开启或关闭。
运行级别说明
# 0 - halt (Do NOT set initdefault to this)
# 1 - Single user mode
# 2 - Multiuser, without NFS (The same as 3, if you do not have networking)
# 3 - Full multiuser mode
# 4 - unused
# 5 - X11
# 6 - reboot (Do NOT set initdefault to this)
查询
chkconfig –list| grep cron
设置级别3关闭
chkconfig –level 3 crond off
设置级别345关闭
chkconfig –level 345 crond off
默认2345开启
chkconfig crond on
删除
chkconfig –del crond
添加
chkconfig –add crond
Linux日志
日志配置文件/etc/rsyslog.conf
控制如何日志归档/etc/logrotate.conf
messages是系统核心日志文件,如果服务没有定义日志,该服务产生日志会到这个文件中,每周归档一次。
debug有调试信息的,日志信息最多
info一般信息日志,最常用
notice具有重要性的普通条件的信息
warning警告级别
err错误级别,阻止某个功能或模块不能正常工作信息
crit严重级别,阻止系统或整个软件不能正常工作的信息
alert需要立即修改信息
emerg内核崩溃等严重信息
none什么都不记录
xargs详解
示例:
有些时候过滤后的东西需要传递给后面其它命令执行实现需求,这个时候xargs就派上用场了。
比如我想把过滤后的东东拷贝至其它目录,其实我可以进入那个目录然后执行ls,然后是过滤,接着再手工以拷贝那样也可以,只不过太慢了,所以下面一条连续的命令就可以搞定。
mkdir pakage && ll | egrep -v 'anaconda-ks.cfg|paka*'| gawk -F' ' '{ print $9 }' | xargs -n1 -i cp {} /root/pakage/
把找到不用的文件删除掉,可以这样。
find /root/pakage/* -print | xargs /bin/rm –f
xargs –n1 –I {}类似for循坏,-n1意思是一个一个对象去处理,-i{}把前面的对象使用{}取代。cp {}拷贝前面的对象到tmp目录下{}_bak,名字加_bak。


rsync详解
与cp,scp不同的是rsync工具不但可以本地拷贝,还可以远程拷贝以及同步数据。
rsync工具在做数据备份方便非常受欢迎。试想一下,如果有数千万个文件或目录你怎么样制定拷贝计划呢?每一个选项都会占用系统计算时间,每一个选项错误,都会延迟拷贝计划任务进度,所以做拷贝计划前很有必了解rsync每个选项,做个详细测试。
儿。
#拷贝installxxx文件到/tmp的目录命名为aa
rsync -av install.log.syslog /tmp/aa
#拷贝本地主机文件800.png到远程主机172的/tmp/目录
rsync -av 800.png 192.168.36.172:/tmp/
#拷贝远程主机172中的数据到本地/mnt/目录
rsync -av root@192.168.36.172:/tmp/800.png /mnt/
#拷贝本地aa/到cc/注意需要加/斜杠,不加不行哦。
rsync -a aa/ cc/
#--no-l,去除软连接,如果源目录中含有软连接,不拷贝哟。
rsync -av --no-l /root/bb/ /root/cc/
#-L,把源文件软连接指向的物理文件拷贝到目标目录中。
rsync -avL /root/bb/ /root/cc/
#-u,如果目标目录中文件比源文件中新,不会执行同步。
rsync -avu /root/aa/ /root/bb/
#-delete,如果目标目录bb/中有源目录aa/中没有的东东,会执行清除目标目录bb/中已有的数据。
rsync -av --delete /root/aa/ /root/bb/
#--exclude,用于过滤掉源中不需要拷贝的文件
#--progress,用于观察拷贝进程
rsync -av --progress --exclude="*.txt" /root/aa/ /root/bb/
find搜索命令
-type类型d目录l链接s套接字c串行设备b块设备f文件
-size +1M大于1M -1M小于1M
-atime +n/-n访问或者执行时间大于/小于n天的文件
-ctime +n/-n写入、更改inode属性(更改所有者、权限或者链接)时间大于/小于n天的文件
-mtime +n/-n:写入时间大于/小于n天的文件
[root@cs1w1 root]# mkdir aa
[root@cs1w1 root]# cd aa/
[root@cs1w1 aa]# ls
[root@cs1w1 aa]# touch aa bb cc
[root@cs1w1 aa]# cd
[root@cs1w1 root]# find /root/aa/ -atime +1
[root@cs1w1 root]# find /root/aa/ -atime -1
/root/aa/
/root/aa/cc
/root/aa/aa
/root/aa/bb
[root@cs1w1 root]# find /root/aa/ -ctime -1
/root/aa/
/root/aa/cc
/root/aa/aa
/root/aa/bb
[root@cs1w1 root]# find /root/aa/ -ctime +1
[root@cs1w1 root]# find /root/aa/ -mtime -1
/root/aa/
/root/aa/cc
/root/aa/aa
/root/aa/bb
[root@cs1w1 root]# find /root/aa/ -mtime +1
[root@cs1w1 root]# find /root/aa/ -name aa
/root/aa/
/root/aa/aa
[root@cs1w1 root]# find /root/aa/ -type d
/root/aa/
[root@cs1w1 root]# find /root/aa/ -type f
/root/aa/cc
/root/aa/aa
/root/aa/bb
[root@cs1w1 root]# find /root/aa/ -type b
[root@cs1w1 root]# find /root/aa/ -type c
[root@cs1w1 root]# find /root/aa/ -type l
[root@cs1w1 root]# find /root/aa/ -type s
[root@cs1w1 root]# cd aa
[root@cs1w1 aa]# ls
aa bb cc
[root@cs1w1 aa]# ln -s cc dd
[root@cs1w1 aa]# ls
aa bb cc dd
[root@cs1w1 aa]# ll
total 0
-rw-r--r-- 1 root root 0 Jul 15 10:29 aa
-rw-r--r-- 1 root root 0 Jul 15 10:29 bb
-rw-r--r-- 1 root root 0 Jul 15 10:29 cc
lrwxrwxrwx 1 root root 2 Jul 15 10:31 dd -> cc
[root@cs1w1 aa]# cd
[root@cs1w1 root]# find /root/aa/ -type l
/root/aa/dd
[root@cs1w1 root]# find /root/aa/ -size -1M
/root/aa/cc
/root/aa/aa
/root/aa/bb
[root@cs1w1 root]# find /root/aa/ -size +1M
[root@cs1w1 root]#
shell中特殊符号用法
*代表0个或多个任意字符
?只代表一个任意的字符
\脱意,将shell特殊符号还原为普通字符
$!上条命令中最后名称
^开头
^[^fs]除去
$?上条命令运行成功状态值
;一行运行2个命令
&命令放在后台执行
>重定向
>>追加重定向
2>错误重定向
2>>错误追加重定向
[]代表中间字符中任意一个字符
;不管command1是否成功都会执行command2
&&只有command1执行成功,command2才会执行,否则不执行
||,command1执行成功后command2不执行,否则执行command2
grep&egrep用法
学好正则收益无穷
.标示任意一个字符(包含特殊字符)
*标示零个或多个*前面的字符
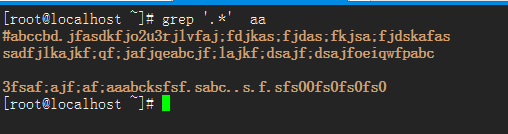
.*表示任意个任意字符(包含空行)
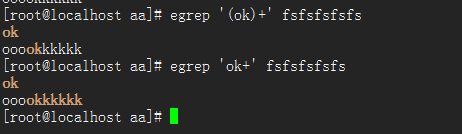
+标示1个或多个+前面的字符
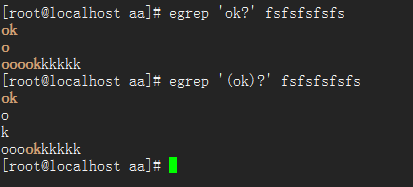
?标示0个或1个?前面字符
-c打印符合要求的行数
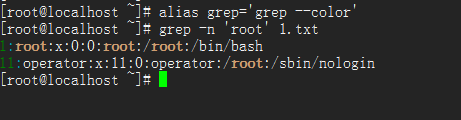
-n输出符合要求的行同时连同行号一起输出
-v打印不符合要求的行
-A后跟数字,打印符合要求的行以及下面2行
-B后跟数字,打印符合要求的行以及上面2行
-C跟数字,打印符合要求的行以及上下各2行
-r会把目录下面所有文件全部遍历
--color把匹配到的关键字红色标识
--include包含有
#过滤etc目录下含有root的conf文件

#过滤包含root字符的行
#统计包含字符abc的行数

#过滤不包含字符abc的行

#过滤包含数字的行

#过滤包含字符abccbd的行以及后面的1行

#过滤包含字符sabc的行以及前面的1行

#过滤不包含数字的行

#过滤不包含#开头的行以及空行

#过滤包含字符a-zA-Z的开头的行

#过滤不包含已数字开头的行

#过滤j与f之间包含任意一个字符或任意一个特殊符号的行

#过滤0个多个包含f的行。

#过滤包含一个字符或空行的行
#过滤包含一个或多个包含ok的行
#过滤包含0个或多个含有o或k或ok的字符的行
#过滤aa目录下包含ok的行

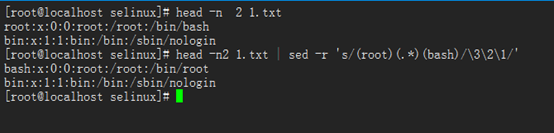
sed用法
s替换
g全局替换
d删除行
r调整位置
-i直接修改文件内容
#将1-2行含有aa替换成test
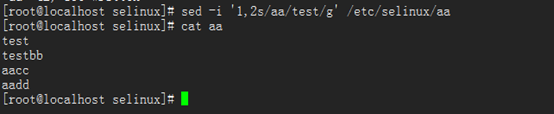
#将所有行的test字符替换成performance
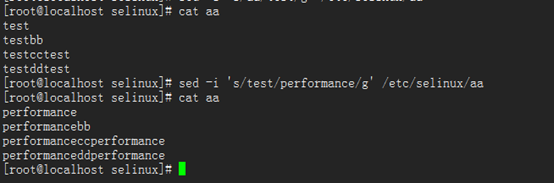
#删除1-11行

#删除含有aa的行
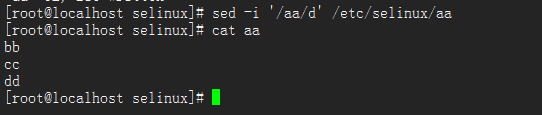
#()标示1个整体,root和bash替换位置
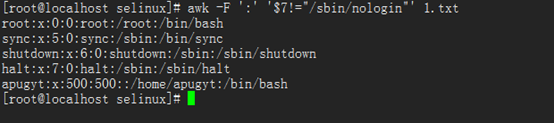
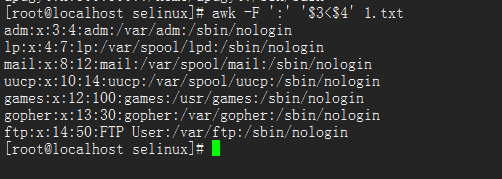
awk用法
截取文件中第1段
自定义字符连接某个段

使用awk内部变量OFS指定连接符

匹配含有root的行

匹配第1段含有oo的行

匹配第3段包含0的行

匹配含有root的行,只打印1、3段,匹配第3段含有50的行,打印第1、2、7段。

匹配第3段大于100的行。

匹配第7段不是/sbin/nologin的行。
匹配第3段小于第4段的行
匹配第3段大于5,并且第3段小于7的行

匹配第3段大于5,或者第7段为/bin/bash

NF段数,NR行数
匹配20行以后的行

匹配20行以后并且第1段包含ssh的行

更改第1段为root

数学计算,第3、4段相加,赋予第7段

计算第3段总和

if第1段包含有root的行就打印

if-else语句
[root@localhost ~]# cat aa
tony gu 35 F
fs fs 36 M
fsfs fsfs 20 F
fsfs kl 25 M
[root@localhost ~]#
[root@localhost ~]# cat bb
#!/bin/bash
awk ' {
if ( $3 <=25 ){
print "user",$1,$2,"is less than 25 years old.";
}
else {
print "User",$1,$2,"is more than 25 years old";
}
}' ~/aa
[root@localhost ~]# ./bb
User tony gu is more than 25 years old
User fs fs is more than 25 years old
user fsfs fsfs is less than 25 years old.
user fsfs kl is less than 25 years old.
for语句

while语句

do while语句

cut用法
-d指定分隔符
-f指定第几段
-c跟数字,标示截取第几个字符,或一个范围区域

sort用法
-t指定分隔符
-n使用纯数字排序,如果对象时英文字母,按0处理。
-r反向排序
-u去重
-kn1,n2,对某1字段进行排序
针对第3字段纯数字进行排序

默认从首字符排序

uniq用法
-c统计重复行数
需要先给文件排序,否则去重不生效。


tee用法
比重定向多了个一个功能呢吸入后面文件同时打印在屏幕上。

tr用法
-d删除某个字符
-s重复字符去除

split用法
切割文档
-b依据大小来分隔文档,单位为byte
-l依据行数来切割
后面跟字符,指定切割后的文件前缀名


EOF用法


wget用法
使用示例:
wget link

Wget - The non-interactive network downloader.
fuser用法
EXAMPLES:
查询使用根文件系统的进程
fuser –m –v /
删除使用根文件系统的进程
fuser –m –v –I –k /
Show which processes use the named files, sockets, or filesystems.
-i ask before killing (ignored without -k)
-k kill processes accessing the named file
-m show all processes using the named filesystems
-u display user IDs
-v verbose output
解压缩用法
#gz
//压缩gz格式文件,不支持压缩目录
// -9, --best compress better
//-1, --fast compress faster
gzip aa
//解压缩gz格式文件
gzip -d aa.gz
//查看
Gzip -l aa.gz
//压缩aa目录下的文件,没个文件一个gz包

//zcat查看gz压缩文本文件

#bz2
只能压缩文件,不能压缩目录
bzip2 -d解压缩
bzip2 -z压缩
#zip
压缩文件
zip 1.txt
压缩目录
zip dir1.zip dir1/*
如果目录下有二级目录甚至更多级目录,不会压缩,所以一定要加r,
可以用级联zip –r dir1.zip dir1/
#unzip
解压
unzip 1.txt.zip
///查看
Unzip -l
///解压到指定目录
Unzip –d
#xz
只能压缩文件,不能压缩目录
压缩
xz test.txt
解压
xz –d test.txt.xz
查看文本文件
xcat test.txt.xz
#tar
//压缩aa文件为aa.tar
tar cvf aa.tar aa
//解压缩aa.tar文件到指定目录
tar xvf aa.tar -C /tmp
//查看
tar tvf aa.tar
-z同时用gzip压缩
-j同时用bzip2压缩
-x解包或者解压缩
-t查看tar包里面的内容
-c建立一个tar包或者压缩文件包
-v可视化
-f写到最后面
-J同时用xz压缩
--exclude filname:在打包或者压缩时,不要将filename文件包括在内。
#tar.gz
//解压缩aatar.gz文件到指定目录
tar xzvf aa.tar.gz -C /tmp
//压缩
tar czvf aa.tar.gz aa.txt
#tar.bz2
//解压缩tar.bz2文件到指定目录
tar xjvf aa.tar.bz2 –C /tmp
//压缩
tar cjvf aa.tar.bz2 aa.txt
#tar.xz
//解压缩tar.xz文件到指定目录
tar xJvf aa.tar.xz –C /tmp
//压缩
tar cJvt aa.tar.xz aa.txt
///排除某个文件下的子目录,这个得记牢咯。
[root@localhost ~]# tree
.
└── dd
├── aa
├── bb
└── f
└── cc
2 directories, 3 files
排除dd下的f子目录
[root@localhost ~]# tar -cvf tar.tar --exclude f dd
dd/
dd/bb
dd/aa
[root@localhost ~]# clear
[root@localhost ~]# ls
dd tar.tar
[root@localhost ~]# tar -tvf tar.tar
drwxr-xr-x root/root 0 2016-07-18 10:21 dd/
-rw-r--r-- root/root 0 2016-07-18 10:16 dd/bb
-rw-r--r-- root/root 0 2016-07-18 10:16 dd/aa
[root@localhost ~]#
rpm用法
abrt-libs-2.0.8-15.e16.centos.i686.rpm
abrt-cli为包名,2.0.8为版本信息,15.e16为发布版本号,i686为运行平台。i386\i586\i686\为32 位平台,x86_64为64平台。如果有noarch代表没有硬件平台限制。
使用示例:
查询是否安装此软件包
rpm –qa
[root@controller others(keystone_admin)]# rpm -qa autogen-libopts
autogen-libopts-5.18-5.el7.x86_64
查询已安装的rpm包相关信息
rpm –qi
[root@controller others(keystone_admin)]# rpm -qi autogen-libopts
Name : autogen-libopts
Version : 5.18
Release : 5.el7
Architecture: x86_64
Install Date: Mon 15 Aug 2016 02:56:46 PM CST
Group : System Environment/Libraries
Size : 145381
License : LGPLv3+
Signature : RSA/SHA256, Fri 04 Jul 2014 08:44:16 AM CST, Key ID 24c6a8a7f4a80eb5
Source RPM : autogen-5.18-5.el7.src.rpm
Build Date : Tue 10 Jun 2014 11:19:30 AM CST
Build Host : worker1.bsys.centos.org
Relocations : (not relocatable)
Packager : CentOS BuildSystem <http://bugs.centos.org>
Vendor : CentOS
URL : http://www.gnu.org/software/autogen/
Summary : Automated option processing library based on autogen
Description :
Libopts is very powerful command line option parser consisting of a set of
AutoGen templates and a run time library that nearly eliminates the hassle of
parsing and documenting command line options.
[root@controller others(keystone_admin)]#
列出一个rpm包安装的文件
rpm –ql
[root@controller others(keystone_admin)]# rpm -ql autogen-libopts
/usr/lib64/libopts.so.25
/usr/lib64/libopts.so.25.15.0
/usr/share/doc/autogen-libopts-5.18
/usr/share/doc/autogen-libopts-5.18/COPYING.lgplv3
/usr/share/doc/autogen-libopts-5.18/COPYING.mbsd
[root@controller others(keystone_admin)]#
列出某一个文件属于哪个rpm包
rpm –qf
[root@controller others(keystone_admin)]# rpm -qf /usr/lib64/libopts.so.25
autogen-libopts-5.18-5.el7.x86_64
[root@controller others(keystone_admin)]#
安装
rpm –ivh
卸载
rpm –e
升级
rpm –Uvh
--force强制安装,即使覆盖属于其他包的文件也要安装
--nodeps,即使依赖包没有安装,也安装。
rpm - RPM Package Manager
yum
yum用法
启动一个yum shell
yum shell
查看支持的包列表,如果安装显示@,未安装显示base,extras,需要升级显示updates。
yum list 或者yum list | egrep –I vim
安装
yum instal –y
查看支持的yum源支持的包数量
yum repolist
生成yum数据库缓存
yum makecache
清除缓存
yum clean all
卸载包
yum remove
查看某个包详细信息
yum info zlib-devel.i686
从yum源中下载rpm包
安装download
yum install yum-plugin-downloadonly.noarch
注意已经安装的包不能再下载的
yum reinstall vim –y –downloadonly –downloaddir=/tmp
平常用这个就Ok了。
yum install vim –y downloadonly –downloaddir=/tmp/
用yumdownloader

创建一个yum源
示例:
CentOS7.1安装rpm包时提示缺失包,有些包iso里面也没有,只能从外网yum,这种情况下,可以提前yum好所需的依赖包,做成一个本地yum源。将这些文件拷贝到没联网的机器就可以使用了。
提示缺少包
[root@localhost ~]# rpm -ivh leofs_mond-20110411-74.i386.rpm
error: Failed dependencies:
libc.so.6 is needed by leofs_mond-20110411-74.i386
libc.so.6(GLIBC_2.0) is needed by leofs_mond-20110411-74.i386
libc.so.6(GLIBC_2.1) is needed by leofs_mond-20110411-74.i386
libc.so.6(GLIBC_2.1.3) is needed by leofs_mond-20110411-74.i386
libc.so.6(GLIBC_2.2) is needed by leofs_mond-20110411-74.i386
libc.so.6(GLIBC_2.3) is needed by leofs_mond-20110411-74.i386
libc.so.6(GLIBC_2.3.3) is needed by leofs_mond-20110411-74.i386
libc.so.6(GLIBC_2.3.4) is needed by leofs_mond-20110411-74.i386
libc.so.6(GLIBC_2.4) is needed by leofs_mond-20110411-74.i386
libcrypt.so.1 is needed by leofs_mond-20110411-74.i386
libdl.so.2 is needed by leofs_mond-20110411-74.i386
libm.so.6 is needed by leofs_mond-20110411-74.i386
libm.so.6(GLIBC_2.0) is needed by leofs_mond-20110411-74.i386
libnsl.so.1 is needed by leofs_mond-20110411-74.i386
libpthread.so.0 is needed by leofs_mond-20110411-74.i386
libpthread.so.0(GLIBC_2.0) is needed by leofs_mond-20110411-74.i386
libpthread.so.0(GLIBC_2.1) is needed by leofs_mond-20110411-74.i386
libpthread.so.0(GLIBC_2.1.1) is needed by leofs_mond-20110411-74.i386
libpthread.so.0(GLIBC_2.2) is needed by leofs_mond-20110411-74.i386
libpthread.so.0(GLIBC_2.3.2) is needed by leofs_mond-20110411-74.i386
libpthread.so.0(GLIBC_2.4) is needed by leofs_mond-20110411-74.i386
libresolv.so.2 is needed by leofs_mond-20110411-74.i386
librt.so.1 is needed by leofs_mond-20110411-74.i386
[root@localhost ~]#
下载制作yum源数据库工具createrepo
[root@localhost ~]# yum -y install createrepo
Loaded plugins: fastestmirror
base | 3.6 kB 00:00:00
extras | 3.4 kB 00:00:00
updates | 3.4 kB 00:00:00
(1/4): extras/7/x86_64/primary_db | 117 kB 00:00:00
(2/4): base/7/x86_64/group_gz | 155 kB 00:00:01
(3/4): updates/7/x86_64/primary_db | 4.1 MB 00:00:04
(4/4): base/7/x86_64/primary_db | 5.3 MB 00:00:08
Determining fastest mirrors
* base: mirrors.skyshe.cn
* extras: mirrors.neusoft.edu.cn
* updates: mirrors.zju.edu.cn
Resolving Dependencies
--> Running transaction check
---> Package createrepo.noarch 0:0.9.9-25.el7_2 will be installed
--> Processing Dependency: python-deltarpm for package: createrepo-0.9.9-25.el7_2.noarch
--> Processing Dependency: libxml2-python for package: createrepo-0.9.9-25.el7_2.noarch
--> Processing Dependency: deltarpm for package: createrepo-0.9.9-25.el7_2.noarch
--> Running transaction check
---> Package deltarpm.x86_64 0:3.6-3.el7 will be installed
---> Package libxml2-python.x86_64 0:2.9.1-6.el7_2.2 will be installed
--> Processing Dependency: libxml2 = 2.9.1-6.el7_2.2 for package: libxml2-python-2.9.1-6.el7_2.2.x86_64
---> Package python-deltarpm.x86_64 0:3.6-3.el7 will be installed
--> Running transaction check
---> Package libxml2.x86_64 0:2.9.1-5.el7_0.1 will be updated
---> Package libxml2.x86_64 0:2.9.1-6.el7_2.2 will be an update
--> Finished Dependency Resolution
Dependencies Resolved
=======================================================================================================================================================================
Package Arch Version Repository Size
=======================================================================================================================================================================
Installing:
createrepo noarch 0.9.9-25.el7_2 updates 92 k
Installing for dependencies:
deltarpm x86_64 3.6-3.el7 base 82 k
libxml2-python x86_64 2.9.1-6.el7_2.2 updates 245 k
python-deltarpm x86_64 3.6-3.el7 base 31 k
Updating for dependencies:
libxml2 x86_64 2.9.1-6.el7_2.2 updates 666 k
Transaction Summary
=======================================================================================================================================================================
Install 1 Package (+3 Dependent packages)
Upgrade ( 1 Dependent package)
Total download size: 1.1 M
Downloading packages:
Delta RPMs disabled because /usr/bin/applydeltarpm not installed.
warning: /var/cache/yum/x86_64/7/updates/packages/createrepo-0.9.9-25.el7_2.noarch.rpm: Header V3 RSA/SHA256 Signature, key ID f4a80eb5: NOKEYs | 0 B --:--:-- ETA
Public key for createrepo-0.9.9-25.el7_2.noarch.rpm is not installed
(1/5): createrepo-0.9.9-25.el7_2.noarch.rpm | 92 kB 00:00:00
Public key for deltarpm-3.6-3.el7.x86_64.rpm is not installed
(2/5): deltarpm-3.6-3.el7.x86_64.rpm | 82 kB 00:00:00
(3/5): python-deltarpm-3.6-3.el7.x86_64.rpm | 31 kB 00:00:00
(4/5): libxml2-python-2.9.1-6.el7_2.2.x86_64.rpm | 245 kB 00:00:00
(5/5): libxml2-2.9.1-6.el7_2.2.x86_64.rpm | 666 kB 00:00:01
-----------------------------------------------------------------------------------------------------------------------------------------------------------------------
Total 768 kB/s | 1.1 MB 00:00:01
Retrieving key from file:///etc/pki/rpm-gpg/RPM-GPG-KEY-CentOS-7
Importing GPG key 0xF4A80EB5:
Userid : "CentOS-7 Key (CentOS 7 Official Signing Key) <security@centos.org>"
Fingerprint: 6341 ab27 53d7 8a78 a7c2 7bb1 24c6 a8a7 f4a8 0eb5
Package : centos-release-7-1.1503.el7.centos.2.8.x86_64 (@anaconda)
From : /etc/pki/rpm-gpg/RPM-GPG-KEY-CentOS-7
Running transaction check
Running transaction test
Transaction test succeeded
Running transaction
Installing : deltarpm-3.6-3.el7.x86_64 1/6
Installing : python-deltarpm-3.6-3.el7.x86_64 2/6
Updating : libxml2-2.9.1-6.el7_2.2.x86_64 3/6
Installing : libxml2-python-2.9.1-6.el7_2.2.x86_64 4/6
Installing : createrepo-0.9.9-25.el7_2.noarch 5/6
Cleanup : libxml2-2.9.1-5.el7_0.1.x86_64 6/6
Verifying : createrepo-0.9.9-25.el7_2.noarch 1/6
Verifying : python-deltarpm-3.6-3.el7.x86_64 2/6
Verifying : deltarpm-3.6-3.el7.x86_64 3/6
Verifying : libxml2-2.9.1-6.el7_2.2.x86_64 4/6
Verifying : libxml2-python-2.9.1-6.el7_2.2.x86_64 5/6
Verifying : libxml2-2.9.1-5.el7_0.1.x86_64 6/6
Installed:
createrepo.noarch 0:0.9.9-25.el7_2
Dependency Installed:
deltarpm.x86_64 0:3.6-3.el7 libxml2-python.x86_64 0:2.9.1-6.el7_2.2 python-deltarpm.x86_64 0:3.6-3.el7
Dependency Updated:
libxml2.x86_64 0:2.9.1-6.el7_2.2
Complete!
[root@localhost ~]#
下载所需的包上传至/opt/rpm目录
[root@localhost ~]# /usr/bin/yum install --downloaddir=/opt/rpm --downloadonly libc.so.6
Loaded plugins: fastestmirror
Loading mirror speeds from cached hostfile
* base: mirrors.skyshe.cn
* extras: mirrors.neusoft.edu.cn
* updates: mirrors.zju.edu.cn
Resolving Dependencies
--> Running transaction check
---> Package glibc.i686 0:2.17-106.el7_2.4 will be installed
--> Processing Dependency: glibc-common = 2.17-106.el7_2.4 for package: glibc-2.17-106.el7_2.4.i686
--> Processing Dependency: libfreebl3.so(NSSRAWHASH_3.12.3) for package: glibc-2.17-106.el7_2.4.i686
--> Processing Dependency: libfreebl3.so for package: glibc-2.17-106.el7_2.4.i686
--> Running transaction check
---> Package glibc-common.x86_64 0:2.17-78.el7 will be updated
--> Processing Dependency: glibc-common = 2.17-78.el7 for package: glibc-2.17-78.el7.x86_64
---> Package glibc-common.x86_64 0:2.17-106.el7_2.4 will be an update
---> Package nss-softokn-freebl.x86_64 0:3.16.2.3-9.el7 will be updated
---> Package nss-softokn-freebl.i686 0:3.16.2.3-14.2.el7_2 will be installed
---> Package nss-softokn-freebl.x86_64 0:3.16.2.3-14.2.el7_2 will be an update
--> Running transaction check
---> Package glibc.x86_64 0:2.17-78.el7 will be updated
---> Package glibc.x86_64 0:2.17-106.el7_2.4 will be an update
--> Finished Dependency Resolution
Dependencies Resolved
=======================================================================================================================================================================
Package Arch Version Repository Size
=======================================================================================================================================================================
Installing:
glibc i686 2.17-106.el7_2.4 updates 4.2 M
Installing for dependencies:
nss-softokn-freebl i686 3.16.2.3-14.2.el7_2 updates 187 k
Updating for dependencies:
glibc x86_64 2.17-106.el7_2.4 updates 3.6 M
glibc-common x86_64 2.17-106.el7_2.4 updates 11 M
nss-softokn-freebl x86_64 3.16.2.3-14.2.el7_2 updates 204 k
Transaction Summary
=======================================================================================================================================================================
Install 1 Package (+1 Dependent package)
Upgrade ( 3 Dependent packages)
Total download size: 20 M
Background downloading packages, then exiting:
Delta RPMs reduced 3.8 M of updates to 842 k (78% saved)
(1/5): nss-softokn-freebl-3.16.2.3-14.2.el7_2.i686.rpm | 187 kB 00:00:00
(2/5): nss-softokn-freebl-3.16.2.3-9.el7_3.16.2.3-14.2.el7_2.x86_64.drpm | 44 kB 00:00:00
(3/5): glibc-2.17-78.el7_2.17-106.el7_2.4.x86_64.drpm | 798 kB 00:00:00
(4/5): glibc-2.17-106.el7_2.4.i686.rpm | 4.2 MB 00:00:04
(5/5): glibc-common-2.17-106.el7_2.4.x86_64.rpm | 11 MB 00:00:35
-----------------------------------------------------------------------------------------------------------------------------------------------------------------------
Total 483 kB/s | 17 MB 00:00:35
exiting because "Download Only" specified
[root@localhost ~]#
创建repo数据库
[root@localhost ~]# createrepo -p -d -o /opt/rpm/ /opt/rpm/
Spawning worker 0 with 5 pkgs
Workers Finished
Saving Primary metadata
Saving file lists metadata
Saving other metadata
Generating sqlite DBs
Sqlite DBs complete
[root@localhost ~]#
更新repo元数据(可选操作)
[root@localhost ~]# createrepo --update /opt/rpm/
Saving Primary metadata
Saving file lists metadata
Saving other metadata
Generating sqlite DBs
Sqlite DBs complete
[root@localhost ~]#
确认repo元数据
[root@localhost rpm]# ls
glibc-2.17-106.el7_2.4.i686.rpm glibc-common-2.17-106.el7_2.4.x86_64.rpm nss-softokn-freebl-3.16.2.3-14.2.el7_2.x86_64.rpm
glibc-2.17-106.el7_2.4.x86_64.rpm nss-softokn-freebl-3.16.2.3-14.2.el7_2.i686.rpm repodata
[root@localhost rpm]# cd repodata/
[root@localhost repodata]# ls
041cca5c43f978a01b7aa183d437b2f208629512ad7c39e618b7d252c2c8dc92-primary.sqlite.bz2
3c112b1ac138d54957b4333ce830986196e64121ca97add7dc0b077b44a02868-other.xml.gz
762a63333594c82421ddf6abc7e94f76538a3fc74a2c72c691c47449a5251f26-other.sqlite.bz2
9ced1af354247835727999f8dd9566ac67259e375ebe321fbc627d32243918e8-filelists.xml.gz
ae83cc34b4f68138398c2bc2bb7de716bdf459c5064a0c6f86e1ee80b36410e2-primary.xml.gz
ff9c201de18d66af38f838314419114402666926f2eb03c0008be6cd0737e41a-filelists.sqlite.bz2
repomd.xml
[root@localhost repodata]# pwd
/opt/rpm/repodata
[root@localhost repodata]#
编辑repo文件
[root@localhost yum.repos.d]# ls
CentOS-CR.repo yumback
[root@localhost yum.repos.d]# cat CentOS-CR.repo
# CentOS-CR.repo
#
# The Continuous Release ( CR ) repository contains rpms that are due in the next
# release for a specific CentOS Version ( eg. next release in CentOS-7 ); these rpms
# are far less tested, with no integration checking or update path testing having
# taken place. They are still built from the upstream sources, but might not map
# to an exact upstream distro release.
#
# These packages are made available soon after they are built, for people willing
# to test their environments, provide feedback on content for the next release, and
# for people looking for early-access to next release content.
#
# The CR repo is shipped in a disabled state by default; its important that users
# understand the implications of turning this on.
#
# NOTE: We do not use a mirrorlist for the CR repos, to ensure content is available
# to everyone as soon as possible, and not need to wait for the external
# mirror network to seed first. However, many local mirrors will carry CR repos
# and if desired you can use one of these local mirrors by editing the baseurl
# line in the repo config below.
#
[cr]
name=CentOS-$releasever - cr
baseurl=file:///opt/rpm
#http://mirror.centos.org/centos/releasever/cr/
basearch/
gpgcheck=0
gpgkey=file:///etc/pki/rpm-gpg/RPM-GPG-KEY-CentOS-7
enabled=1
[root@localhost yum.repos.d]#
验证repo
[root@localhost yum.repos.d]# yum clean all
Loaded plugins: fastestmirror
Cleaning repos: cr
Cleaning up everything
Cleaning up list of fastest mirrors
[root@localhost yum.repos.d]# yum repolist
Loaded plugins: fastestmirror
cr | 2.9 kB 00:00:00
cr/primary_db | 9.4 kB 00:00:00
Determining fastest mirrors
repo id repo name status
cr CentOS-7 - cr 5
repolist: 5
[root@localhost yum.repos.d]#
从做好的repo源中安装缺失包
[root@localhost ~]# yum install libc.so.6
Loaded plugins: fastestmirror
Loading mirror speeds from cached hostfile
Resolving Dependencies
--> Running transaction check
---> Package glibc.i686 0:2.17-106.el7_2.4 will be installed
--> Processing Dependency: glibc-common = 2.17-106.el7_2.4 for package: glibc-2.17-106.el7_2.4.i686
--> Processing Dependency: libfreebl3.so(NSSRAWHASH_3.12.3) for package: glibc-2.17-106.el7_2.4.i686
--> Processing Dependency: libfreebl3.so for package: glibc-2.17-106.el7_2.4.i686
--> Running transaction check
---> Package glibc-common.x86_64 0:2.17-78.el7 will be updated
--> Processing Dependency: glibc-common = 2.17-78.el7 for package: glibc-2.17-78.el7.x86_64
---> Package glibc-common.x86_64 0:2.17-106.el7_2.4 will be an update
---> Package nss-softokn-freebl.x86_64 0:3.16.2.3-9.el7 will be updated
---> Package nss-softokn-freebl.i686 0:3.16.2.3-14.2.el7_2 will be installed
---> Package nss-softokn-freebl.x86_64 0:3.16.2.3-14.2.el7_2 will be an update
--> Running transaction check
---> Package glibc.x86_64 0:2.17-78.el7 will be updated
---> Package glibc.x86_64 0:2.17-106.el7_2.4 will be an update
--> Finished Dependency Resolution
Dependencies Resolved
=======================================================================================================================================================================
Package Arch Version Repository Size
=======================================================================================================================================================================
Installing:
glibc i686 2.17-106.el7_2.4 cr 4.2 M
Installing for dependencies:
nss-softokn-freebl i686 3.16.2.3-14.2.el7_2 cr 187 k
Updating for dependencies:
glibc x86_64 2.17-106.el7_2.4 cr 3.6 M
glibc-common x86_64 2.17-106.el7_2.4 cr 11 M
nss-softokn-freebl x86_64 3.16.2.3-14.2.el7_2 cr 204 k
Transaction Summary
=======================================================================================================================================================================
Install 1 Package (+1 Dependent package)
Upgrade ( 3 Dependent packages)
Total download size: 20 M
Is this ok [y/d/N]: y
Downloading packages:
-----------------------------------------------------------------------------------------------------------------------------------------------------------------------
Total 138 MB/s | 20 MB 00:00:00
Running transaction check
Running transaction test
Transaction test succeeded
Running transaction
Updating : glibc-common-2.17-106.el7_2.4.x86_64 1/8
Updating : glibc-2.17-106.el7_2.4.x86_64 2/8
Updating : nss-softokn-freebl-3.16.2.3-14.2.el7_2.x86_64 3/8
Installing : nss-softokn-freebl-3.16.2.3-14.2.el7_2.i686 4/8
Installing : glibc-2.17-106.el7_2.4.i686 5/8
Cleanup : glibc-common-2.17-78.el7.x86_64 6/8
Cleanup : glibc-2.17-78.el7.x86_64 7/8
Cleanup : nss-softokn-freebl-3.16.2.3-9.el7.x86_64 8/8
Verifying : nss-softokn-freebl-3.16.2.3-14.2.el7_2.x86_64 1/8
Verifying : glibc-2.17-106.el7_2.4.i686 2/8
Verifying : glibc-common-2.17-106.el7_2.4.x86_64 3/8
Verifying : nss-softokn-freebl-3.16.2.3-14.2.el7_2.i686 4/8
Verifying : glibc-2.17-106.el7_2.4.x86_64 5/8
Verifying : glibc-2.17-78.el7.x86_64 6/8
Verifying : nss-softokn-freebl-3.16.2.3-9.el7.x86_64 7/8
Verifying : glibc-common-2.17-78.el7.x86_64 8/8
Installed:
glibc.i686 0:2.17-106.el7_2.4
Dependency Installed:
nss-softokn-freebl.i686 0:3.16.2.3-14.2.el7_2
Dependency Updated:
glibc.x86_64 0:2.17-106.el7_2.4 glibc-common.x86_64 0:2.17-106.el7_2.4 nss-softokn-freebl.x86_64 0:3.16.2.3-14.2.el7_2
Complete!
正常安装
[root@localhost ~]# rpm -ivh leofs_mond-20110411-74.i386.rpm
Preparing... ################################# [100%]
Updating / installing...
1:leofs_mond-20110411-74 ################################# [100%]
[root@localhost ~]# service leofs_mond status
leofs_mond.service - SYSV: leofs_mond startup script
Loaded: loaded (/etc/rc.d/init.d/leofs_mond)
Active: active (running) since Thu 2016-05-12 21:03:39 CST; 4s ago
Process: 12502 ExecStart=/etc/rc.d/init.d/leofs_mond start (code=exited, status=0/SUCCESS)
CGroup: /system.slice/leofs_mond.service
├─12514 /LeoCluster/bin/leofs_mond -c /LeoCluster/conf/leofs_mond.conf
└─12515 /LeoCluster/bin/leofs_mond -c /LeoCluster/conf/leofs_mond.conf
May 12 21:03:39 localhost.localdomain systemd[1]: Starting SYSV: leofs_mond startup script...
May 12 21:03:39 localhost.localdomain leofs_mond[12502]: Starting leofs_mond: [ OK ]
May 12 21:03:39 localhost.localdomain systemd[1]: Started SYSV: leofs_mond startup script.
May 12 21:03:39 localhost.localdomain leofs_mond[12514]: leofs_mond master 12514 start.
May 12 21:03:39 localhost.localdomain leofs_mond[12515]: leofs_mond worker 12515 start.
[root@localhost ~]#
源码编译用法
大部分软件是通过源码安装,安装一个源码包,是需要把源代码编译成二进制可执行文件。
好处是可以自定义修改源代码外还可以定制相关功能。常见的源码包编译器是GCC。
常见的3个步骤:
./config菌体可以用./configure –help查看,在这一步检测系统与套件是否有编译需要的库,缺少某个库不能完成编译。只有检测后才会生成一个MakeFile文件。常用—prefix=/tmp指定安装位置。
make根据makefile文件中预设参数编译,其实是gcc在工作。
make install,生成相关的软件存放目录和配置文件的过程。
mod
lsmod用法
确认bonding是否被加载
lsmod | egrep –I bonding
[root@cs1w1 modprobe.d]# man lsmod
LSMOD(8) LSMOD(8)
NAME
lsmod - program to show the status of modules in the Linux Kernel
insmod用法
使用示例:
insmod /root/bonding
[root@cs1w1 modprobe.d]# man insmod
INSMOD(8) INSMOD(8)
NAME
insmod - simple program to insert a module into the Linux Kernel
modprobe用法
查看module文件
modprobe –l
加载bonding信息
modprobe bonding
删除bonding
modprobe –r bonding
NAME
modprobe - program to add and remove modules from the Linux Kernel
rmmod用法
用法:
rmmod bonding
NAME
rmmod - simple program to remove a module from the Linux Kernel
modinfo用法
查看bonding module 信息:
modinfo bonding
DESCRIPTION
modinfo extracts information from the Linux Kernel modules given on the command line. If the module name is not a filename, then the /lib/modules/version directory is searched, as done by modprobe(8).
lvm用法
///pv创建
pvcreate /dev/sdb1 /dev/sdc1
///pv删除
pvremove /dev/sdb1
///查看
pvs
pvdisplay
pvscan
///vg创建
vgcreate centos /dev/sdb1/dev/sdc1
///vg删除
vgremove centos
///vg改名字

///vg扩展
vgextend centos /dev/sdc
///激活,关闭vg
vgchange -a y
vgchange -a n
///lv 创建,-l指定pe数量,-L指定lv容量
lvcreate -l 10238 -n home centos
lvcreate -L 39.99g -n home centos
///lv删除
lvremove -f /dev/mapper/centos-centos--home
///激活,关闭lv
lvchange -an /dev/mapper/centos-home
lvchange -ay /dev/mapper/centos-home
/// lv改名字

///lv扩展
确认vg可用pe数量
vgdisplay
扩展Lv pe数量
lvresize -l +4606 /dev/centos/home
重新调整文件系统大小
resize2fs /dev/centos/home
///lv缩减
卸载现有挂载分区
umount /home
执行检查
e2fsck -f /dev/mapper/centos-home
执行文件系统缩减后为22GB
resize2fs /dev/centos/home 22G
执行lv缩减,-L指定缩减后为22GB,-L -22G指定缩减22GB。
lvresize -L 22G /dev/centos/home
lvresize -L -22G /dev/centos/home
///格式化,挂载,写入分区表
格式化
mkfs.ext4 /dev/centos/home
挂载
mount /dev/centos/home /home/
写入开机启动分区表
/dev/mapper/centos-home /home ext4 defaults 2 1
执行分区表检查
mount -av
时间
用tzselect配置时区和location
[root@localhost Asia]# /usr/bin/tzselect
Please identify a location so that time zone rules can be set correctly.
Please select a continent or ocean.
1) Africa
2) Americas
3) Antarctica
4) Arctic Ocean
5) Asia
6) Atlantic Ocean
7) Australia
8) Europe
9) Indian Ocean
10) Pacific Ocean
11) none - I want to specify the time zone using the Posix TZ format.
#选择时区
#? 11
Please enter the desired value of the TZ environment variable.
For example, GST-10 is a zone named GST that is 10 hours ahead (east) of UTC.
#键入CST+0中国时区
#UTC为国际时区
CST+0
awk: cmd. line:5: warning: escape sequence `\.' treated as plain `.'
The following information has been given:
TZ='CST+0'
Therefore TZ='CST+0' will be used.
Local time is now: Thu May 12 18:13:06 CST 2016.
Universal Time is now: Thu May 12 18:13:06 UTC 2016.
Is the above information OK?
1) Yes
2) No
#? 1
You can make this change permanent for yourself by appending the line
TZ='CST+0'; export TZ
to the file '.profile' in your home directory; then log out and log in again.
Here is that TZ value again, this time on standard output so that you
can use the /usr/bin/tzselect command in shell scripts:
CST+0
[root@localhost Asia]# /usr/bin/tzselect
Please identify a location so that time zone rules can be set correctly.
Please select a continent or ocean.
1) Africa
2) Americas
3) Antarctica
4) Arctic Ocean
5) Asia
6) Atlantic Ocean
7) Australia
8) Europe
9) Indian Ocean
10) Pacific Ocean
11) none - I want to specify the time zone using the Posix TZ format.
#? 5
Please select a country.
1) Afghanistan 18) Israel 35) Palestine
2) Armenia 19) Japan 36) Philippines
3) Azerbaijan 20) Jordan 37) Qatar
4) Bahrain 21) Kazakhstan 38) Russia
5) Bangladesh 22) Korea (North) 39) Saudi Arabia
6) Bhutan 23) Korea (South) 40) Singapore
7) Brunei 24) Kuwait 41) Sri Lanka
8) Cambodia 25) Kyrgyzstan 42) Syria
9) China 26) Laos 43) Taiwan
10) Cyprus 27) Lebanon 44) Tajikistan
11) East Timor 28) Macau 45) Thailand
12) Georgia 29) Malaysia 46) Turkmenistan
13) Hong Kong 30) Mongolia 47) United Arab Emirates
14) India 31) Myanmar (Burma) 48) Uzbekistan
15) Indonesia 32) Nepal 49) Vietnam
16) Iran 33) Oman 50) Yemen
17) Iraq 34) Pakistan
#? 9
Please select one of the following time zone regions.
1) Beijing Time
2) Xinjiang Time
#? 1
The following information has been given:
China
Beijing Time
Therefore TZ='Asia/Shanghai' will be used.
Local time is now: Fri May 13 02:13:32 CST 2016.
Universal Time is now: Thu May 12 18:13:32 UTC 2016.
Is the above information OK?
1) Yes
2) No
#? 1
You can make this change permanent for yourself by appending the line
TZ='Asia/Shanghai'; export TZ
to the file '.profile' in your home directory; then log out and log in again.
Here is that TZ value again, this time on standard output so that you
can use the /usr/bin/tzselect command in shell scripts:
Asia/Shanghai
[root@localhost Asia]# date
Thu May 12 18:13:40 CST 2016
[root@localhost Asia]# clock
Thu 12 May 2016 06:13:44 PM CST -0.396667 seconds
[root@localhost Asia]#
#加入全局环境变量
vi /etc/profile
export TZ='CST+0'
硬件和系统时间同步
date -s 14:20:50
hwclock --show 或者
clock --show
设置硬件时间
hwclock --set --date="06/18/14 14:55" (月/日/年时:分:秒)或者# clock --set --date="06/18/14 14:55" (月/日/年时:分:秒)
硬件时钟与系统时钟同步:
# hwclock --hctosys 或者 # clock --hctosys hc代表硬件时间,sys代表系统时间,即用硬件时钟同步系统时钟
系统时钟和硬件时钟同步:
# hwclock --systohc或者# clock --systohc 即用系统时钟同步硬件时钟
修改配置文件来修改时区
后台运行
nohup用法
#直接加&在后台,如果退出终端,脚本也会退出,加上nohup没问题,产生的日志在Nohup文件中
示例:
nohup sh /root/aa.sh &
screen用法
多个进程之间多路复用一个终端管理器。
查看会话列表
screen –ls
新建一个test会话
screen –S test
ctrl+a,再按d退出会话,不影响终端窗口上的任何操作。
重新连接detach的会话
screen –r test
swap
使用硬盘文件增加swap空间
///创建文件
dd if=/dev/zero of=/SWAP/swapfile bs=1M count=1000
///格式化
mkswap /SWAP/swapfile
///添加
swapon /SWAP/swapfile
///开启启动
vi /etc/fstab
/usr/swap/swapfile swap defaults 0 0
UUID=215c17ef-145c-419c-afdc-461b8a4fb66b swap swap defaults 0 0
///校验
mount -av
free –g
修改cenots7密码
进入grub菜单后按e
找到ro字符,替换成rw init=/sysroot/bin/sh
按ctrl+x进入emergecy模式
键入chroot /sysroot
后输入passwd改变root密码
执行touch /.autorelabel
输入exit退出chroot模式,然后reboot重启完成。
制作一个系统服务
http://www.2cto.com/os/201202/121249.html
