Myeclipse10.6+Flash Builder 4.6安装配置
所需软件列表:
Myeclipse 10.6(或eclipse 3.6+);
Flash Builder 4.6;(以下简称FB)
Tomcat 6.0+;
JDK 1.6;
blazeds-turnkey-4.0.0.14931;
安装以上程序.(下载地址,破解等等,都能百度到….)
安装FB的eclipse插件
找到FB安装目录:
D:\Program Files\Adobe\Adobe Flash Builder 4.6\utilities\Adobe Flash Builder 4.6 Plug-in Utility.exe
双击安装.(不安装FB直接安装这个插件是不可以的)
安装时要选择myeclipse的目录,选到: D:\Program Files\MyEclipse\MyEclipse 10即可.
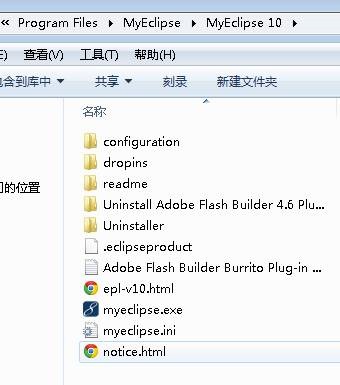
安装完flash builder插件的myeclipse再打开时变成了中文的界面,看个人喜好了,本人用惯了原版界面,就改回去了.方法如下:
|
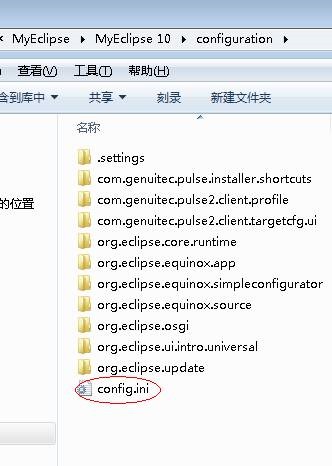
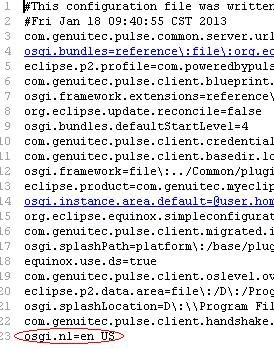
找到myEclipse安装目录下的configuration文件下找到config.ini在最后添加osgi.nl=en_US来解决此问题 打开后如下图: |
blazeDS的设置
将blazeds-turnkey-4.0.0.14931目录下的三个war包拷贝到tomcat/webapps下(并把blazeds.war解压,后面用到)
至此所有的安装工作完毕.接下来就是如何新建并运行一个java flex web项目了.
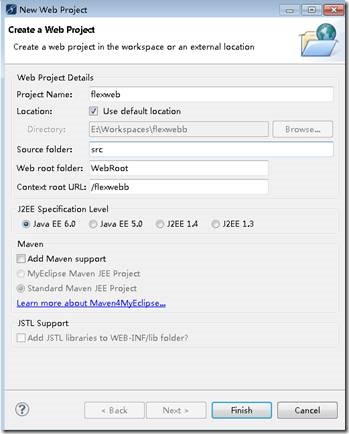
新建一个web项目:flexweb
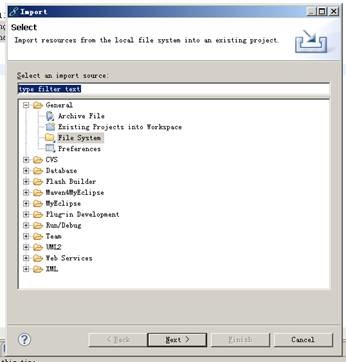
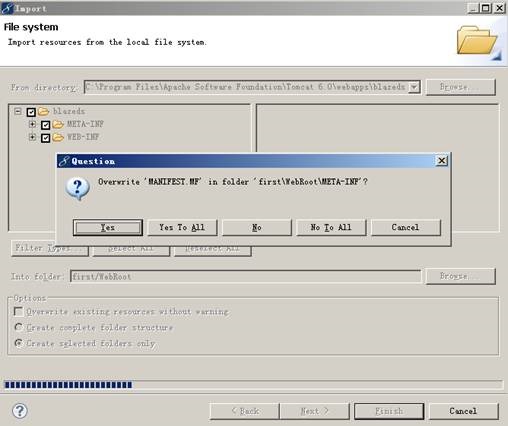
右击WebRoot选择import—>GeneralàFile system,展开发现在WEB-INF目录下面多了flex文件夹,这个很重要主要是通信的4个配置文件.
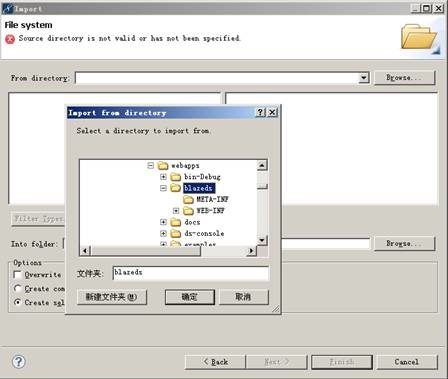
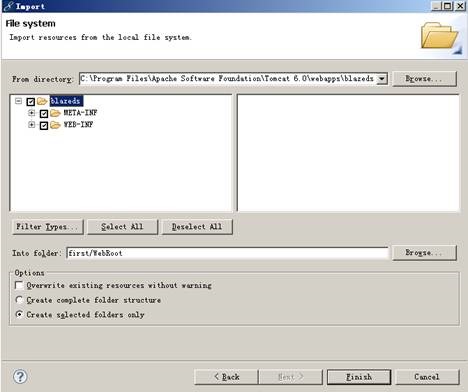
“From directory”选到tomcat/webapps下的blazeds目录.
单击Finish 然后选择”Yse to all”
导入成功
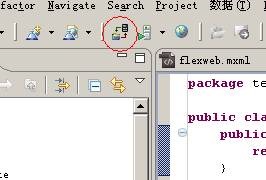
部署到tomcat
给web项目加入flex项目属性
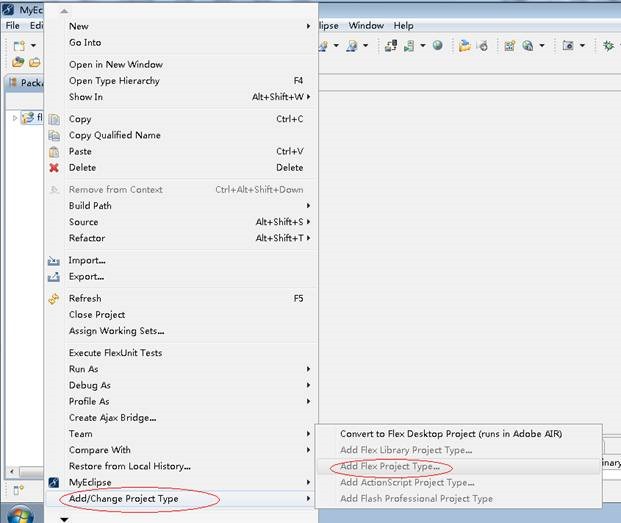
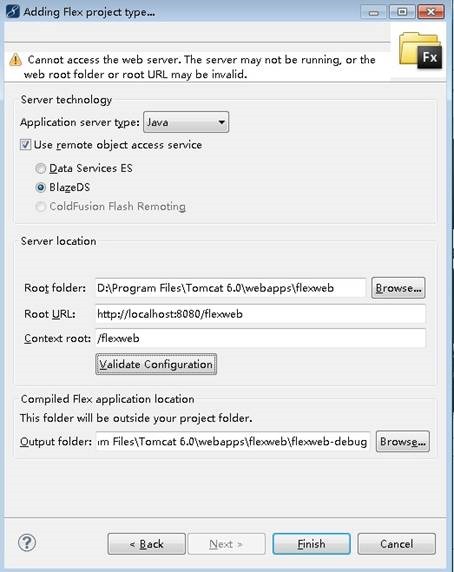
在flexweb项目上右键,选择”Add/Change Project Type”:
本人的项目已经加过了,所以是灰色的啦.
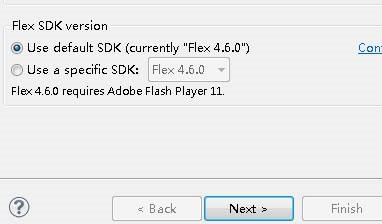
其中的几个目录,参照上图设置即可.记得先”Validate Configuration”一下再完成.
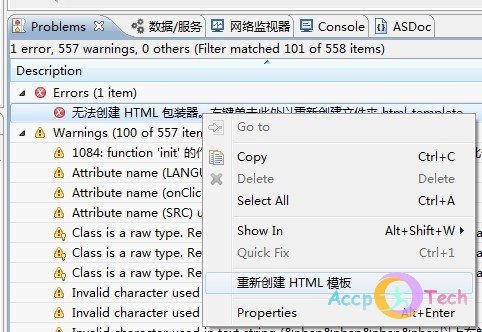
OK,完成后解决错误的方法:
重新创建html模板就哦了.
下面是解决src目录冲突的问题: src是java的源文件夹存java源代码地方,但是现在被flex给占用了.
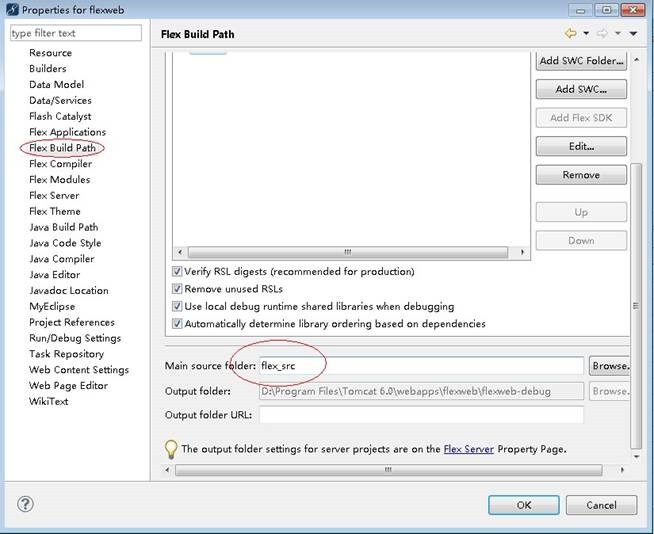
在flexweb项目上右键-属性,打开后找到”Flex Build Path”(Flex构建路径):
把Main souce folder直接改为:flex_src
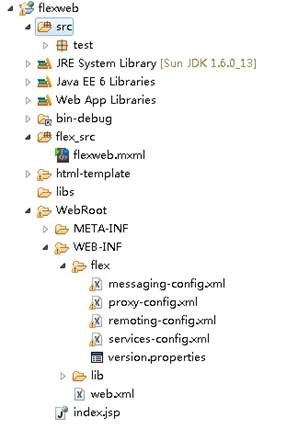
然后把src文件夹里面的flexweb.xml移动到flex_src文件夹里面,最终目录如下:
做个helloworld实现flex与java通信
这里都是参考网上已有的教程.
切换到myeclipse视图,暂时忽略一切可能出现的红色叉号.
在src/test目录下新建类:Accptech.java
|
package test; public class Accptech { public String helloWorld(String name){ return name+" 你好,欢迎来到fb世界!"; } } |
配置Webroot/WEB-INF/flex/remoting-config.xml:
|
<?xml version="1.0" encoding="UTF-8"?> <service id="remoting-service" class="flex.messaging.services.RemotingService"> <adapters> <adapter-definition id="java-object" class="flex.messaging.services.remoting.adapters.JavaAdapter" default="true"/> </adapters> <default-channels> <channel ref="my-amf"/> </default-channels> <destination id="mytest"> <properties> <source>test.Accptech</source> </properties> </destination> </service> |
修改flex_src/flexweb.mxml文件:
|
<?xml version="1.0" encoding="utf-8"?> <s:Application xmlns:fx="http://ns.adobe.com/mxml/2009" xmlns:s="library://ns.adobe.com/flex/spark" xmlns:mx="library://ns.adobe.com/flex/mx" minWidth="955" minHeight="600"> <fx:Script> <![CDATA[ import mx.controls.Alert; import mx.rpc.events.FaultEvent; import mx.rpc.events.ResultEvent; protected function myFlex_resultHandler(event:ResultEvent):void { var name:String=event.result as String; Alert.show(name); } protected function btnSend_clickHandler(event:MouseEvent):void { myFlex.helloWorld(txtName.text); } ]]> </fx:Script> <fx:Declarations> <!-- Place non-visual elements (e.g., services, value objects) here --> <s:RemoteObject id="myFlex" destination="mytest" result="myFlex_resultHandler(event)" /> </fx:Declarations> <s:Panel x="87" y="20" width="250" height="200" title="1st flex4"> <s:TextInput x="16" y="37" id="txtName"/> <s:Button x="168" y="38" label="发送" id="btnSend" click="btnSend_clickHandler(event)"/> </s:Panel> </s:Application> |
解释:
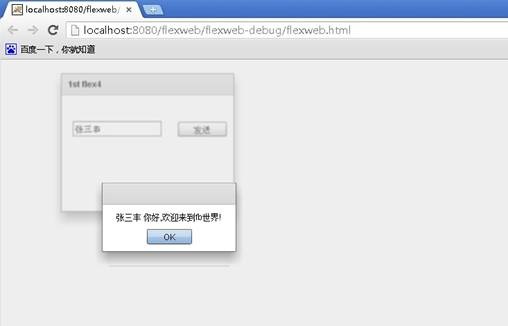
这个配置就是调用java端的一个远程对象, destination="mytest"就是我们刚才配置的remoting-config.xml文件中的ID名称,result="myFlex_resultHandler(event)" 就是如果服务器成功就执行result里面的方法。
<fx:Declarations>
<!-- Place non-visual elements (e.g., services, value objects) here -->
<s:RemoteObject id="myFlex" destination="mytest" result="myFlex_resultHandler(event)" />
</fx:Declarations>
然后点发送按钮时发送远程对象的helloWorld方法,执行click="btnSend_clickHandler(event)"

 所需软件列表:
Myeclipse 10.6(或eclipse 3.6+);
Flash Builder 4.6;(以下简称FB)
Tomcat 6.0+;
JDK 1.6;
blazeds-turnkey-4.0.0.14931;
安装以上程序.(下载地址,破解等等,都能百度到….)
安装FB的eclipse插件
找到FB安装目录:
D:\Program Files\Adobe\Adobe Flash Builder 4.6\utilities\Adobe Flash Builder 4.6 Plug-in Utility.exe
双击安装.(不安装FB直接安装这个插件是不可以的)
安装时要选择myeclipse的目录,选到: D:\Program Files\MyEclipse\MyEclipse 10即可
