Mobile开发环境,这里就不详细介绍了,无非就是根据自己的系统安装ActiveAsync和手机模拟器。我目前使用的是Mobile6.0的模拟器,目前有6.1的和6.5的,因为是兼容的,而且内核基本没动,所以我也就懒得升级咯。
进入正题,开发过的人都知道,Mobile原始窗体除了上下边框栏,都是白色背景,这样的界面,客户肯定是不会满意的,所以我们需要为客户针对软件进行美观。我这里采用也是Alpha Blend API,黎波老师也介绍过,我这里算是借用了吧,我项目中所使用的下载包,只需要替换掉命名空间就行。PlatformAPI.zip
将包解压加入项目中,现在咋们可以编写自己的代码了。首先,创建好窗体后,设置几个全局变量。

 Code
Code
 //窗体变量
 Size formSize = Size.Empty;
 //纵横屏幕标志 动态更换图片用 默认纵向por 横向lan
 string formSign = "por";
 Graphics gxBuffer;
 Bitmap offBitmap;
 Font font = new Font("Tahoma", 10, FontStyle.Regular);
 //手机程序路径
 string path = System.IO.Path.GetDirectoryName(Assembly.GetExecutingAssembly().GetName().CodeBase);
 接下来,结合Alpha Blend API开始绘制页面,页面绘制事件采用双Bitmap防闪烁,效率会有所影响,但问题不大,接下来开始绘制页面。

 Code
Code
 protected override void OnPaint(PaintEventArgs e)


 {
{
 if (offBitmap != null)


 {
{
 AdjustFormLayout();
 gxBuffer = Graphics.FromImage(offBitmap);
 gxBuffer.Clear(this.BackColor);
 this.BackColor = SystemColors.MenuText;

 //确认当前屏幕大小,获取对应的图片文件夹
 GetConfig getconfig=new GetConfig();
 ConfigClass config = getconfig.CheckScreenSize(formSize.Width.ToString(), formSize.Height.ToString());
 Program.ScreenFileName = config.FileName;

 AlphaImage bmp = AlphaImage.CreateFromFile(path + @"\" + Program.ScreenFileName + @"\bg.png");
 Rectangle imgRect = new Rectangle(0, 0, formSize.Width, formSize.Height);
 bmp.Draw(gxBuffer, imgRect);

 e.Graphics.DrawImage(offBitmap, 0, 0);
 }
}
 else
else


 {
{
 e.Graphics.Clear(this.BackColor);
 }
}
 }
}

 protected override void OnResize(EventArgs e)


 {
{
 base.OnResize(e);
 if (offBitmap != null)
 offBitmap.Dispose();

 offBitmap = new Bitmap(this.Width, this.Height, PixelFormat.Format32bppRgb);
 }
}


 /**//// <summary>
 /// 获取屏幕大小,展现模式
 /// </summary>
 public void AdjustFormLayout()


 {
{
 Rectangle screenBounds = Screen.PrimaryScreen.Bounds;
 float widthRatio = 0.0F;
 float heightRatio = 0.0F;

 DisplayManager.GetDisplayRatiosByDpi(this, ref widthRatio, ref heightRatio);


 控件按比例缩放#region 控件按比例缩放

 if (DisplayManager.GetDisplayMode() == DisplayMode.Portrait)


 {
{
 // 纵向
// 纵向
 formSize = new Size(screenBounds.Width, screenBounds.Height);
 formSign = "por";
 //viewCount = 9;
 }
}
 else if (DisplayManager.GetDisplayMode() == DisplayMode.Landscape)


 {
{
 // 横向
// 横向
 formSize = new Size(screenBounds.Width, screenBounds.Height);
 formSign = "lan";
 //viewCount = 8;
 }
}
 else
else


 {
{
 // 正方
// 正方
 formSize = new Size(screenBounds.Width, screenBounds.Height);
 formSign = "por";
 //viewCount = 9;
 }
}
 #endregion

 }
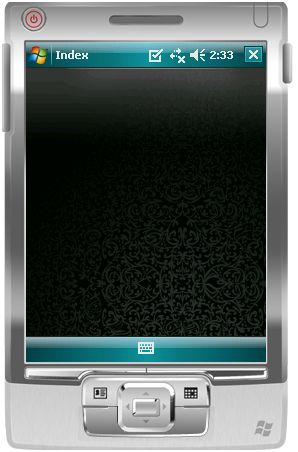
} 根据需要,引用对应的命名空间,编译后,页面显示如下

这样,最基本的背景图片就绘制上了,由于代码中我设置了根据手机分辨率大小获取不同大小的背景图,大家如果用不上可以自己删除掉,图片路径直接改为手机上安装程序的路径就可以了。背景的图片需要你们TEAM中的美工了,如果美工把图片设置为透明的,那样最好,显示出来的背景会和上下边框栏根据主题的变化而变化了,方法是一样的,自己试咯。
如何使界面更好看,让我们下面来继续修改,我想要个主题栏,栏目上有图片还有字,让我们继续来绘制,现在修改只需要修改OnPaint事件中一些东西,增加一个标题栏的绘制,一个标题栏的图标,再绘制点字上去,代码如下

 Code
Code
 //标题栏绘制
 bmp = AlphaImage.CreateFromFile(path + @"\" + Program.ScreenFileName + @"\indexP_alphaBar.png");
 imgRect = new Rectangle(0, 0, 320, 39);
 bmp.Draw(gxBuffer, imgRect);
 //标题图片绘制
 bmp = AlphaImage.CreateFromFile(path + @"\" + Program.ScreenFileName + @"\indexPeople_04.png");
 imgRect = new Rectangle(10, 10, 19, 22);
 bmp.Draw(gxBuffer, imgRect);
 //文字绘制
 gxBuffer.DrawString("Hello Bright!", font, brush, 60, 10);
需要注意的是,绘制文字需要使用画笔,所以请先实例一个画笔,由于我背景是黑色,所以我画笔颜色为白色,在构造函数中将画笔颜色设置为白色,
 Brush brush;
 public FrmIndex()


 {
{
 brush = new SolidBrush(Color.White);
 InitializeComponent();
 }
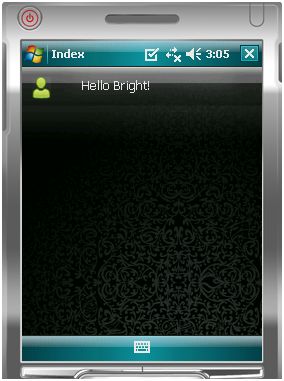
} 画面效果如下:

背景,图片,文字的绘制基本完成,我代码里为了方便,坐标都写死了,最好能根据屏幕大小按比例绘制,因为最新的手机屏幕大小已经远远超了320*320了,按比例绘制,你只需要替换到图片就能使用,写死坐标你会发现调坐标会郁闷死的。最后给大家展示一张比较完整的主页面图,

绘制也就到这了,如果有时间我会再写一些修改过的高人写的有用的控件,或者今日插件打包,输入法挡住屏幕自动切换等。其中也有很多都是借用别人的东西,哎,自己水平有限,写不出来,请大家留口德,不要丢鸡蛋。。。

 Brush brush;
 public FrmIndex()
 {
{ brush = new SolidBrush(Color.White);
 InitializeComponent();
 }
}


 }
}


【推荐】编程新体验,更懂你的AI,立即体验豆包MarsCode编程助手
【推荐】凌霞软件回馈社区,博客园 & 1Panel & Halo 联合会员上线
【推荐】抖音旗下AI助手豆包,你的智能百科全书,全免费不限次数
【推荐】博客园社区专享云产品让利特惠,阿里云新客6.5折上折
【推荐】轻量又高性能的 SSH 工具 IShell:AI 加持,快人一步