Flask CBV写法以及其他常用知识
首先,需要注意
1 if __name__ == '__main__':
2     app.run()
在app.run()后面不要写代码,因为run()会一直运行。
默认执行Ip是127.0.0.1的5000端口
如果自定义:
1 if __name__ == '__main__':
2     app.run(host='0.0.0.0',port=80,debug=False)
Flask CBV写法
flask的cbv与django原理类似
也是通过dispatch,通过反射找到method方法,然后执行。
 1 from flask import views
 2
 3 def auth(func):
 4     def inner(*args,**kwargs):
 5         result = func(*args,**kwargs)
 6         return result
 7     return inner
 8
 9 class IndexView(views.MethodView):
10     methods = ['GET']
11     decorators = [auth,]
12     '''
13     这个auth相当于是IndexView的一个装饰器,as_view会循环这个decorators列表,并将其再套一层装饰器,然后执行
14     '''
15     def get(self):
16         return 'Index.GET'
17     def post(self):
18         return 'Index.POST'
19 app.add_url_rule('index',view_func=IndexView.as_view(name='index')) #name=endpoint
20 #上面这行相当于Flask那个装饰器@app.route
21
22
23 if __name__ == '__main__':
24     app.run()
具体源码执行流程:

view函数第一步
self=view.view_class(*args,**kwargs)相当于给这个视图类实例化(view.view_class=cls,这里已经是将视图类赋值了)。
第二步就是,执行视图类的dispatch方法。
然后通过继承的父类,执行dispatch_request:
dispatch_request通过反射,然后将method变成小写找到方法,在执行。和django类似。
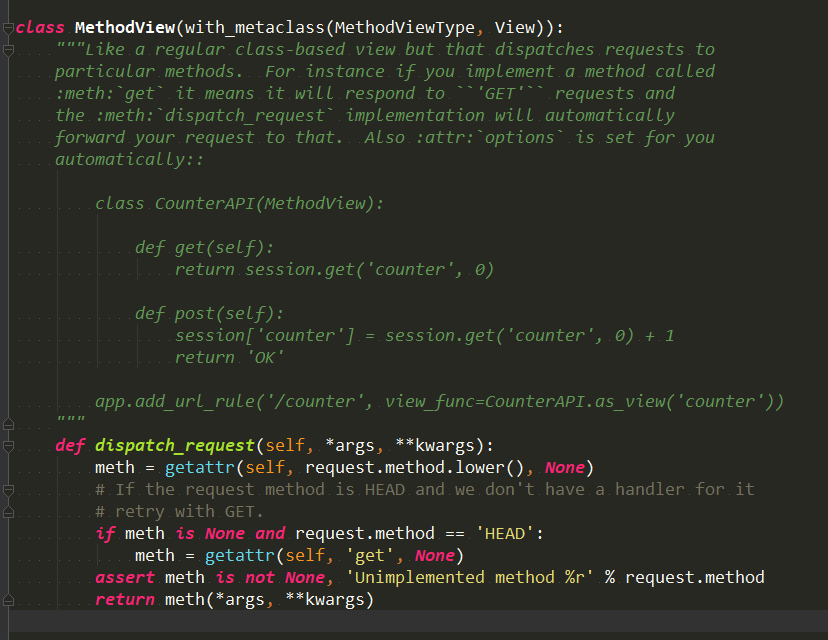
另一种CBV写法:
就是不继承views.MethodView而是继承views.View
 1 class IndexView2(views.View):
 2     methods = ['GET']
 3     decorators = [auth,]
 4
 5     def dispatch_request(self):
 6         print('Index')
 7         return 'Index'
 8     '''
 9     继承views.View需要手动写dispatch_request
10     '''
11     def get(self):
12         return 'Index.GET'
13     def post(self):
14         return 'Index.POST'
15 app.add_url_rule('index',view_func=IndexView2.as_view(name='index')) #name=endpoint
Flask的模板语言:
1 def func1(arg):
2     return arg+"字数补丁"
3
4
5 @app.route('/')
6 def index2():
7     return render_template('abcd.html',ff=func1)
网页:
 1 <!DOCTYPE html>
 2 <html lang="en">
 3 <head>
 4     <meta charset="UTF-8">
 5     <meta http-equiv="x-ua-compatible" content="IE=edge">
 6     <meta name="viewport" content="width=device-width, initial-scale=1">
 7     <title>Title</title>
 8 </head>
 9 <body>
10 <h1>{{ ff('我是正文') }}</h1>
11 </body>
12 </html>
能过直接通过网页执行函数。
后台向前端发送html标签:
1 def func1(arg):
2     return "<input type='text' value='%s'/>"%(arg,)
3
4
5 @app.route('/')
6 def index2():
7     return render_template('abcd.html',ff=func1)
html前端safe标签:
 1 <!DOCTYPE html>
 2 <html lang="en">
 3 <head>
 4     <meta charset="UTF-8">
 5     <meta http-equiv="x-ua-compatible" content="IE=edge">
 6     <meta name="viewport" content="width=device-width, initial-scale=1">
 7     <title>Title</title>
 8 </head>
 9 <body>
10 <h1>{{ ff('我是正文')|safe }}</h1>
11 </body>
12 </html>
另一种写法:后端safe标签
1 from flask import Markup
2 def func1(arg):
3     return Markup("<input type='text' value='%s'/>"%(arg,))
4
5
6 @app.route('/')
7 def index2():
8     return render_template('abcd.html',ff=func1)
Flask特有的宏定义:
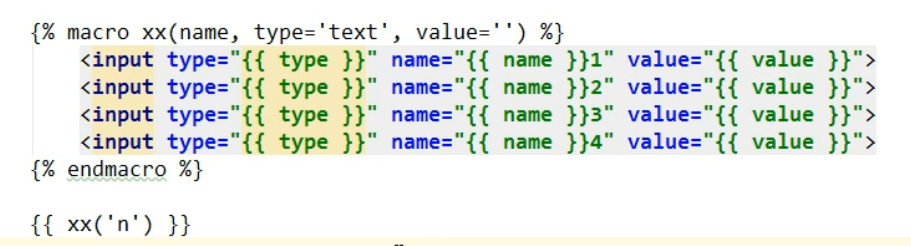
实际上就是在html写一块标签,也就是一个函数,如上图示例,
函数名为xx,需要传参数name,type,value,
然后下面的{{ xx('n') }}就是在调用执行这个函数,并传参n
Flask请求相关。(reqeust)
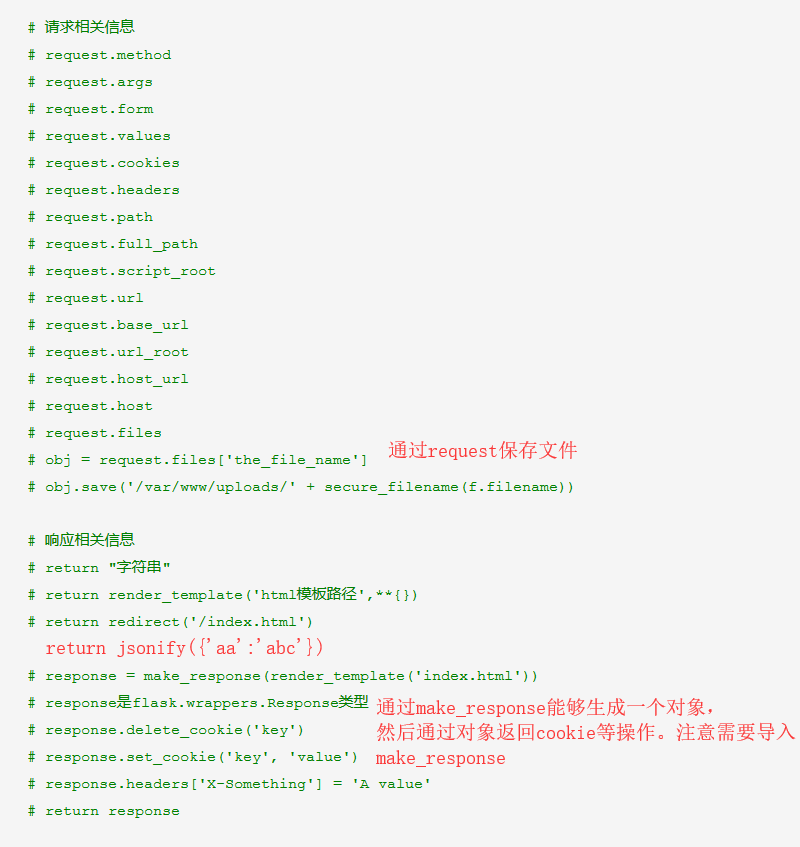
上面response也可以设置响应头等内容。
中天一片无情月,是我平生不悔心
