


- 第一步就是看linu是否安装了mysql,经过rpm -qa|grep mysql查看到centos下安装了mysql5.1,那就开始卸载咯
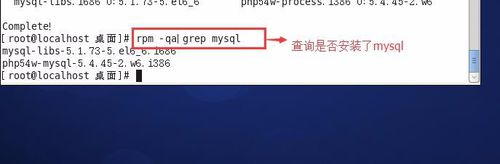
centos6.5下yum安装mysql5.6
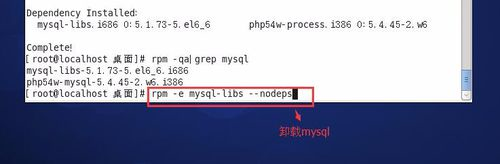
2 接下来就是卸载mysql5.1了,命令:rpm -e mysql-libs --nodeps
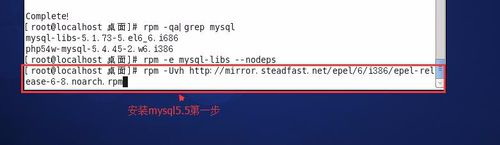
3 yum中之后mysql5.1,安装还是5.1,现在就要去增加一个新的repo
命令:rpm -Uvh http://mirror.steadfast.net/epel/6/i386/epel-release-6-8.noarch.rpm
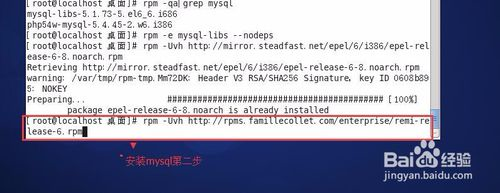
4 一共需要增加两个repo,现在增加另一个
命令:rpm -Uvh http://rpms.famillecollet.com/enterprise/remi-release-6.rpm
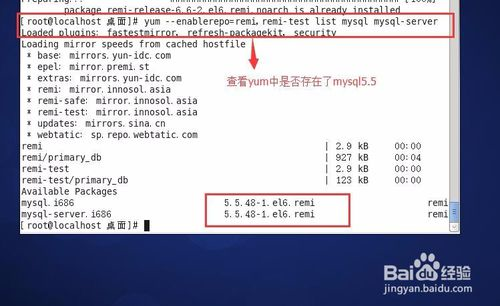
5 现在查看一些是否增加成功了
命令:yum --enablerepo=remi,remi-test list mysql mysql-server
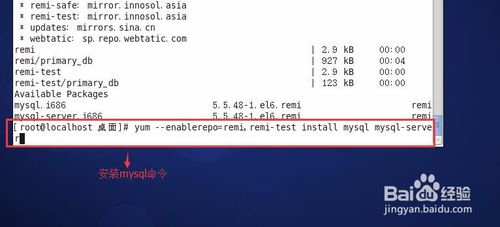
6 接下来就是安装mysql5.56了
命令:yum --enablerepo=remi,remi-test install mysql mysql-server
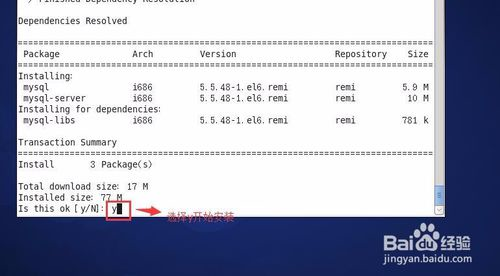
7出现这个东西的时候一定要选择y。不然神都救不了你,就要重新安装了
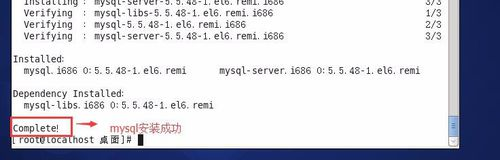
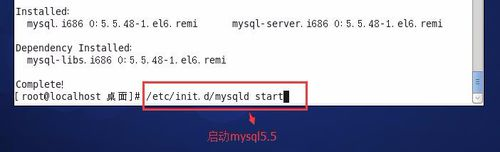
8:看到下面这个图片证明你的mysql安装成功了
9 接下来需要启动一下mysql
命令:/etc/init.d/mysqld start
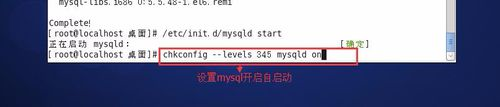
10 下面这条命令设置开机自启动,省的我们每次开机就去启动一下mysql了
命令:chkconfig --levels 345 mysqld on
11 要启用MySQL 安全设置请输入以下命令
命令:/usr/bin/mysql_secure_installation
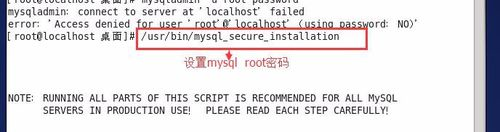
一直选 y
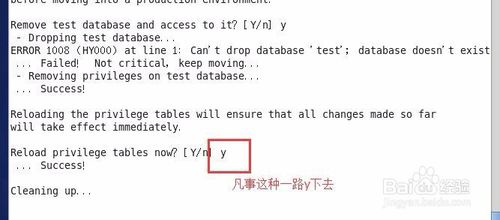
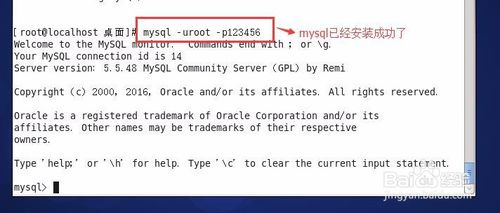
12 到这里就要验证一下mysql是否安装成功了。如果输入看到以下界面的话,那么你就安装成功了。犒劳一下自己吧。
连接数据库命令:mysql -u用户,-p密码
mysql默认端口是3306,如果需要修改端口
如需要修改端口:
//登陆mysql
[root@pingxiang ~]# mysql -uroot –p
//查看端口
mysql> show global variables like 'port';
+---------------+-------+
| Variable_name | Value |
+---------------+-------+
| port | 3306 |
+---------------+-------+
1 row in set (0.00 sec)
//修改etc文件夹下的my.cnf
[root@pingxiang etc]# vi my.cnf
[mysqld]
port=3560
datadir=/var/lib/mysql
socket=/var/lib/mysql/mysql.sock
# Disabling symbolic-links is recommended to prevent assorted security risks
symbolic-links=0
# Settings user and group are ignored when systemd is used (fedora >= 15).
# If you need to run mysqld under a different user or group,
# customize your systemd unit file for mysqld according to the
# instructions in http://fedoraproject.org/wiki/Systemd
user=mysql
# Semisynchronous Replication
# http://dev.mysql.com/doc/refman/5.5/en/replication-semisync.html
# uncomment next line on MASTER
;plugin-load=rpl_semi_sync_master=semisync_master.so
# uncomment next line on SLAVE
;plugin-load=rpl_semi_sync_slave=semisync_slave.so
# Others options for Semisynchronous Replication
;rpl_semi_sync_master_enabled=1
;rpl_semi_sync_master_timeout=10
;rpl_semi_sync_slave_enabled=1
# http://dev.mysql.com/doc/refman/5.5/en/performance-schema.html
;performance_schema
[mysqld_safe]
log-error=/var/log/mysqld.log
pid-file=/var/run/mysqld/mysqld.pid
#
# include all files from the config directory
#
!includedir /etc/my.cnf.d
~
~
~
"my.cnf" 38L, 1093C
//初始情况下文件默认端口是3306,故没有port=端口,要自己添加进去
按ESC键 跳到命令模式
:w 保存文件但不退出vi
:wq 保存文件并退出vi
//重启mysql
[root@pingxiang etc]# /etc/init.d/mysqld restart
//出现以下信息说明重启成功
Stopping mysqld: [ OK ]
Starting mysqld: [ OK ]
//登陆mysql,查看端口
mysql> show global variables like 'port';
+---------------+-------+
| Variable_name | Value |
+---------------+-------+
| port | 3560 |
+---------------+-------+
1 row in set (0.00 sec)
Lunix 允许开放端口:
命令:vi /etc/sysconfig/iptables
# Generated by iptables-save v1.4.7 on Wed Aug 15 18:07:41 2018
*filter
:INPUT ACCEPT [6:384]
:FORWARD ACCEPT [0:0]
:OUTPUT ACCEPT [6:2572]
#-A INPUT -p tcp -m tcp --dport 8080 -j ACCEPT
-A INPUT -m state --state ESTABLISHED,RELATED -j ACCEPT
-A INPUT -p icmp -j ACCEPT
-A INPUT -i lo -j ACCEPT
-A INPUT -m state --state NEW -m tcp -p tcp --dport 22 -j ACCEPT
-A INPUT -m state --state NEW -m tcp -p tcp --dport 80 -j ACCEPT
-A INPUT -m state --state NEW -m tcp -p tcp --dport 8080 -j ACCEPT
-A INPUT -m state --state NEW -m tcp -p tcp --dport 6037 -j ACCEPT
-A INPUT -m state --state NEW -m tcp -p tcp --dport 3306 -j ACCEPT
-A INPUT -m state --state NEW -m tcp -p tcp --dport -j ACCEPT
-A INPUT -j REJECT --reject-with icmp-host-prohibited
-A FORWARD -j REJECT --reject-with icmp-host-prohibited
COMMIT
# Completed on Wed Aug 15 18:07:41 2018
~
~
~
~
"/etc/sysconfig/iptables" 20L, 848C
阿里云允许开放端口:
可百度查询如何设置阿里云允许端口开放(因为我自己用的是阿里云服务器,其他服务器好像不用这样做)
Mysql允许远程连接
先登陆mysql mysql -u用户 -p密码
然后执行命令: grant all privileges on *.* to 'root'@'%' identified by 'root';
mysql> grant all privileges on *.* to 'root'@'%' identified by 'root';
Query OK, 0 rows affected (0.00 sec)
mysql> flush privileges;
Query OK, 0 rows affected (0.00 sec)
好了,可以用navicat连接了,(我用navicat,很方便),祝大家都能一次性安装成功
